Autenti digital signatures in WEBCON BPS
Applies to version: 2020.1.x and above; author: Franciszek Sakławski
Introduction
In WEBCON BPS version 2020, the support for digital signatures has been enhanced by preparing plugins (SDK – Software development kit) that enable digital signing of documents.
Four plugins have been prepared that allow for integration with external digital signature providers:
The following article describes the process of signing documents by using Autenti software.
Process description
The following diagram shows the Autenti API Workflow:

Fig. 1. Autenti API Workflow
Autenti software provides the different abilities of operating on the processed document.
- Creating a document in the system
- Uploading a file with the document for signing
- Checking the document status
- Sending an e-mail with link to sign the document
- Two-step verification via SMS
All above actions are available for use in the new SDK plugin that supports Autenti software.
Sing the above diagram, the following workflow scenario has been created:

Fig. 2. The workflow diagram
Four action are defined in the process:
- Send document to Autenti
- Request document status
- Check status
- Request signed document
The method of user verification should be mentioned here. In the above scenario, the person that sends a contract to sign is the registered Autenti software user. The signing person does not have to register anywhere. This signature is covered by the Autenti certificate that provides:
- Document authenticity – the document has been created and signed on the Autenti platform
- Document integrity – all interested people have signed the same document
The Autenti certificate also contains information about the entire process – who signed the document, when, and how the identify of the signed person was verified.
If the signed person wants to send documents to sign, they must receive the verification key that will allow to use Autenti REST API – for more information see: https://autenti.com/.
Using the above information, you can register the contract and then send it to be signed. After signing, you can check whether a new employee has signed the contract via the button on the top bar of the form. If so – the system will download the signed document and finish the workflow.
Let’s go to WEBCON BPS Designer Studio and configure the workflow.
Business case
The simple workflow has been created:

Fig. 3. The signature workflow
On the form, the fields necessary for the correct operation of the workflow have been defined. Notice, that the “Technical form fields” group is visible only in admin mode – there are two technical fields that are an integral part of the process.
- Document external ID – this is a field where you will enter the document ID from the Autenti database.
In the Autenti REST API documentation, you can find that the correct return of the GUID number by the system means the correct loading of the document to the company’s internal database.
So, if the system does not receive feedback about the document number and does not enter them in the defined field – they will block you after the action of sending the document.
- Attachment source ID – the field that with the attachment ID – from the internal database
The form is presented in the following way:

Fig. 4. The form
Let’s go to the action of sending documents to be signed. Enter the action configuration window on the “Contract preparation” step and on the “Submit for signing ” transition path add the “Send for signing” action. These actions have been prepared as SDK plugins to WEBCON BPS platform – they are a dedicated addition to the platform for the purpose of signing documents with Autenti, and are not part of the standard software.

Fig. 5. The “Send to sign” action
The SDK action configuration window has additional fields that need to be filled out. Let’s take a look at some of them.

Fig. 6. Integration key
The integration key is used in every action that calls Autenti REST API so it is the best to save them in a safe but accessible place – e.g. in the process constants. For more information about storing data in WEBCON BPS Designer Studio see: Global constants and rules.
In the next section let’s configure the selection of the attachment that has to be signed:

Fig. 7. The configuration of the action for sending documents
In the first field define how to select the attachment to sign – there are two options:
- Based on the document category
- Based on the SQL query
If you select the first option, you can define which category is to be selected. Additionally, a RegEx expression can be used – to limit the search by attachment name. If you select the second option, you have to create a query that will return Att_ID of a given attachment from the WFDataAttachments table.
For more information see our knowledge base: https://community.webcon.com/knowledge-base.
Two last fields of this section are technical form fields. In the first “Copy source attachment ID” field select “Attachment source ID” and in the second “Copy sent Document ID to field” – “Document external ID”.
The next section is “Message content”. In the “Subject” and “Content” fields select your fields from the form. The most important field is “Sender details” that defines whether the person sending document should also sign them. There are two available options:
- Viewer – only people defined on the list must sign the document
- Signer – people defined on the list and the sender should sign the document
Select the first option.
The next section is “Recipients selection”.

Fig. 8. The configuration of the action for sending documents
In the “Signers Item List” field select the item list from which SDK should take data:
- Name – the name of the signed person
- E-mail – the e-mail address to which the link to sign the document is to be sent
- Phone number – a verification code will be sent to the number defined in this field
While the “Additional SMS verification” field is self-explanatory, remember that when you select this field, you must also set the column containing thenumber as required. Otherwise, when you try to perform an action and the field with the number is not filled in, the system will return an error.
The last field is “Signature type”, there are two options:
- ESIGNATURE – standard digital signature
- QUALIFIED_ESIGNATURE – qualified signature
Description of the qualified signature:
- Requires personal identity verification – notarized or official.
- The certificate must be stored on a secure device and must be protected with a PIN. It is not possible to export them outside the device.
- It is equivalent to a handwritten signature – it can act as evidence in court.
- It verifies itself automatically – in PDF readers you can see that certificate is valid.
After correct configuration the action, go to the Portal and test it – go through the path on where the “Submit for signig” action is located.

Fig. 9. The form
After clicking this button, the system will move us to the next step. Additionally, you will receive the e-mail. Click the “Document” button – the system will redirect you to the provider’s page. Now you have to confirm that you have read and understand the document and click the “Start signing” option.

Fig. 11. The document that needs signing
After clicking, the system moved you to the next screen – you have to enter the code which has been sent to the number provided on the form.
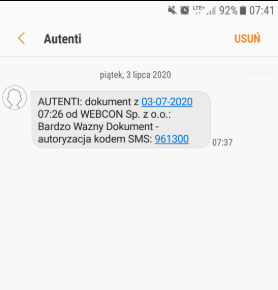
Fig. 12. SMS with authenticaton code
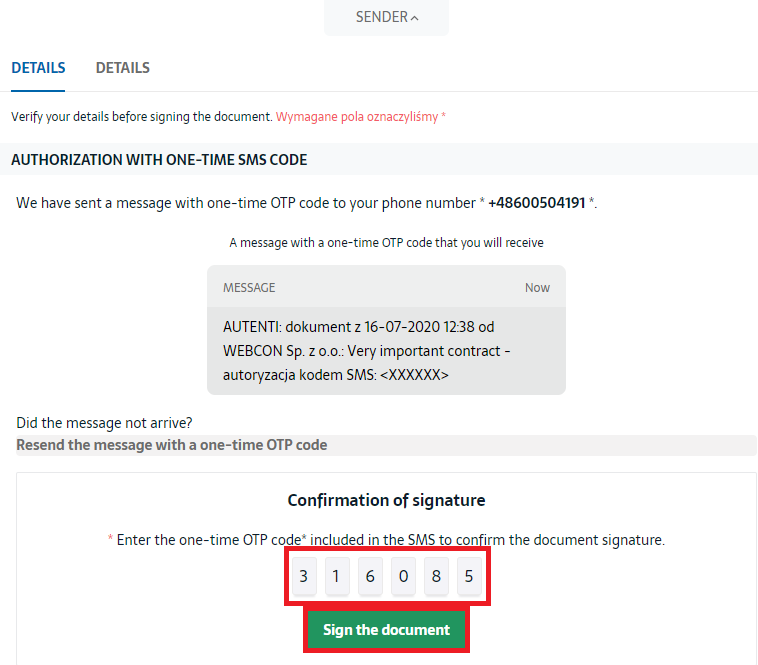
Fig. 13. The screen where you sign the document
After correct signing, you will receive the appropriate message:
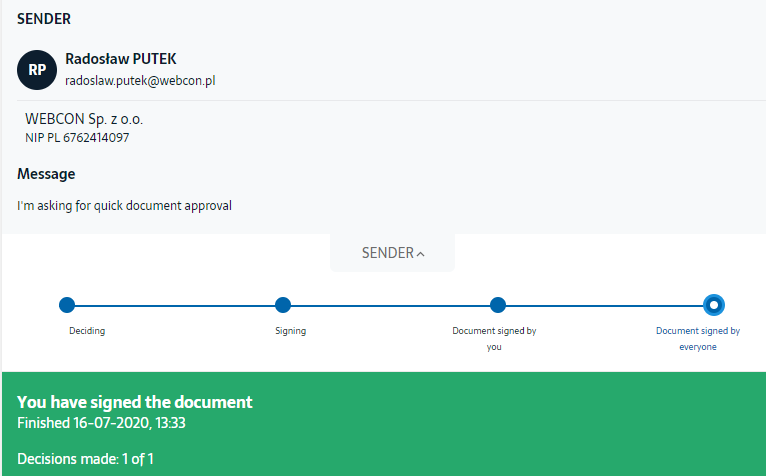
Fig. 14. The screen after correctly signing the document
Additionally, a notification was sent to your e-mail address with an attached signed document and a link to the document’s page.
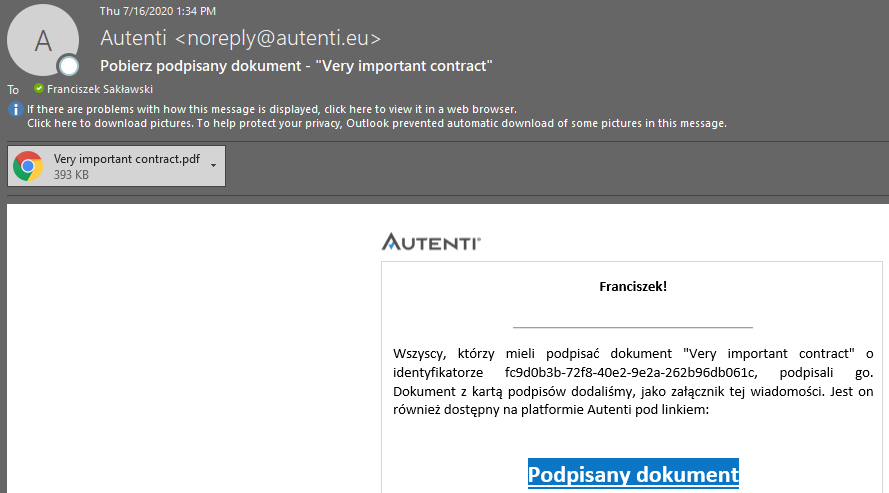
Fig. 15. The e-mail with the signed document
If the document was correctly signed, a certificate confirming the authenticity of the signature should be attached to it.

Fig. 16. The Autenti certificate
The document waits in the “Waiting for signature” step. We defined the action that allows to check the document status.

Fig. 17. The action configuration for checking document status
In the “Plugin configuration” select the field that stores the GUID number of the document and in the “Copy Status to field” field – select the field in which the status is to be entered. The system can return 5 different statuses:
- PROCESSING – not all decisions have been made
- SUCCESS – everyone signed the document
- FAILED – at least one person has not signed the document
- WITHDRAWN – document has been withdrawn
- ERROR – operation error
If the system returns the “SUCCESS” status, the instance goes to the “Signed” step.
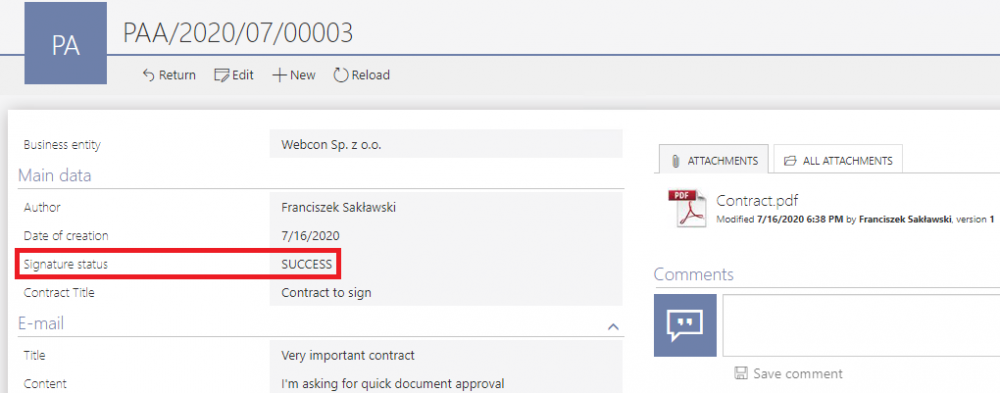
Fig. 18. The document status
On the “Signed” path, the “Download signed document” SDK action is executed. Let’s go to the Designer Studio:
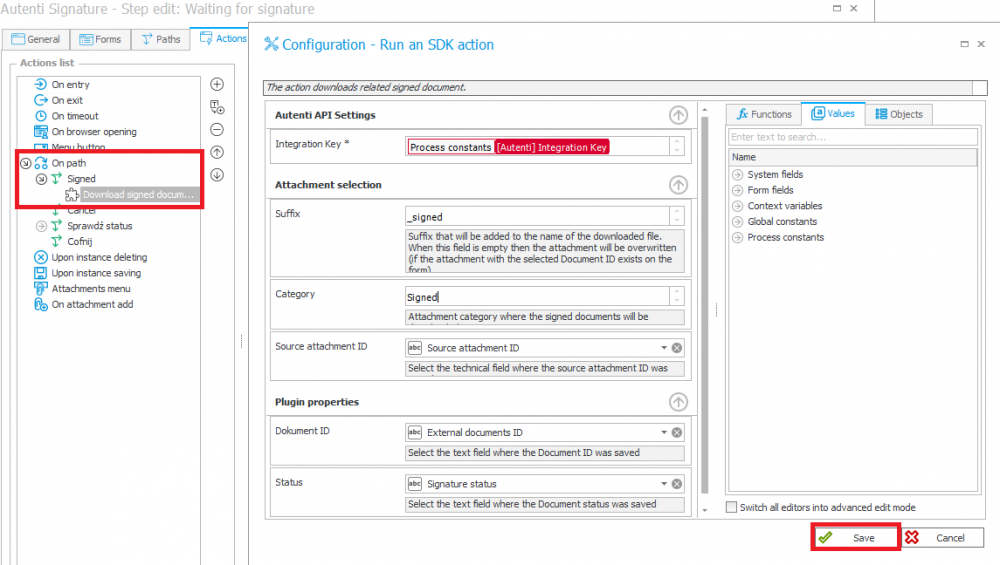
Fig. 19. The action configuration
The configuration fields are the same as the fields from the previous actions, except for the “Category” and “Suffix” fields. The “Category” field defines the document category that will be assigned to the downloaded, signed document. The “Suffix” field specifies the suffix that will be added to the name of the signed document.
As you see, the document was successfully configured.
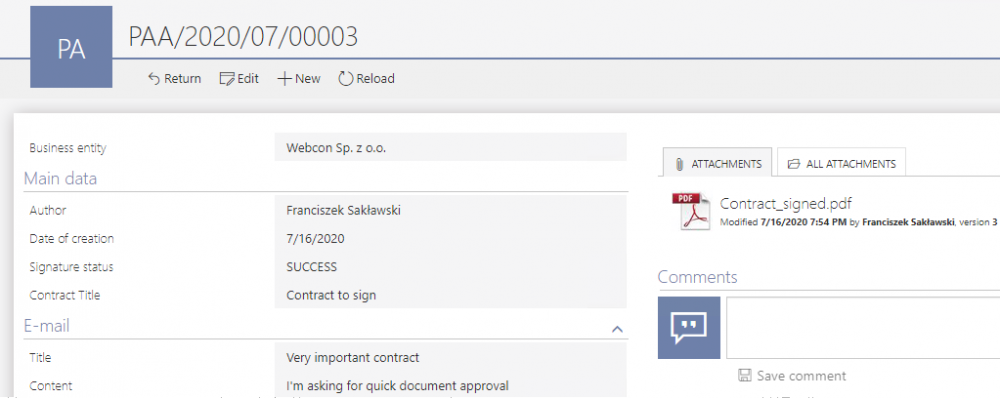
Fig. 20. The form with the signed document
Summary
Digital signatures are already an important business tool. This solution will only gain in popularity in the coming years, which is why it is so important to focus on this issue now. The workflow presented above is only an example of how to employ these new plugins (SDK) to supplement WEBCON BPS. These plugins, with minor modifications, can be added to any workflow.
The source code of plugins can be found on our GitHub account: https://github.com/WEBCON-BPS/BPSExt-Signing-Autenti. Please note that this is just a sample plugin, delivered under this license.
Useful links:

