Lite mode in Designer Studio
Applies to version: 2023 R3 and above; author: Łukasz Maciaszkiewicz
Introduction
Designer Studio is a powerful programming tool often used within companies by multiple developers engaged in unrelated projects. Since access to all the extensive functionalities of Designer Studio is often not necessary when developing dedicated applications, and unauthorized access to certain assets could potentially have adverse effects on the company, it is worth to delve into the features of the limited access to Designer Studio, specifically the Lite mode.
What is the Lite mode in Designer Studio?
The Lite mode is a functionality that allows users to work in Designer Studio with limited privileges. It enables users to access only the functionalities associated with the context of a particular application, preventing unauthorized access to the full configuration or specific areas of Designer Studio. Assigning such privileges also provides opportunities to involve in software development projects individuals who, despite lacking formal qualifications, can effectively create applications based on the low-code technology, but should not hold access to full system configuration.
Business case
A trading company has a Business Applications Department with 10 individuals employed as citizen developers. Despite lacking formal qualifications and in-depth software development knowledge, these individuals can use Designer Studio to create fully functional and useful business applications for various departments of the company. Their work is overseen by the Department Manager who coordinates the execution of tasks and delegates responsibilities among subordinates.
At present, the Department is involved in three projects dedicated to developing applications for the HR Department, Customer Service Department, and Sales Department, respectively.
Meet the Big Brother: Unveiling the Role of the System Administrator
Given the Department Manager's formal qualifications and extensive experience in the IT and programming field, they are the only authorized person to use Designer Studio as the System Administrator. This means that, quite literally, they have a broader view. With access to the full configuration of Designer Studio at the global and application levels, they can see buttons, options, or fields that are either invisible or inactive for citizen developers with Application administrator privileges. Furthermore, among other things, they have the ability to manage data sources created by other users or create user groups…
BPS groups
To facilitate the concurrent execution of three projects, the Department Manager organized their subordinates into three groups and assigned each group to a respective project. In this situation, the most natural approach appears to be creating project-specific BPS groups comprised of designated citizen developers. With this, the System Administrator will be able to manage privileges efficiently and conveniently assign and delegate tasks.
You can create the aforementioned BPS groups in both Portal and Designer Studio. Since the article available here delves deeply into topics related to creating groups in Portal and the privileges associated with managing them, it's worth briefly exploring the latter option.
To create a new BPS group in Designer Studio, navigate to the BPS users and groups list (System settings → Global parameters). Now, choose the BPS groups tab in the newly opened window. The tab window presents information in tabular form about all available BPS groups. You can filter the displayed groups by selecting or unselecting the Waiting for synchronization or Synchronized buttons. Click the Add (![]() ) button situated on the right side of the table.
) button situated on the right side of the table.
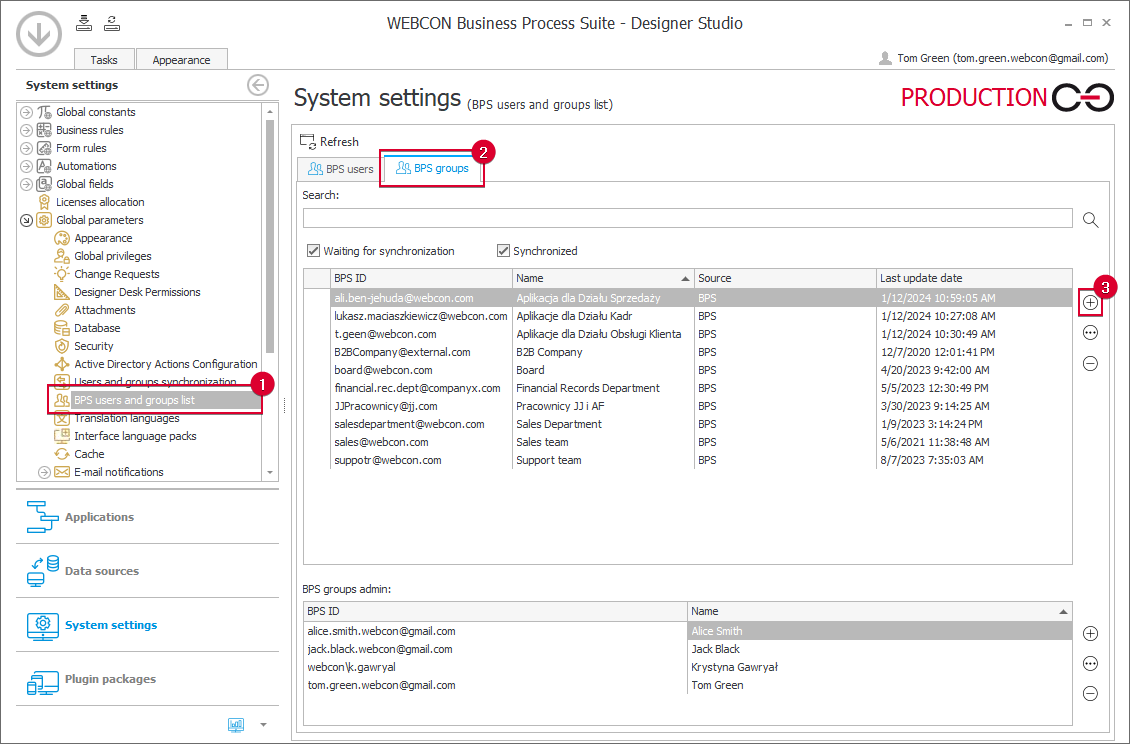
The Add button available on the right side of the table containing information about groups allows you to add a new BPS group Additionally, there are Edit and Remove buttons positioned directly below, allowing you to modify the existing groups.
Clicking the aforementioned button opens the Add group window where you can configure a new group. To be able to save the configuration, you must fill out the Group identifier (BPS ID) and Display name fields. Please note that for the first field [Group identifier (BPS ID)], the identifier must be entered in the UPN format. In this case, the created groups are named as follows: “Customer Service Department Application”, “HR Department Application”, and “Sales Department Application”. The group owner’s e-mail address acts as a group identifier.
To define the group members, go to the Users field and choose respective users by clicking the Browse button (![]() ). The company employs 10 citizen developers, with two groups consisting of 3 members each, and the last one consisting of 4 members. You can designate individuals responsible for managing the group and its members in the Group owners field, using the Browse button, similar to the Users field. In the discussed case, Tom Green (t.green) is designated as the responsible individual for all the three created groups.
). The company employs 10 citizen developers, with two groups consisting of 3 members each, and the last one consisting of 4 members. You can designate individuals responsible for managing the group and its members in the Group owners field, using the Browse button, similar to the Users field. In the discussed case, Tom Green (t.green) is designated as the responsible individual for all the three created groups.
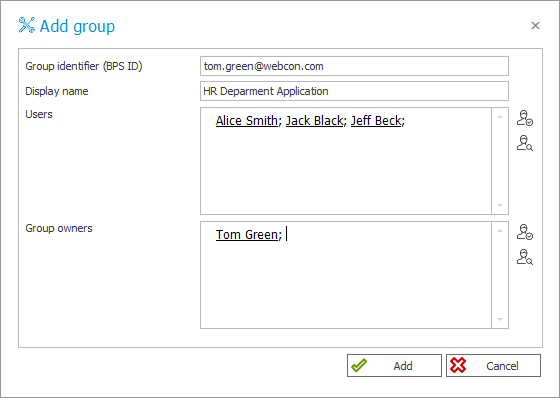
Configuration of a BPS users group
After finishing the configuration, click the Add button located at the bottom of the window. The newly created groups will appear on the BPS groups list and synchronize with the selected identity supplier service after some time.
Application Administrator
Completing the addition of BPS user groups marks only the halfway point. After adding them, it is worth considering the specific privileges needed by citizen developers to effectively perform their tasks without the risk of interfering with critical aspects of the system configuration.
Designer Studio provides a range of administrative privileges, including the role of Application Administrator. A user with Application Administrator privileges has access to the configuration of a specific application but does not have the capability to create others. Instead, they have the ability to add new processes created within a specific application and modify existing ones. Furthermore, they have the capability to create data sources and utilize existing ones, provided that the existing ones are public.
Hence, it appears that these privileges will be applicable for the described business case. The sections below present an example of configuration and provide a detailed description of the privileges granted to an Application Administrator.
- Granting privileges
In the described case, the Department Manager, who holds the System Administrator role, can grant the privileges of an Application Administrator.
For this purpose, the following three applications have been created in Designer Studio: “HR Department Application”, “Customer Service Department Application”, and “Sales Department Application”. (The configuration is identical for all three applications, with the only difference being the BPS group to which the privileges are granted.)

The three newly created applications are added to the “Application” group
To add the aforementioned privileges to each application, select the icon of a respective application on the selection tree, and choose the User privileges tab. The tab window is divided into four fields that specify different types of privileges. The first field holding the explicit name Application Administrator allows you to add the discussed privileges to the previously created groups. To do that, click the Browse button located on the right side of the aforementioned field.
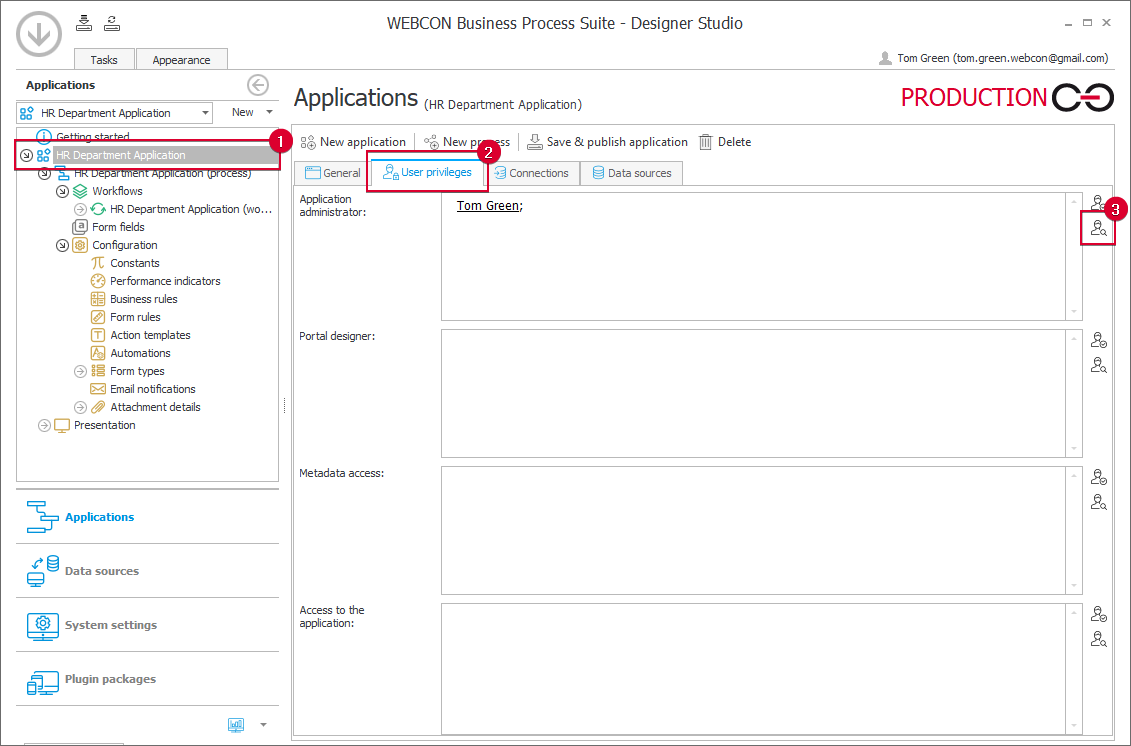
Please note that, by default, the Application Administrator field contains the user who created a given application (Tom Green in this case).
Enter the name of the group assigned to work on the given application (in this case this is “HR Department Application”) in a newly opened window and click the Browse button. Once you locate the correct group, double-click its name in the table below the search box. This action will populate the field next to the Add button. Finally, click the OK button.
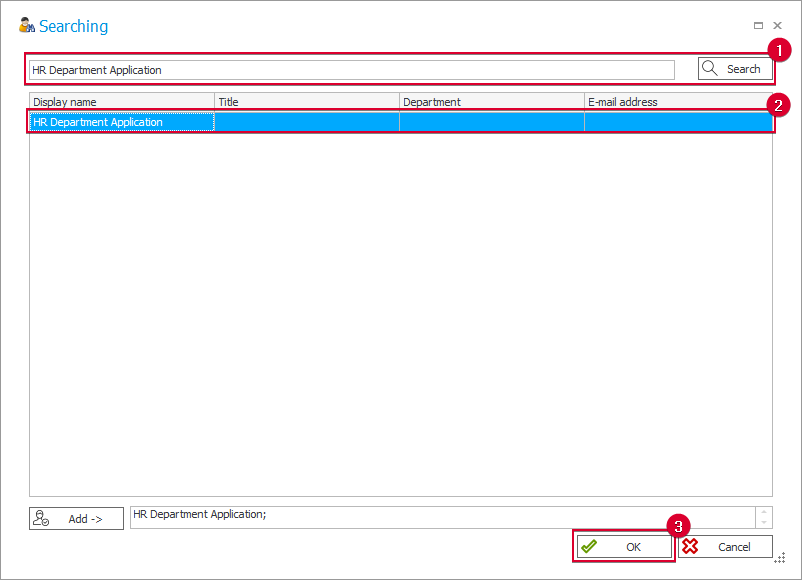
After adding a group, its name will appear in the Application Administrator field. To save the changes, click the Save & publish application button.

With created applications to which specific groups have been granted access, each group member can log into Designer Studio and utilize this tool in the so-called Litemode, with restricted privileges.
Working with limited privileges – the Lite mode
Upon logging into Designer Studio, a citizen developer belonging to the appropriate group immediately receives a message informing them about operating in Lite mode and restricting their capabilities to the application they administer.

The message displayed before accessing Designer Studio
Once you click the OK button, the Designer Studio window opens.
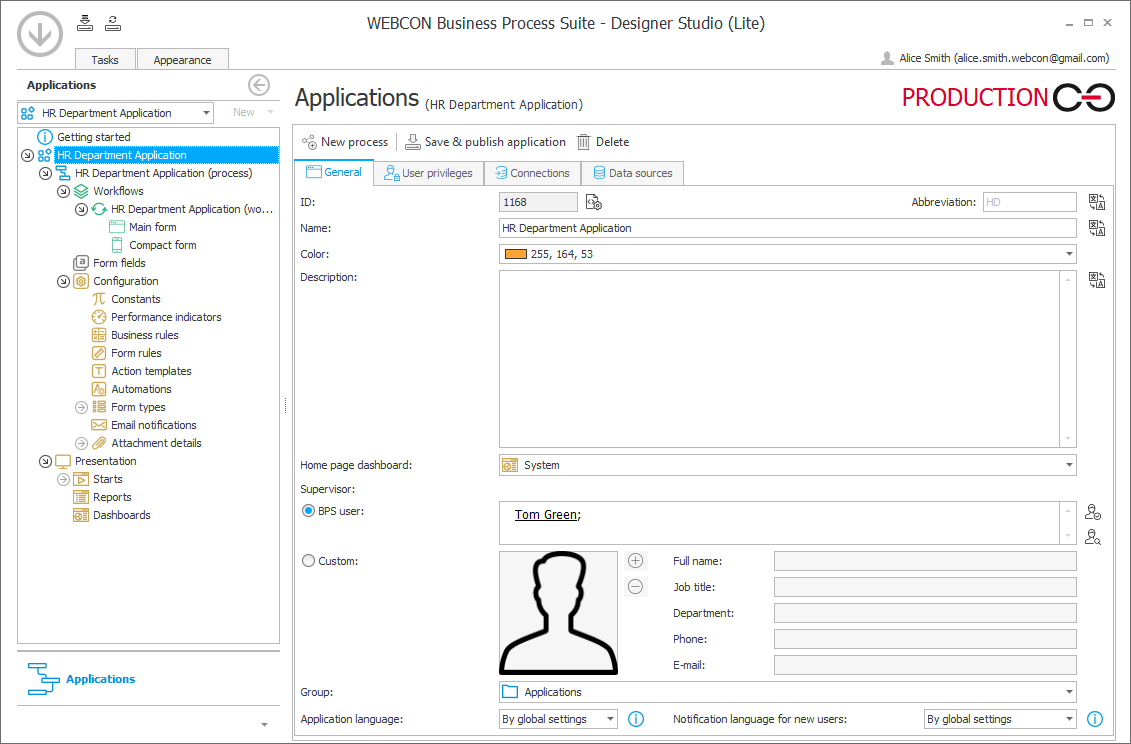
The Designer Studio window available to users who work in the Lite mode Please note the reduced number of available or active elements compared to the view available to the System Administrator
At the Designer Studio level, the citizen developer can only access their assigned application which was created by the Department Manager – in this case, the HR Department Application. However, they can also navigate to other applications they administer, provided that such applications exist.
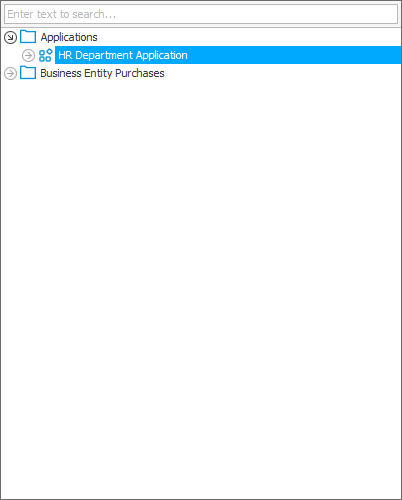
The Application Administrator can also open other applications they administer
While creating new applications is not possible, the Application Administrator can add and modify processes within the assigned application. Furthermore, the citizen developer with access rights to other applications in Designer Studio can link the processes contained within them…
- Adding a related process
To link a process available in one application and use it within the HR Department Application, the citizen developer must be an administrator in both cases. Once this condition is fulfilled, they can link and share a specific process within an application and also make modifications to it.
To make a process available in the discussed example, right-click on the application or process icon in the selection tree and choose the Create relation option from the context menu.
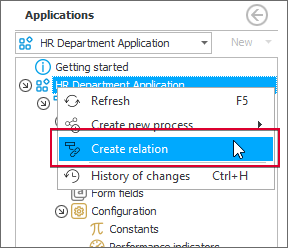
Linking a process created in a different application
In a newly opened window, expand the node of the respective application, choose the required process, and click the OK button. (In the discussed example, the citizen developer has access to the Customer Service Application and links the process contained within it.)
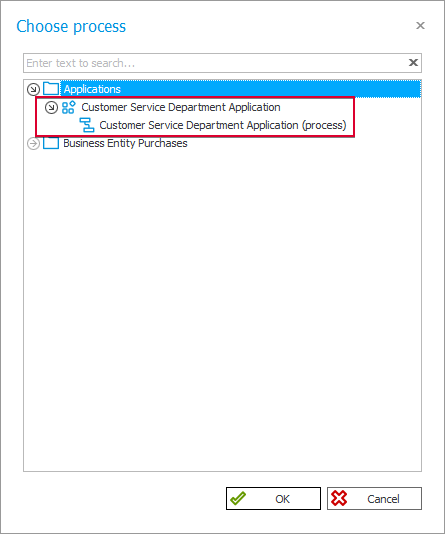
The window allowing for selection of the related process
Such a related process will become available on the selection tree in the HR Department Application. Its non-standard icon indicates, among other things, that it is linked from other application.
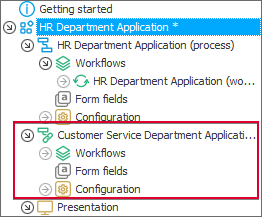
The related process is distinguished by a non-standard icon.
Now, the HR Department Application user has access to the related process which they can modify and configure as needed.
It is important to note here that the System Administrator can also add a related process to which a given citizen developer has no access, for example, when creating an application. In this scenario, the HR Department Application administrator can see the process on the selection tree (with a greyed-out icon) but cannot modify it. However, they can still consider it in reports, for example.
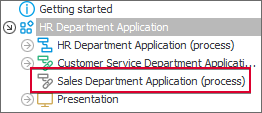
The process linked by the System Administrator, to which the Application Administrator has no access, is marked with a greyed-out icon, indicating that it cannot be edited.
- Data sources
The sections above briefly mentioned the elements that are either unavailable or inactive in the Designer Studio window view. Among them is also the Data sources button providing access to the section where they can be managed. Does that mean that the citizen developer is unable to use data sources in their application? Of course not, but their usage is restricted.
First of all, a data source can be linked to a given application by the System Administrator when creating the application. The Application Administrator can then access them immediately without the need to link them manually.
Secondly, users operating in the Lite mode can create new data sources themselves and subsequently utilize and modify them within their own projects.
To create a new data source, simply select the Data sources tab in the application configuration window. This window contains a table presenting available data sources. Click the New button located next to it.
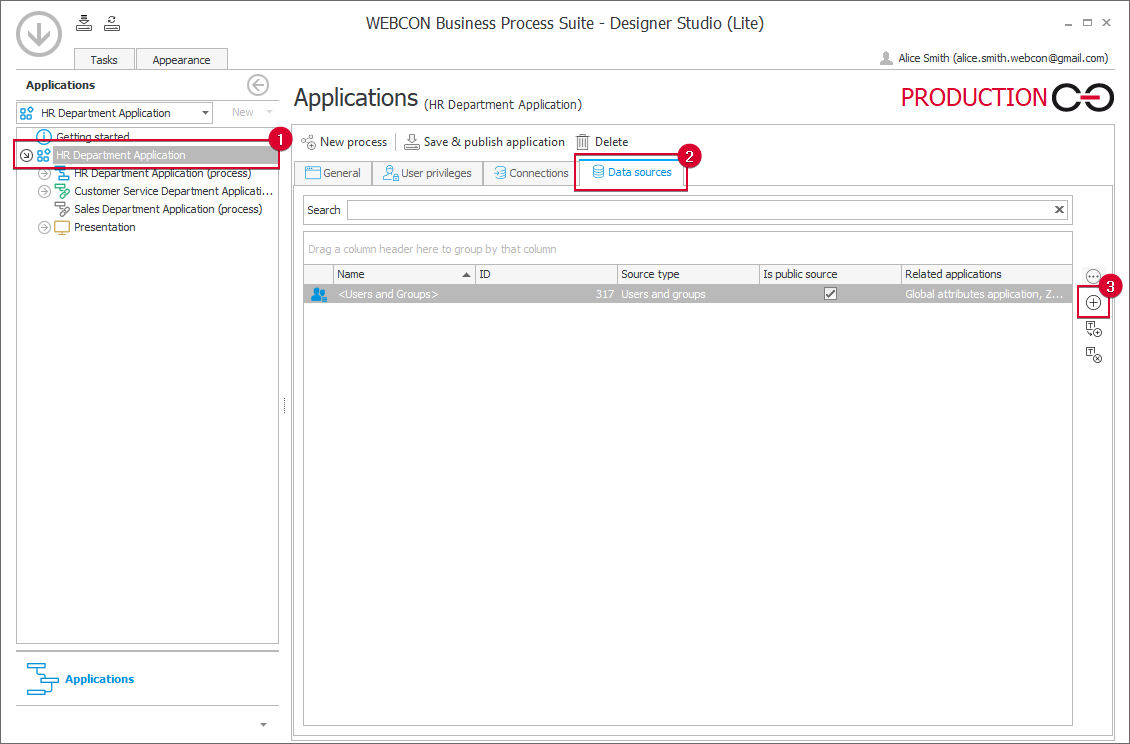
The Data Sources tab enables you to create new data sources and add existing ones
After pressing the aforementioned button, a window will open where you can configure a new data source. The configuration is done in a standard manner, so it is enough to mention that the Association and security tab contains the specific application for which the source is created (in this case this is HR Department Application). Additionally, users can make such a source available to other applications to which they have access by pressing the Attach to Application button (![]() ).
).
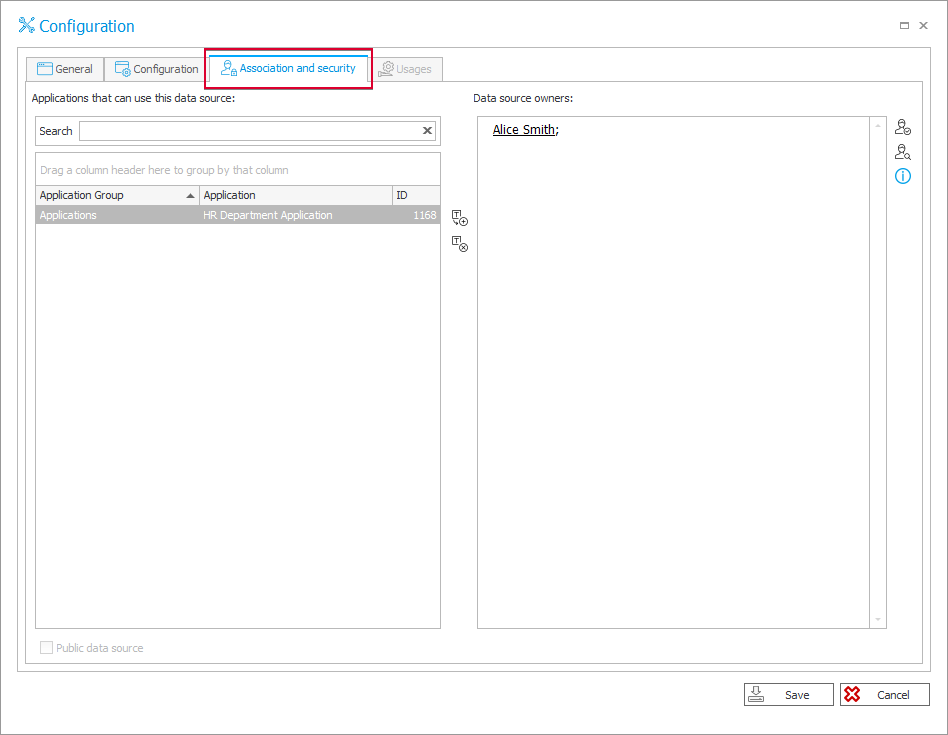
The data source is automatically assigned to the application within which it is created. Its author automatically becomes its owner
Finally, it's worth noting that the Application administrator can also attach existing data sources if they are public. More information about designating data sources as public is available in the article available here.
To do that, click the Attach Existing button (![]() ) in the Data Sources tab and select the respective source in the newly opened window.
) in the Data Sources tab and select the respective source in the newly opened window.
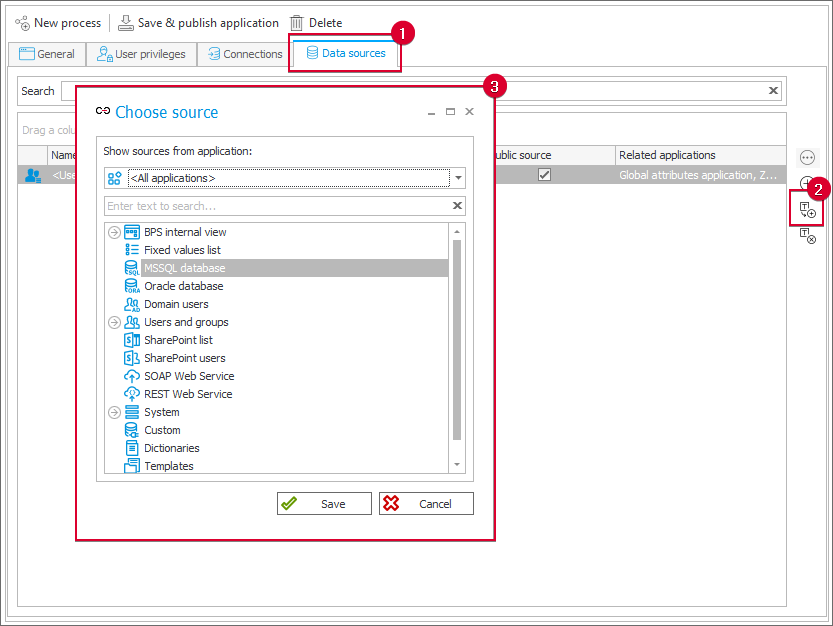
Adding an existing public data source
- Global form fields, rules, and constants
The last issue that deserves attention is the handling of elements with a “global” status, such as form fields, rules, or constants. While the citizen developer, acting as the Application Administrator, cannot create them in the discussed scenario (due to the lack of access to the System Settings section), they can still utilize these elements if they are defined.
For example, to add a global form field, select the Form fields node in the selection tree and then click the New form field button available in the upper bar. Then, in the Field type area, expand the Share global fields node and select one of the available form fields.
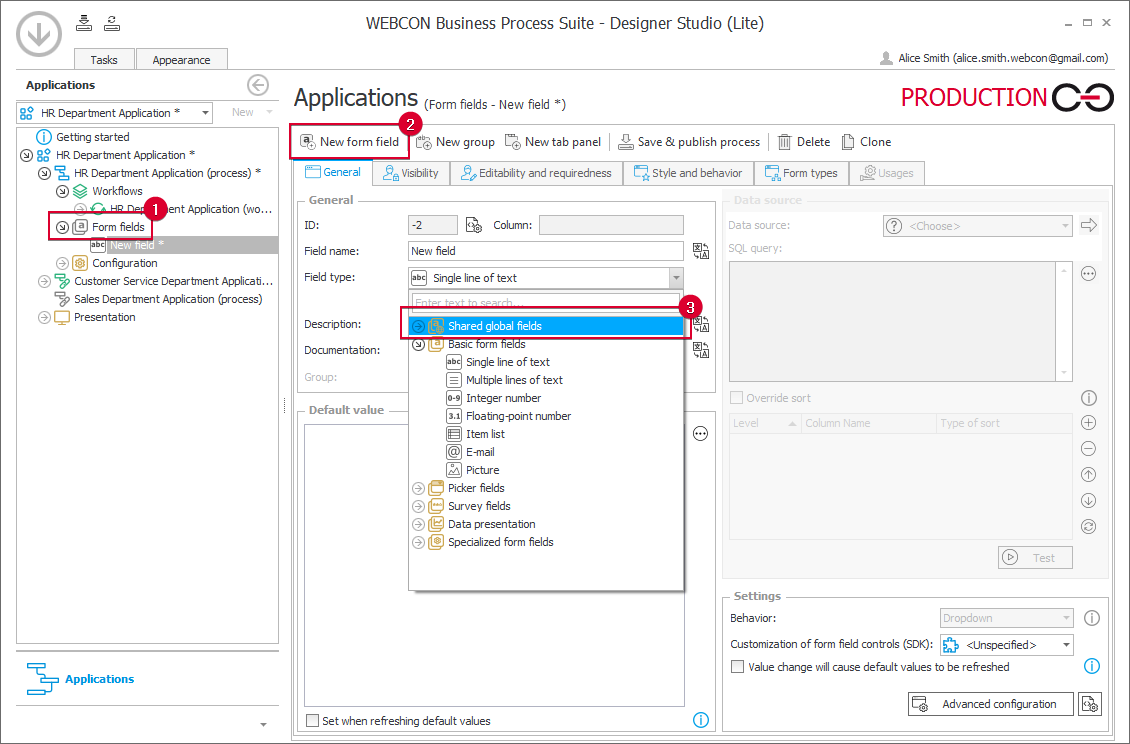
Adding a global form field
Once you add the form field and save your changes, it can be used in the application configuration. At the same time, the Application Administrator cannot edit it at the global level, but can only adapt it to their own context.
Remember to check out the process!
As three citizen developers have access to the HR Department Application in the described scenario, this situation can lead to “conflicts”…
Let us assume that one of the citizen developers is working within the only process available in the application and making modifications to it. After an hour passes and they want to save their (numerous) changes, the following message appears:
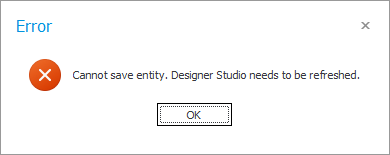
It is not difficult to imagine their reaction when they realize that not only can they not save their changes, but the required Designer Studio refreshing mentioned in the message results in their loss. When they regain their peace of mind, they will realize that while they were making modifications, another BPS group member made a minor change in the configuration of the same process and saved it.
Therefore, the question to ask is: can such situations be prevented? Yes, they can and should be prevented! You can do that using the process check-out functionality.
The process check-out functionality allows you to isolate a given process and prevents situations where the same process is edited simultaneously by multiple users. A user who has checked out the process for editing is assured that the modifications they make will not be lost because the system does not allow other users to save changes in the same process.
- How to check out a process?
Enabling the mentioned functionality is very easy and does not require advanced configuration. To check out a given process, right-click its icon on the selection tree and choose Check out for edit.
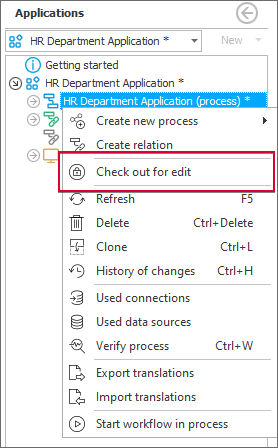
A process can be checked out by right-clicking its icon and selecting the Check out for edit option
Clicking the mentioned button will trigger the saving of the current process. Once the saving is completed, a green check mark will appear in the upper part of the process window (it is visible only for the user who checked out the process).
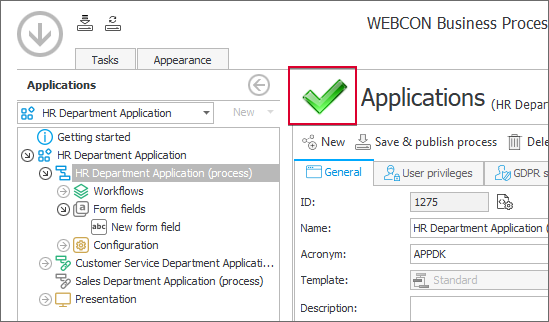
The check mark informs the user in a given Designer Studio instance that they have checked out the process.
Clicking the mark opens a window containing information about the process check-out and details about the user who performed it, among other things.
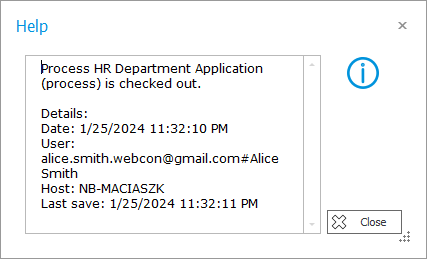
The window containing information about the process check-out
Please note that other users who open such a process will see a padlock symbol next to the application name. By clicking it, they will also be able to view information about the process check-out.
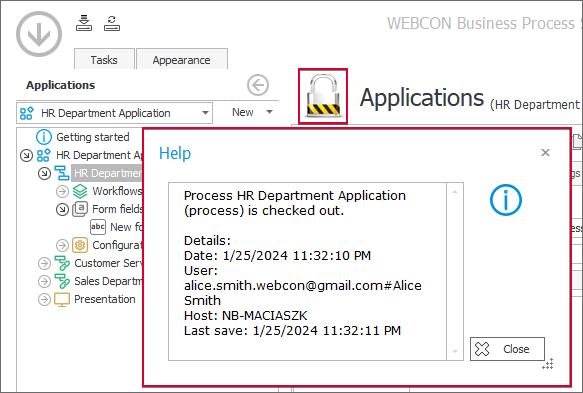
The padlock symbol informs users of other Designer Studio instances that a given process is checked-out
However, it doesn't end there – an attempt to save such a process by other users will result in displaying a message informing that such an operation is not possible and suggesting to refresh the process.
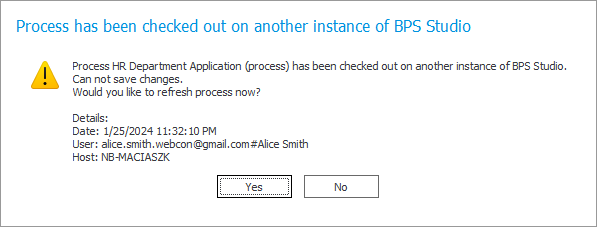
The message displayed when attempting to save a process checked-out by other user
Summary
The Lite mode is especially useful in situations where security is prioritized. By restricting access to functionalities and assets, this mode provides tools that enable effective creation of business applications. Furthermore, it facilitates progress supervision and allows for the designation of specific areas, thereby increasing control over developed solutions.

