Starting workflow by using the SharePoint list
Applies to version: 2020.1.x and above; author: Michał Kastelik
Introduction
WEBCON BPS can be extensively integrated with Microsoft SharePoint Online. This article describes how to start a workflow by using a standard SharePoint list with advanced column formatting.
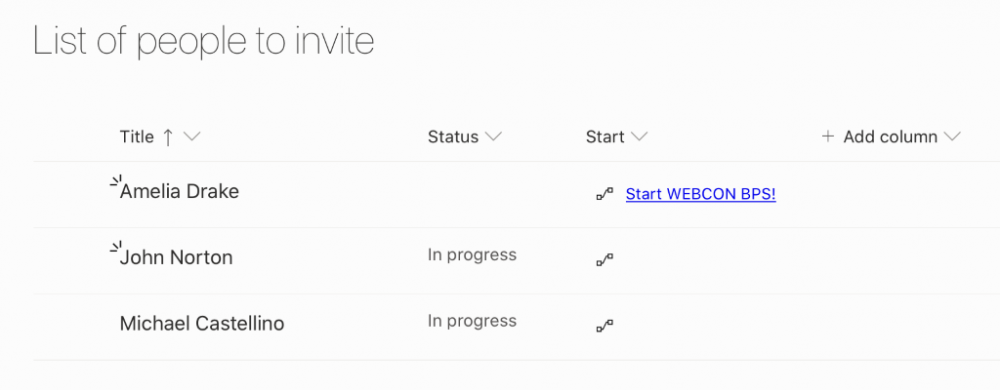
In the presented scenario, the SharePoint list will be used to start the workflow of inviting people to the conference – after entering the name and surname, a marketing workflow will be started. The current status of the task can be checked in the SharePoint list column.
Configuration of the SharePoint list
The list consist of the following fields:
- Title field – contains the name of the invited person
- Status field – contains the current status of the task
- BPS URL field – contains a link to the started WEBCON BPS instance
- Start – allows you to start a new workflow instance
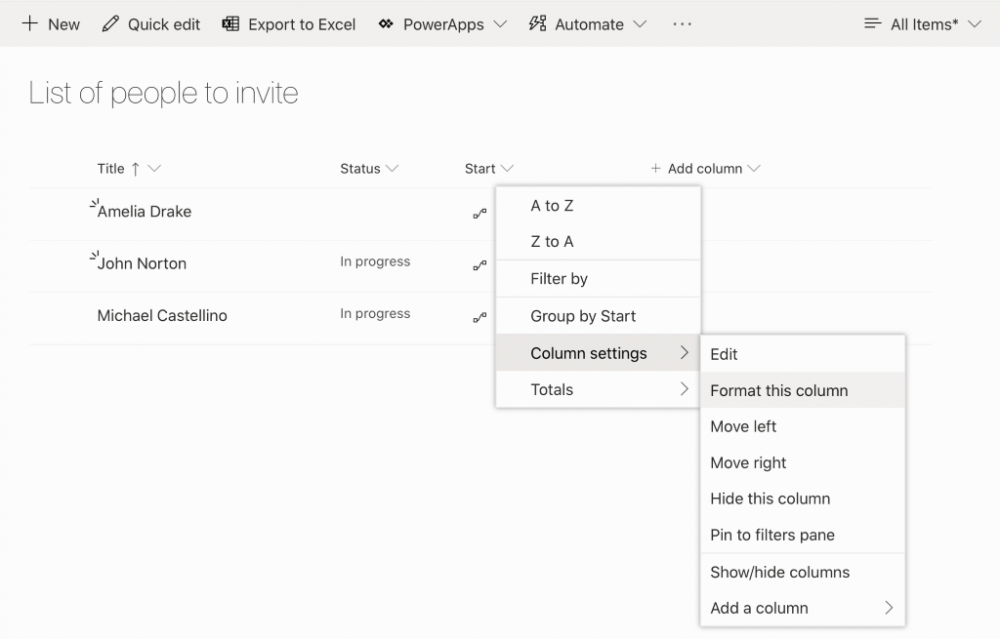
To start the workflow in WEBCON BPS from the Start column, go to the advanced column formatting settings.
After clicking on the column, select the “Column settings” option and then “Format this column” -> “Advanced mode”. In the configuration select the field to which the formatting should be applied (in our case this is the Start field).
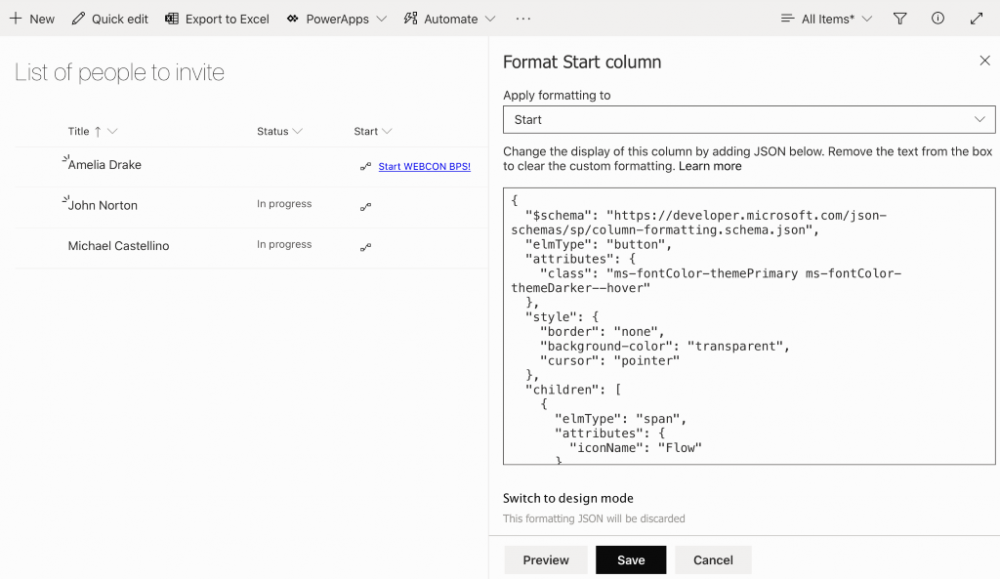
In the next step, insert the JSON code of the solution – this code adds the object to the right of the column value containing the icon and the inscription that it also a link. In the case of the icon, one of the available in the Microsoft Fluent collection called “Flow” was selected.
The list of all available icons can be found at https://developer.microsoft.com/en-us/fluentui#/styles/web/icons.
The link address that was used in this solution refers to the start address of the workflow defined in the WEBCON BPS environment.
In the link, the additional parameters are also passed such as:
- [$ Title] – to the AttText1 field in our form we pass the value of the Title field
- [$ ID] – to the AttText4 field of the form we pass the ID value of the list row
- https://webconbps.sharepoint.com/Lists/Start%20BPS%20list/DispForm.aspx?ID=’+[$ID] – to the AttText3 field we pass the entire link to the item list
The entire solution code in our scenario looks like this:
{
“$schema”: “https://developer.microsoft.com/json-schemas/sp/column-formatting.schema.json”,
“elmType”: “button”,
“attributes”: {
“class”: “ms-fontColor-themePrimary ms-fontColor-themeDarker–hover”
},
“style”: {
“border”: “none”,
“background-color”: “transparent”,
“cursor”: “pointer”
},
“children”: [
{
“elmType”: “span”,
“attributes”: {
“iconName”: “Flow”
},
“style”: {
“padding-right”: “9px”
}
},
{
“elmType”: “a”,
“txtContent”: “=if([$Status]==”,’Start WEBCON BPS!’, if([$Status]==’In progress’, ”,”))”,
“attributes”: {
“target”: “_blank”,
“href”: “=’https://presentation.webconbps.com/BPSPortal/db/1/app/71/start/wf/145/dt/148/form?com_id=2&returnurl=%2Fdb%2F1%2Fapp%2F71&AttText1=’ + [$Title] + ‘&AttText4=’ + [$ID] + ‘&AttText3=https://webconbps.sharepoint.com/Lists/Start%20BPS%20list/DispForm.aspx?ID=’+[$ID]”
}
}
]
}
After clicking on the link from the SharePoint list, the assigned WEBCON BPS application will start along with the parameters provided in the address.
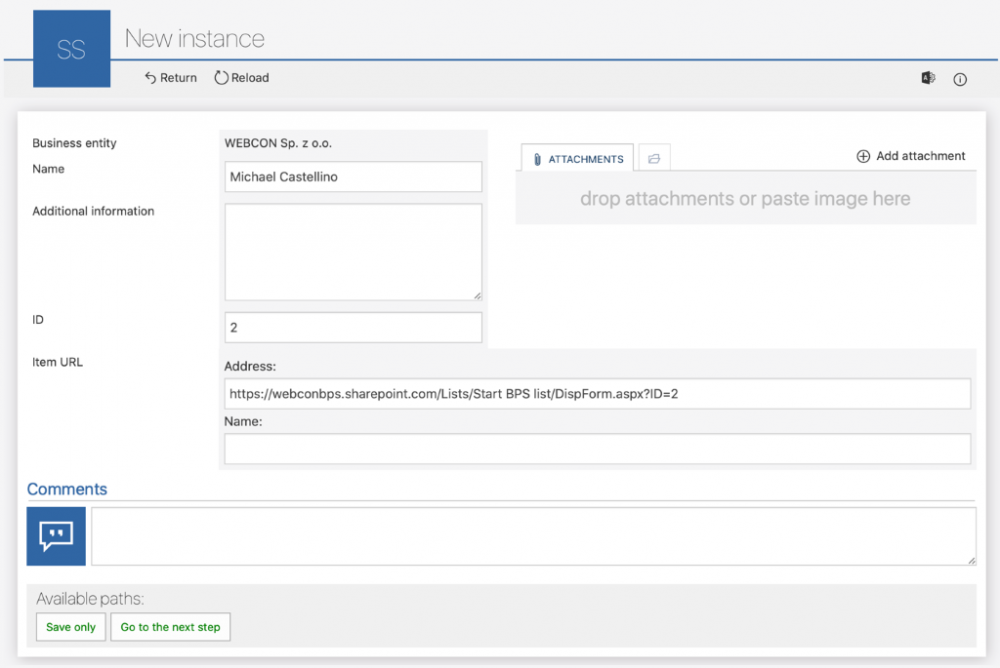
After finishing this step, a “Status” field value in the list is updated to the current step in the workflow. Additionally a link to the saved WEBCON BPS instance is saved in the BPS URL column.
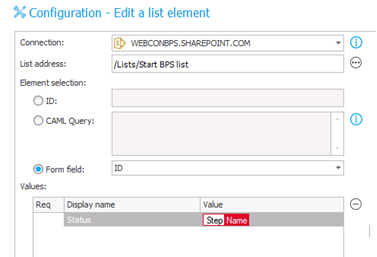
To modify these values, an “Edit a list element” action from the SharePoint content tab was used. In the configuration, after selecting the connection and list, define the field in which the instance ID is stored. Below you specify which field will be changed and the value.
The final effect of the SharePoint list looks like this:
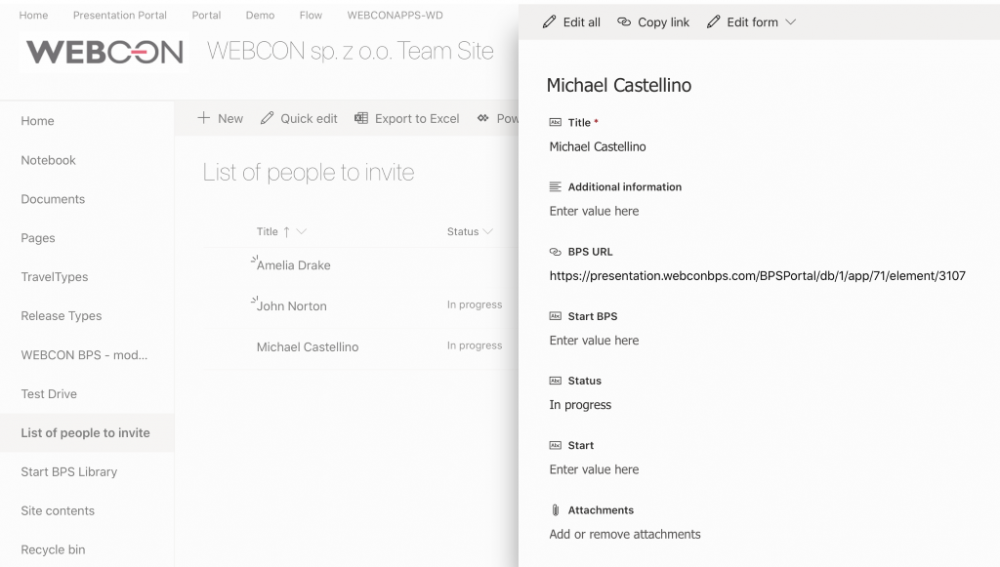
In the presented solution, the link to start the instance in the “Start” column appears only when the Status column is empty, otherwise the link is hidden. The = If method was used there.
“=if([$Status]==”,’Start WEBCON BPS!’, if([$Status]==’In progress’, ”,”))”,

