ToDo List
Applies to version: 2024 R1 and above; author: Łukasz Maciaszkiewicz
Introduction
Designing a business application is a process that requires both good memory and coordination from the people involved in it. Unfortunately, when faced with a large number of tasks, lengthy execution times, many people involved, or often all of the above, even the most capable mind must yield. To address these challenges, Designer Studio offers a functionality that enables users to create a list of tasks for execution (ToDo), which is discussed in this article.
What is a ToDo List?
Simply put, a ToDo List functions as an electronic notebook, presenting elements of the application within a table that require further configuration or approval. It is created by users themselves who can add elements to it, describe tasks to be executed, as well as mark their status, while navigating within Designer Studio. As a result, the application designer gains the ability to easily manage design operations, even when they involve a larger number of individuals or extend over a period of time.
How to access the list and use it?
Every user with privileges to edit application in Designer Studio can access ToDo List and the whole functionality. To view the list, click the Actions tab available in the upper bar of the Designer Studio window and select the ToDo List button.

- Navigation within the ToDo List window
The list window is displayed independently of the configuration windows for specific application objects in Designer Studio, allowing it to remain open while designing. As mentioned earlier, the ToDo List has a tabular form, and its elements are grouped by default according to the application to which they belong. However, please note that the list can also contain elements that do not belong to any specific application, such as global automations and business rules. These elements are grouped in a separate node and are visible only to system administrators. You can freely modify this default grouping method using the Filter editor… option in the context menu that appears when you click the heading of any table column.
In a similar manner, you can change the table's four default columns by selecting the Column Chooser option from the previously mentioned context menu.
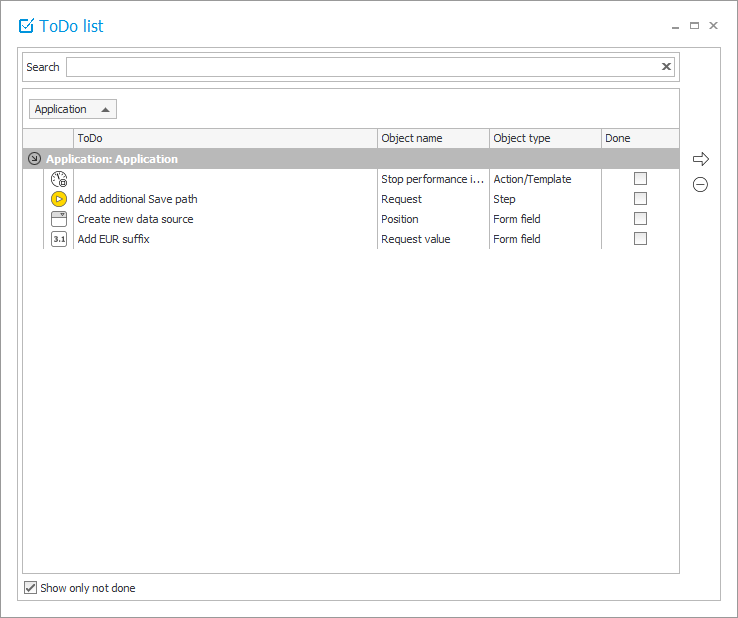
Importantly, in addition to presenting the added elements, the ToDo List window also allows you to manage them. Specifically, using the menu available on the right side of the list, you can directly open the configuration window of the selected element by pressing the arrow button (![]() ), or delete it by using the minus button (
), or delete it by using the minus button (![]() ) provided below. Furthermore, users can mark elements for which tasks have already been executed by selecting the appropriate checkbox in the Done column. These elements can then be hidden by selecting the Show only not done checkbox located in the bottom left corner. It's also worth noting that for a larger number of elements, you can utilize the search box to quickly find the desired one.
) provided below. Furthermore, users can mark elements for which tasks have already been executed by selecting the appropriate checkbox in the Done column. These elements can then be hidden by selecting the Show only not done checkbox located in the bottom left corner. It's also worth noting that for a larger number of elements, you can utilize the search box to quickly find the desired one.
- Adding elements to the list and editing them
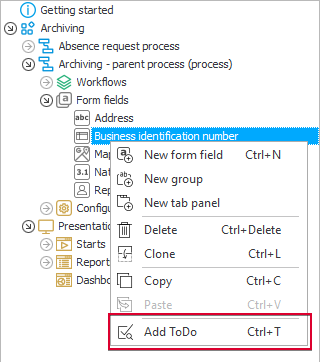
Users with access to a particular application in Designer Studio can add elements to ToDo List. The procedure is straightforward: simply right-click on a desired element in Designer Studio's selection tree, then choose Add ToDo from the context menu (or use the shortcut CTRL + T). You can add most configurable elements in Designer Studio to ToDo List.
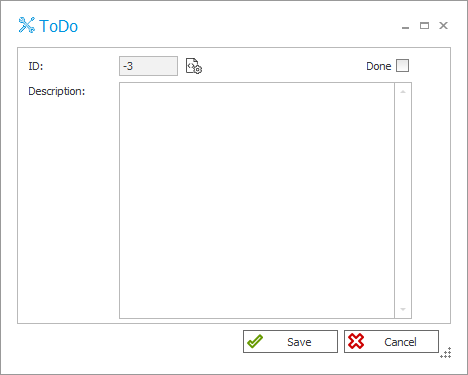
Choosing the Add ToDo option opens a separate window where you can optionally describe the task in the Description field. The information entered here is then displayed in the ToDo column of the list. At this point, you can also mark the element as already executed by checking the Done checkbox, indicating it no longer requires further attention from the designer.
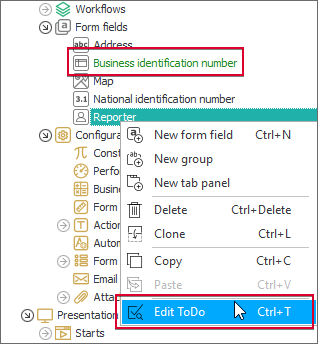
After adding the element and pressing the Save button, it is further distinguished by turning green on the Designer Studio's selection tree, indicating its inclusion on the ToDo List. You can then edit such an element by right-clicking on it and selecting the Edit ToDo option from the context menu. It's worth mentioning that an entry on the list is not duplicated when an element for which it was created is copied or cloned.
NOTE: the entries added to ToDo List are not preserved when exporting or importing an application in Designer Studio.
ToDo List in projects imported from Designer Desk
For an application prototype that was created in Designer Desk and is imported into Designer Studio, ToDo List is generated automatically. This means that the system automatically creates entries on the list for specific objects included in the prototype, eliminating the need for manual input by the user. Moreover, each entry is accompanied by an automatically generated standard task description (provided in the ToDo column of the list).
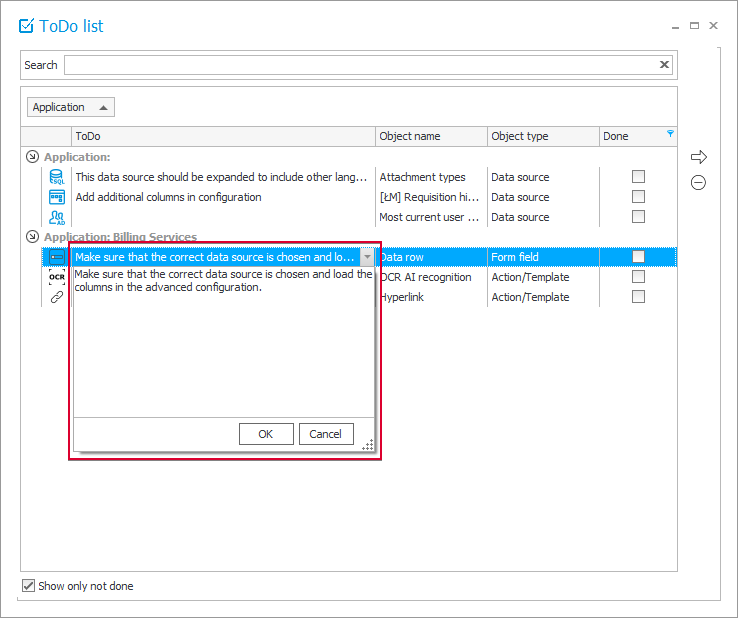
Below is a list of objects for which entries are automatically created on ToDo List after importing the prototype into Designer Studio:
- path (if the I need this path to be available only in some cases checkbox has been selected in the prototype path configuration in Designer Desk),
- actions (excluding the actions that do not require configuration in Designer Studio, such as Notification, Stop sharing, Finish editing a file using OneDrive, Cancel editing a file using OneDrive),
- Choice field (regardless of its behavior, i.e. Dropdown, Popup search window, or Autocomplete), or form fields that belong to the Data presentation group,
- business rules,
- data sources (except Fixed values list).
Summary
The functionality of creating a list of tasks for execution can prove extremely useful, especially when designing more complex applications. Thanks to its simplicity and user-friendliness, the ToDo List functionality enables designers to effectively manage projects and monitor their progress.

