Applies to version: 2020.1.x and above; author: Franciszek Sakławski
Introduction
WEBCPON BPS supports your office365 workflow by enabling you to generate printouts (e.g., car reservation, order, or shopping list). It is possible when you use the MS Word add-in. This article describes how to Install the add-in.
Installation
To install the add-in, go to the WEBCON BPS Portal, click on your profile icon and then, click the “Install MS Office add-ins” -> “Word” option.

Fig. 1. WEBCON BPS Portal
The system will start the process of installation. After successful installation, the add-in will be visible on the ribbon at the top of MS Word.

Fig. 2. MS Word with WEBCON BPS add-in
Business case
A simple printout of car reservation has been created. There is an instance in the system storing information about data of the reserved car and registration.
Fig. 3. The Car reservation form
Next go to the WEBCON BPS tab in MS Word and click the “User settings” button to connect with the Portal.

Fig. 4. WEBCOB BPS add-in for MS Word
The Portal login window will appear on the screen – enter the portal address and then, click the “Connect” button. The system will ask you for your login and password.
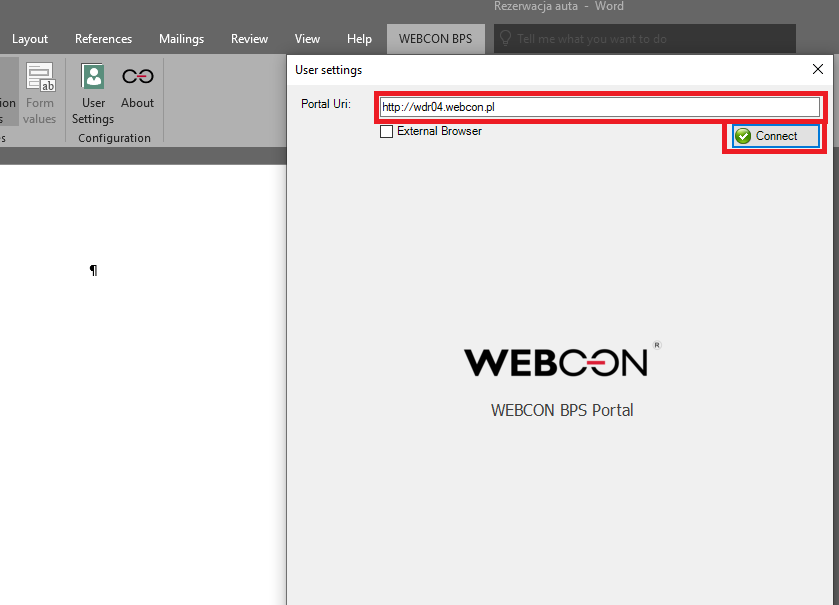
Fig. 5. The Portal login window
After connecting with the Portal click the “File Generation Templates” button.

Fig. 6. The “File Generation Templates” option
On the right there is a menu in which you must indicate the application, process and document type from which the data for printing will be loaded.
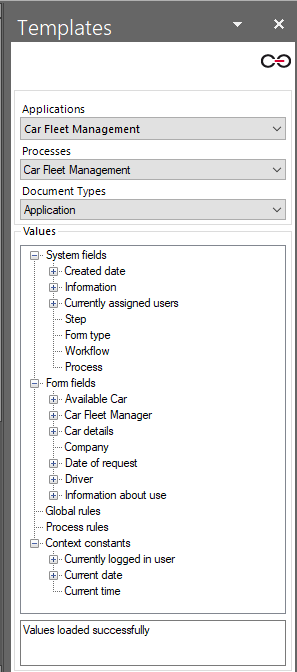
Fig. 7. The selecting process window
The next step is to create the printout.
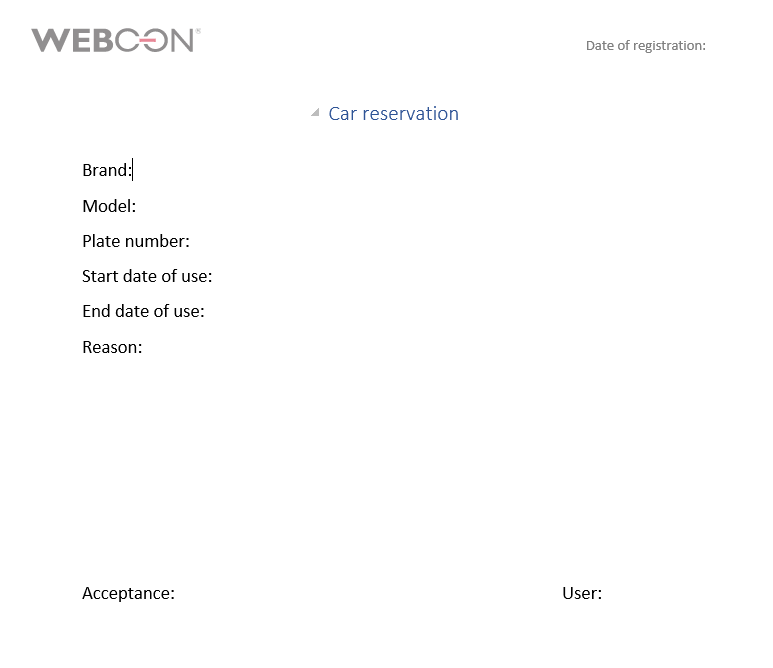
Fig. 8. The printout template
To add the fields to the printout – just drag them or double-click with the cursor in the place where you want to insert them. The printout looks like this:
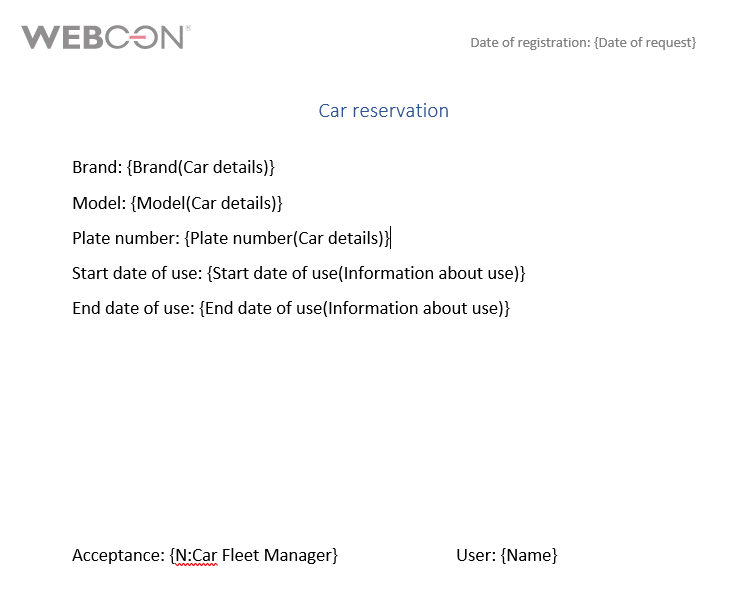
Fig. 9. The printout template with completed fields
In the process of car reservation, a button was defined which generates the printout and was related with the document templates process. More information about the method of storing documents can be found at Storage methods of document templates.
In the button configuration the link to the instance storing the template has been added:
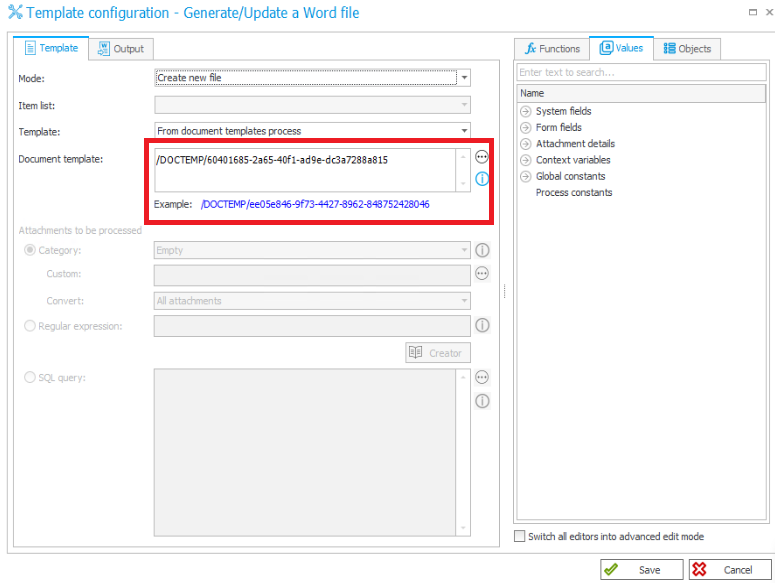
Fig. 10. The configuration of generating the printout
Let’s go to the instance and try to generate the printout.
Fig. 11. The car reservation form
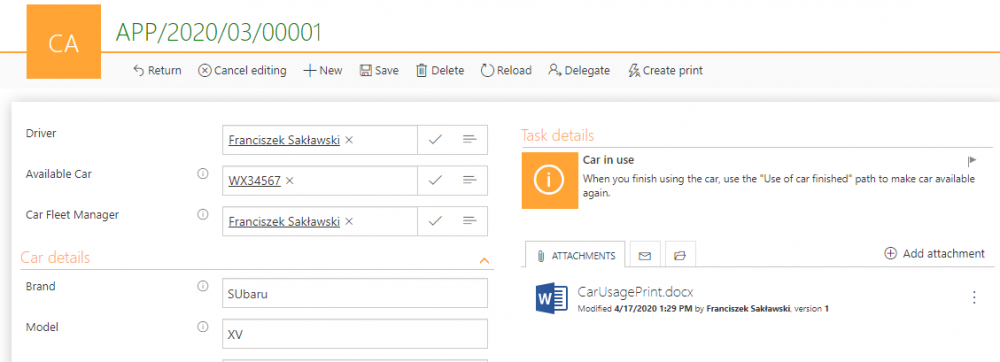
After clicking the button, the printout should be added in the Attachments section of a given instance.
Fig. 12. The car reservation instance with the attachment
To check if the data was correctly entered, open the MS Word file by clicking the attachment icon from the form level. On the preview you will be able to verify the correctness of the generated information.
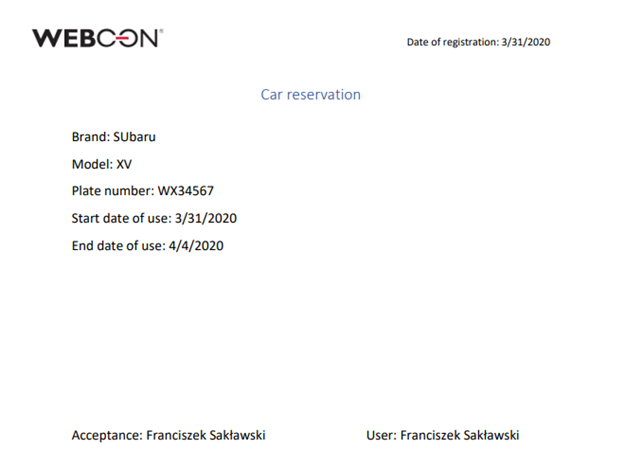
Fig. 13. The generated printout
The MS Word add-in to the WEBCON BPS gives you a lot of abilities to create printouts. You can easily create a printout and implement them for your business needs.


