Export and import of translations in WEBCON BPS
Applies to version: 2023 R1 and above; author: Krystyna Gawryał
Introduction
Version 2023 R1 of WEBCON BPS introduced the possibility to export translated names of application elements created by the person responsible for configuring the application, and then to import the completed translation document into the system.
This article describes this functionality with an example of its use in the company.
Note: Translations can be exported/imported within one environment and one main version of WEBCON BPS.
Business case
An international company operating in the food sector wants to conduct a series of webinars among its employees to explain the changes that the recently introduced European Commission Regulation on Food Additives brings to the industry and to the company's operations in general. Accordingly, a process has been created to register those interested in attending such a webinar. It is planned that the process, as well as the webinars themselves, will be available in 3 language versions: English, French, and German.
Export and import of translations in WEBCON BPS Designer Studio
In the original version, the process and the application in which it was created are available in English. The person responsible for configuring the process wants to enter translations in groups for each selected language in a separate file.
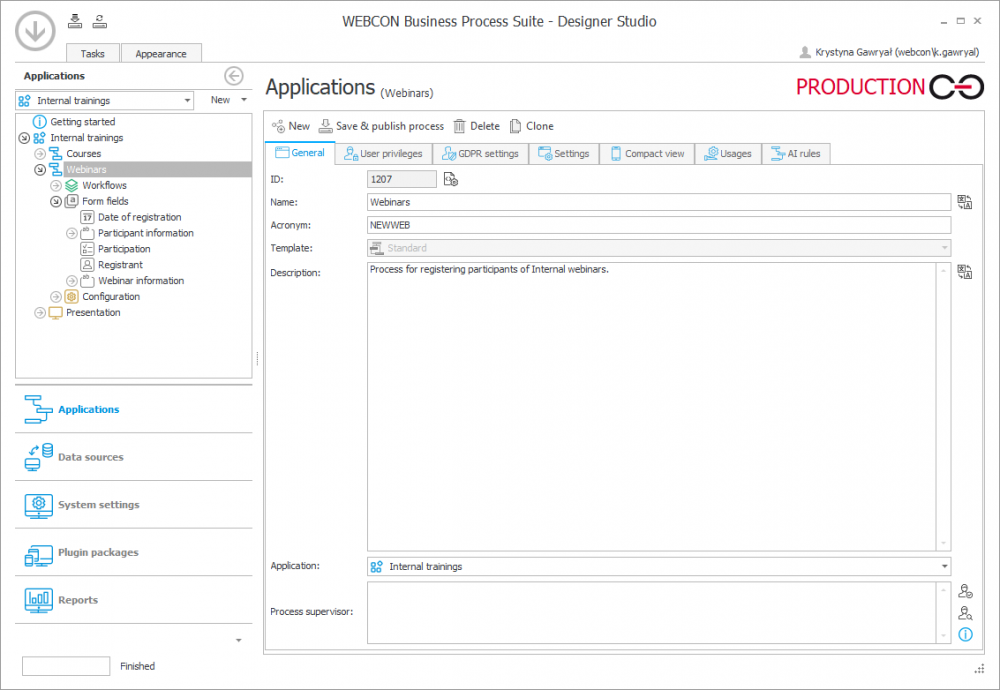
Fig. 1. Main page of the “Webinars” process in Designer Studio
To export a file with translations, right-click the process and select Export translations from the shortcut menu.

Fig. 2. Exporting process translations in Designer Studio
After a while a window will appear where you can specify the Content language and the destination for downloading the .xlsx file with translations.
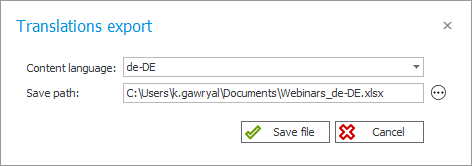
Fig. 3. Selecting the content language and the location of the translation file on the hard disk
The list of available Content languages corresponds to the one defined in the System settings (Global parameters → Translation languages).
The export covers translations for the selected process and the presentation layer of the application to which the process belongs.
The user is informed about the successful export of translations with a corresponding message.
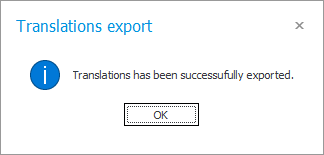
Fig. 4. Confirmation of successful process translation export
After the translations have been exported, the user can edit the downloaded file and add the missing translations. Changes should be made only in the column with the name of the target language, e.g. "de-DE" – in the corresponding cells of the sheet enter the translations of the value from the adjacent column, e.g. OriginalName.
Note: changing data in other columns may prevent import of translations into the system.
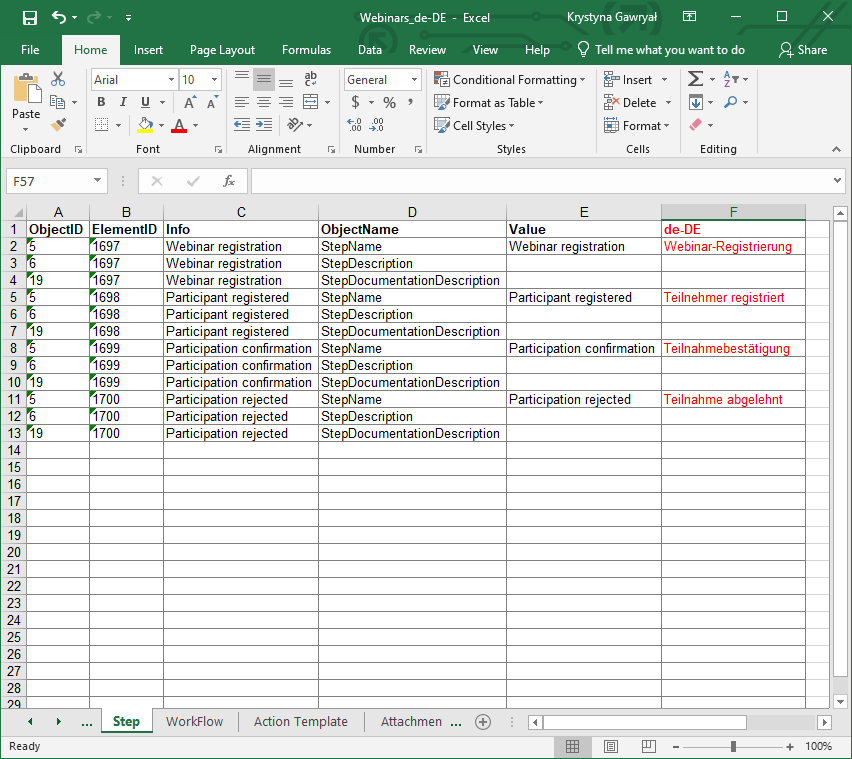
Fig. 5. Editing an Excel file with translations
In order for the process to be fully translated into the target language (in this case, German), it is necessary to complete the translations on all sheets in the Excel file.
Once the file is complete, it needs to be imported into Designer Studio. To do this, select Import translations from the process right-click menu, specify the location of the MS Excel file and click Load.

Fig. 6. Importing an Excel file with translations
As in the case of export, the user is informed about the successful import of translations with a corresponding message.
If you click on the corresponding icon next to the element for which the translation has been entered in the Excel file, you will see that the translation has been successfully added to the system.
![]()
Fig. 7. Translation of the process description into German imported from the Excel file.
Similarly, if you log in to WEBCON BPS Portal and set German as the interface language, and then navigate to the element associated with the translated process (e.g. a form, see Fig. 8), the element will be displayed in the target language.
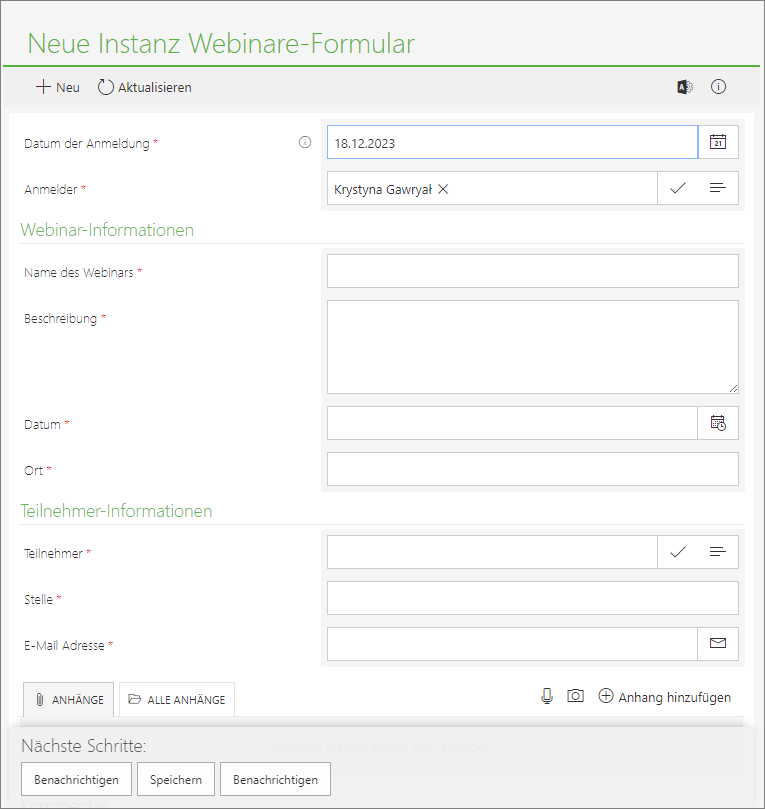
Fig. 8. Form translated into German using the translation export/import functionality
Export and import of translations in WEBCON BPS Portal
The application administrator can also export their translations from Portal. To do so, they should click on the icon next to the profile picture and select Translations and then Export from the drop-down menu. This option is available when Edit mode is enabled in Portal.
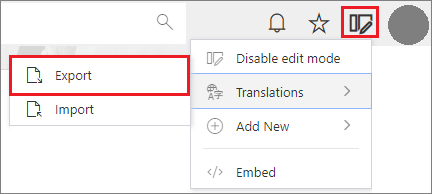
Fig. 9. Exporting application translations in Portal
The Export translations window will appear, where you should select the target language of the translation and the application process to be translated. After confirming the export, the .xlsx file containing the translations will be saved to the default location on the hard disk.
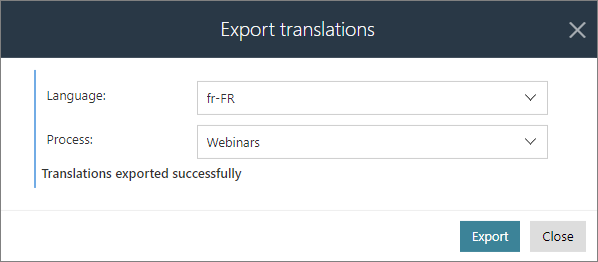
Fig. 10. Process translation export window
As before, the Excel file should be edited by entering the missing translations in the fr-FR column.
The file with the finished translations can then be imported by selecting Translations → Import from the user menu and pointing to the corresponding MS Excel document.
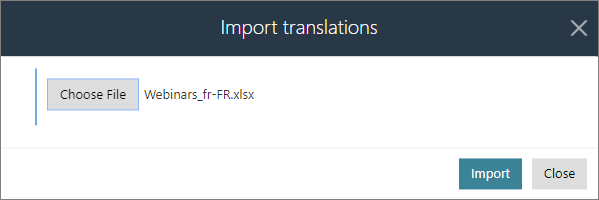
Fig. 11. Importing an Excel file with translations into Portal
Once the file has been successfully imported, the browser window refreshes automatically. Then, after changing the language in Portal to French, you can see that the names of the elements have been changed according to the translations entered.

Fig. 12. Preview of the workflow translated into French using the translation export/import functionality
The process can now be made available to company employees who speak English, German, and French.
Summary
The functionality of exporting and importing translations in Designer Studio and Portal speeds up the process of translating the names of application elements created with WEBCON BPS. The person responsible for its configuration no longer needs to add translations for each term separately and can be sure that no phrase requiring translation is overlooked. Therefore, the functionality can be successfully used in international companies where processes in different language versions are required.
Note: Starting from system version 2023 R1, the previous translation export/import tool WEBCON.BPS.TranslationImportExport.exe is no longer supported and a corresponding warning message is displayed when trying to use it.

