How to create barcode printout templates
Applies to version: 2019.1.x and above; authors: Wojciech Mleczko, Krystyna Gawryał
Introduction
WEBCON BPS supports barcodes as a method of identifying documents and workflow instances. Using barcodes allows to automate the process of scanning and registering paper documents. Stickers with barcodes simplify archiving documents, and based on barcode labels it is possible to quickly find the right workflow instance in the system. The main part of the configuration is preparing label templates.
Creating new template using Zebra Designer
- After installing and starting Zebra Designer, select Create a New Label in the wizard.

Note: the label template wizard is available if the driver for the barcode printer is installed on your computer.
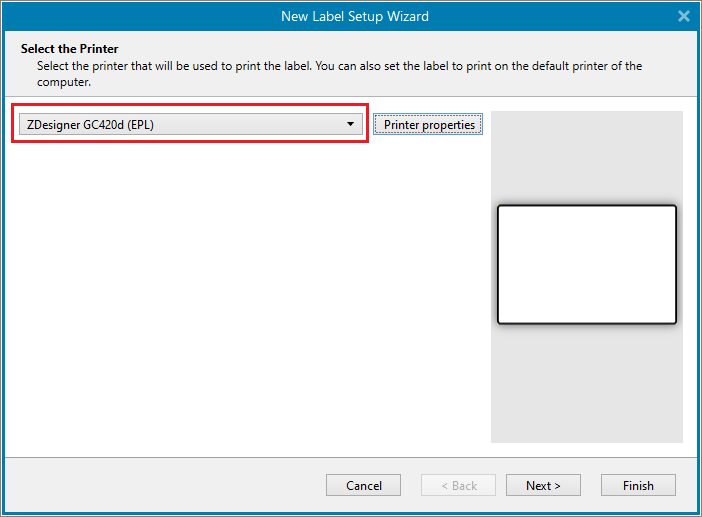
- Choose the printer you wish to use:
- Select one of predefined label formats. For instance, select ① Print on a sheet of paper.
After that, the program automatically goes to page size settings ②:

Select your preferred unit of measure. You can choose from cm, in, mm, and dot.
- In the next step, select label orientation:

- Set label dimensions and then click Finish:

- Blank label with defined dimensions:
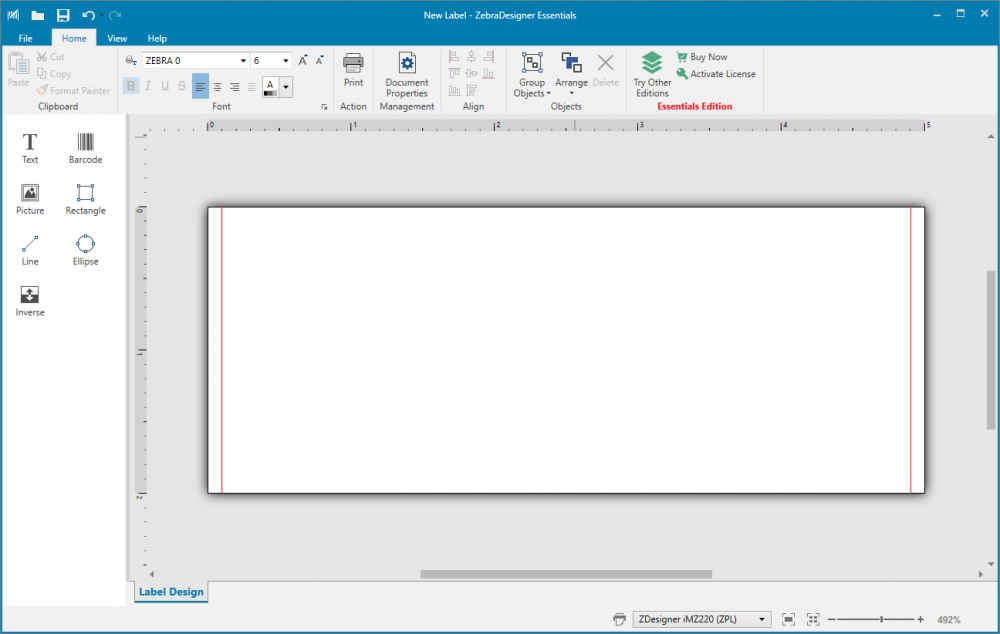
- To create a label template with two codes (one barcode and one Data Matrix code) and information about the date and author, select elements from the left menu.
First add a text object. Select ① Text from the menu and then place an object on the label.
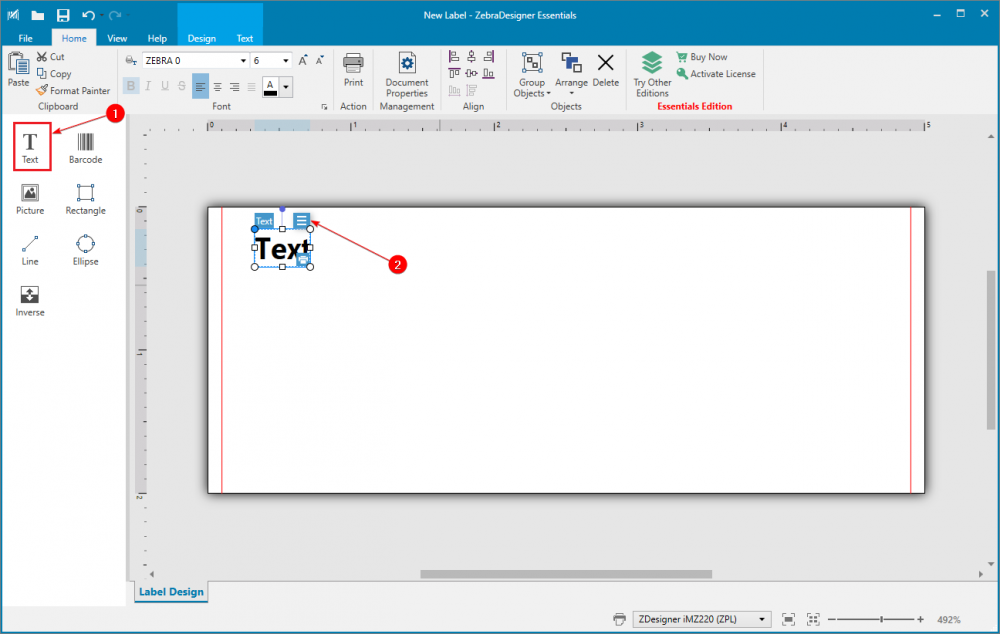
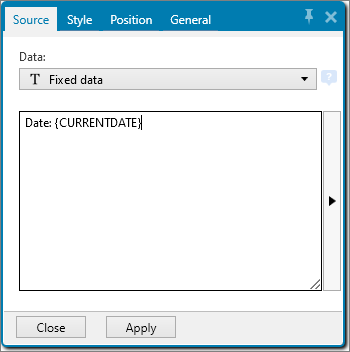
- When you click on the object menu ②, a window will appear where you need to enter text, e.g. Date: {CURRENTDATE}
- In the Style tab, configure the font settings:

If you want use the standard font size (without scaling), select the smallest size.
- The same actions should be performed for the text parameter Author: {N:CURRENTUSER}

- Next, add a barcode. For this purpose, select Barcode from the left menu and choose its location on the label. Enter {WFD_ID} in the barcode configuration window.
The default barcode type used in BPS is Code 128. To set barcode options, click on the Barcode tab.

The barcode width depends on the X dimension value. An explanation of how this value affects the printout can be found later in this article.
- In the Human Readable tab you can specify whether the barcode interpretation is to be placed below the code.

- Next, add the 2D Data Matrix code. Again, select Barcode from the left menu, place it at the desired location on the label. In the window that appears, configure barcode data as {DBCODE}{WFD_ID} (it is important to include the variable referencing the database acronym {DBCODE}):
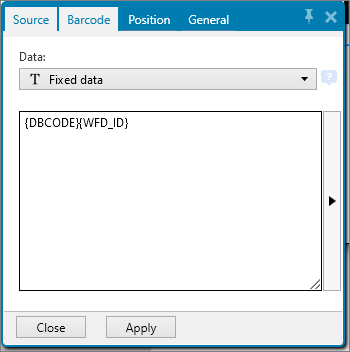
- Define the barcode type by selecting Data Matrix in the Barcode tab. As with the previous code, define its size by specifying the X dimension value:

- Designed label may look like this:
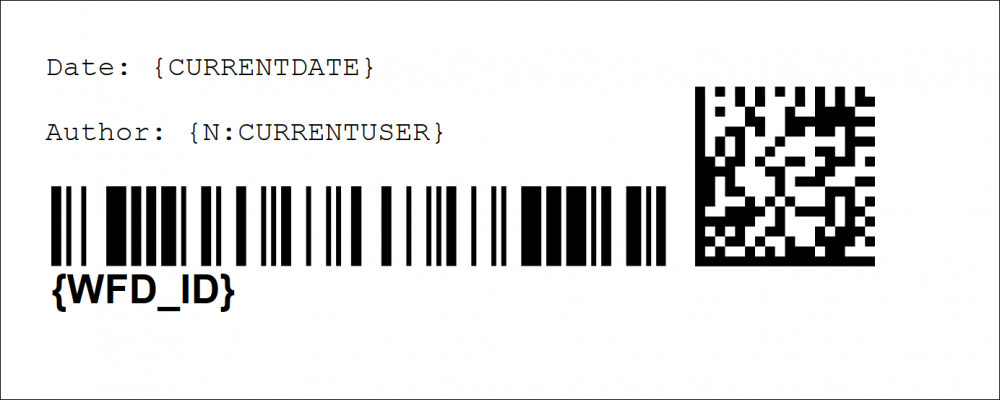
- Save your project for future usage.
To use the template in BPS, select Print and check the Print to file option.
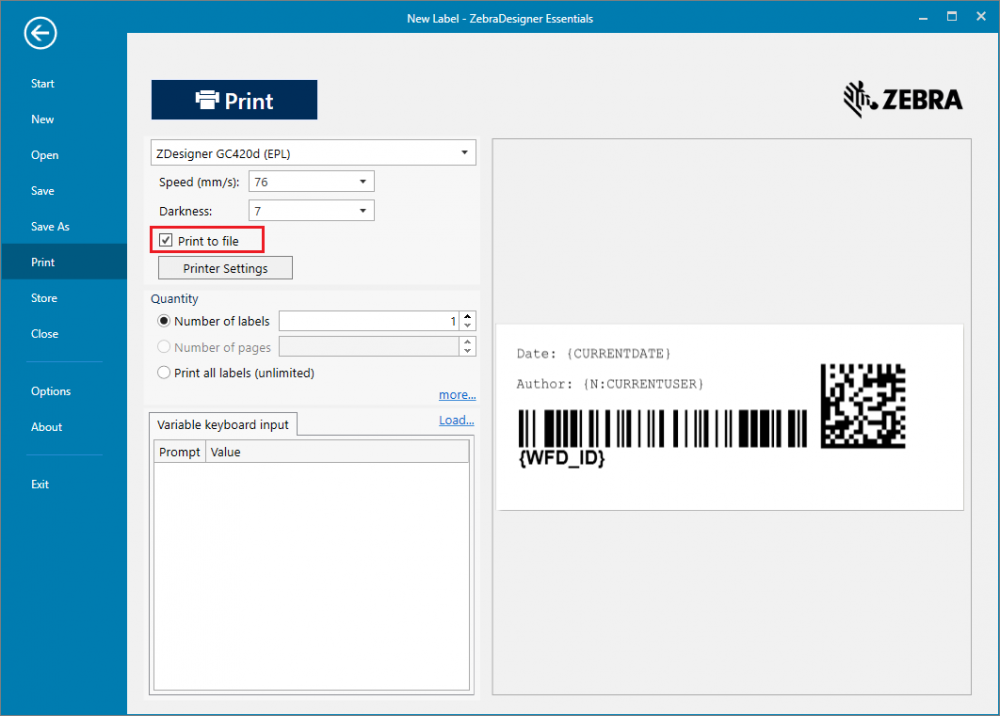
- A window opens in which you need to indicate where to save the file. Save the file and open it using any text editor.
- Copy the file content and paste it in the configuration window of the Print a barcode label action:
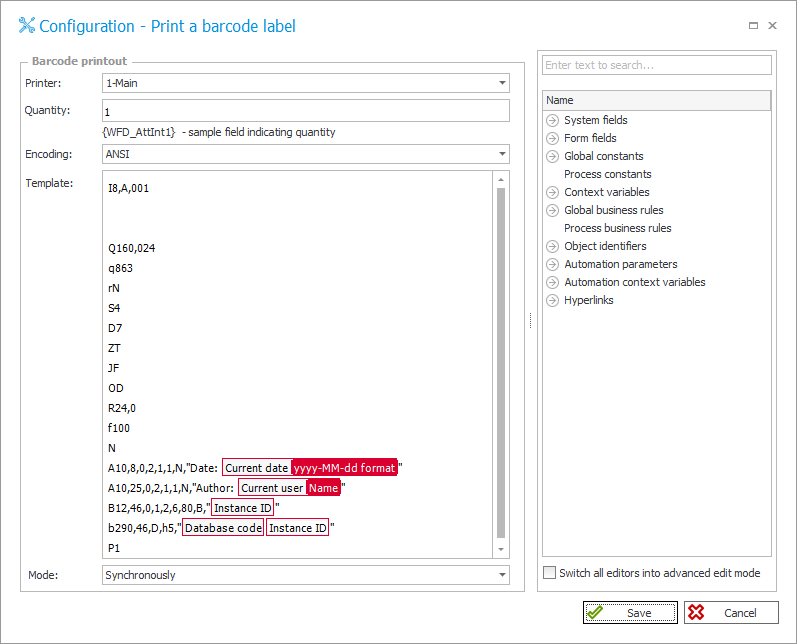
- Save the process and test the print:
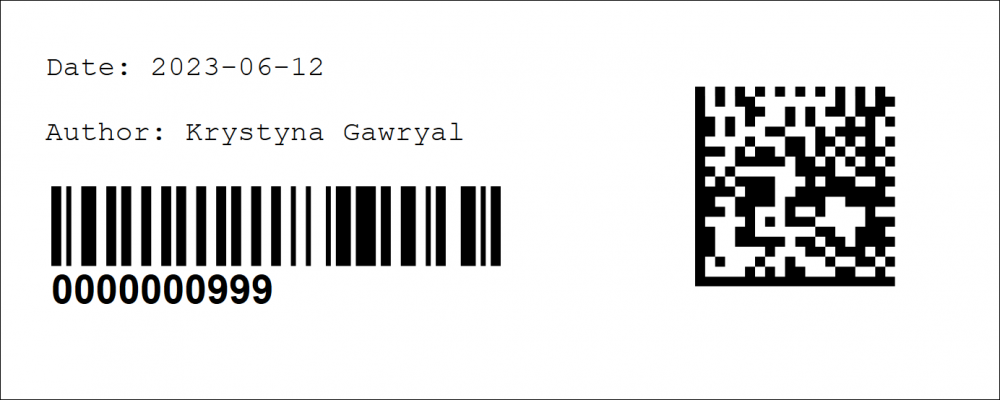
EPL language
The generated file contains printer commands in EPL language. Below is a brief description of the basic commands used for printing.
Default print template in BPS (for the Main printer) is as follows:
I8,B,001

rY

JF

WY

S1

D14

R24,0

ZB

UN

q448

Q151,28

N

A20,20,0,2,1,1,N,"Date:  2023-06-12"

A20,40,0,2,1,1,N,"Author: Jan Kowalski"

B40,60,0,1,3,9,56,N,"0000000999"

A30,120,0,2,1,1,N,"00000033"

P1
The first part contains printer setup commands. The Second part is the information about printable elements.
Printer setup commands:
- I8,B,001
Character set selection. The first parameter sets the number of bits, the second selects the printer's code page, and the third is the country code.
In this case, it is set to: 8 bit, Windows-1250 printer code page, country code USA
- rY
Double buffer mode. Y – enables double buffer mode.
- JF
Enables the “Top Of Form Backup” feature. F – ejects the label tape after printing, so that the label can be torn off.
- WY
Enables escape sequence. The Y value means that the escape sequence is supported.
- S1
Select the print speed. Higher value means higher print speed.
- D14
Select the print density. Higher value means darker printout.
- R24,0
Set the reference point. Value given in dots. Defines place from which printing starts.
- ZB
Set print direction. The B value sets printing from bottom of the image buffer.
- UN
Disable error reporting.
- q448
Set the label width (in dots).
- Q151,28
Set the form length. The first parameter (151) defines the label width, the second (28) defines the length of gaps between labels. Values expressed in dots.
- N
Clear image buffer.
- P1
Print image buffer.
If your print result is not satisfying, you can try to modify the speed, density, label width, label length or gap length.
Label content is defined in lines:
A20,20,0,2,1,1,N,"Date:  2023-06-12"

A20,40,0,2,1,1,N,"Author: Jan Kowalski"

B40,60,0,1,3,9,56,N,"0000000999"

A30,120,0,2,1,1,N,"00000033"
Lines starting with “A” generate text on label. Parameters for A command:
1) horizontal start position
2) vertical start position
3) rotation
4) font selection
5) horizontal multiplier
6) vertical multiplier
7) print mode (normal or reverse image)
8) data field
Lines starting with “B” generate text on label. Parameters for B command:
1) horizontal start position
2) vertical start position
3) rotation
4) barcode selection
5) narrow bar width
6) wide bar width
7) barcode height
8) print human readable code
9) data field
Examples of standard fonts and font sizes (Zebra 5 font supports only capital letters):
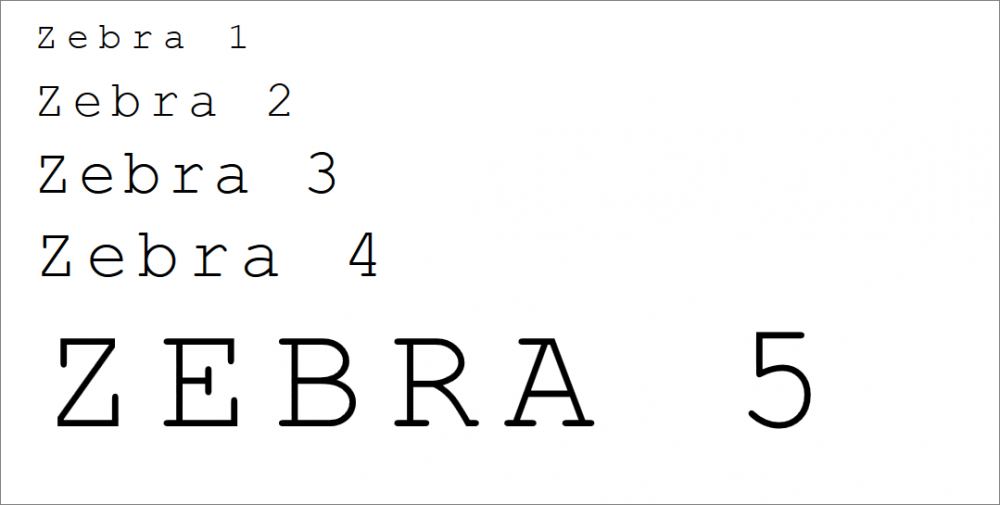
The sample printout contains three lines of text:
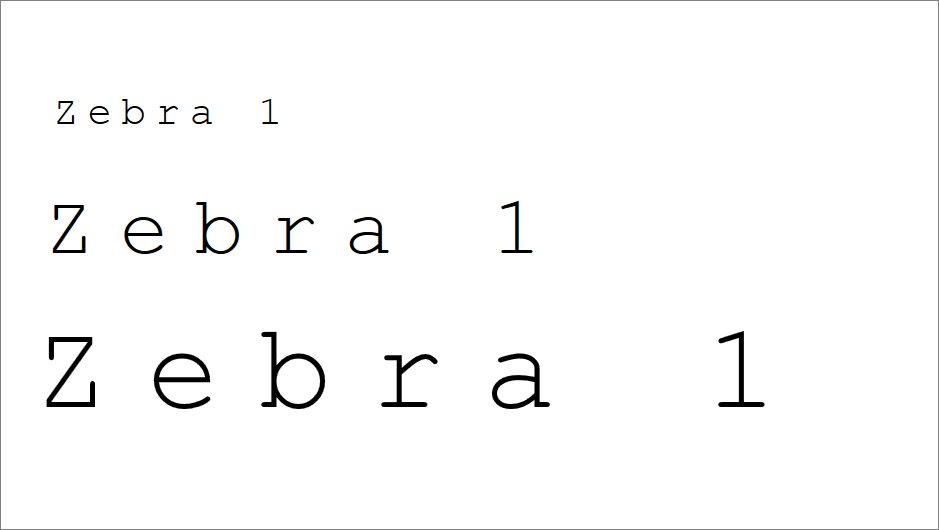
The font is Zebra 1, but horizontal and vertical multipliers are used here, as set by the parameters 5) and 6) in the EPL code. In the first line the multiplier value was set to 3, in the second – to 4, in the third – to 5. Using multipliers, you can generate bigger text with bigger character gap length. It all depend on the preferences. You can ether use multipliers or increase/decrease the font size.
Barcode width can be modified by changing narrow bar width:

Narrow bar width (X dimension) values can be set as indicated in the figure above.
What is the dot size?
The printer ZDesigner GC420d (EPL) used here has resolution 203 dpi, so 8 dots are equal to 1 mm (40 mils).
Full EPL language specification is available at https://www.zebra.com/us/en.html

