Picker fields on the MODERN form
Applies to version: 2020.1.x and above; author: Franciszek Sakławski
Introduction
You can use picker fields on your forms to allow the user to choose data for a form field. This article presents all the types of available picker fields in WEBCON BPS and shows how you can configure them using a real business scenario.
Picker fields
When adding a form field in WEBCON BPS Designer Studio you can select their type:
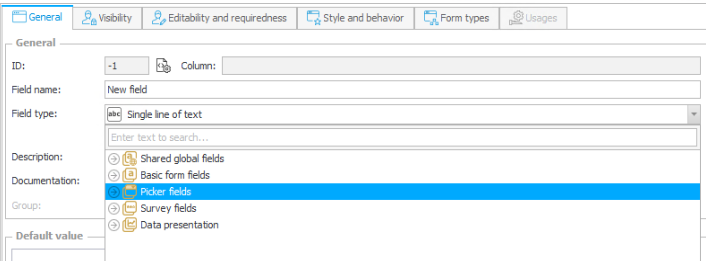
Fig. 1. The selection of a field type in WEBCON BPS Designer Studio
After expanding the “Picker fields” list there are several options:

Fig. 2. The selection of a field type in WEBCON BPS Designer Studio
- Choice field – it is the most universal field. You can define your own data set or use the existing one. In addition it is divided into three subtypes:
- Dropdown -> the selection of one value from the drop-down menu
- Pop-up search window -> an additional pop-up window appears, where you can select several options
- Autocomplete -> a text field that dynamically suggests answers depending on the given characters
- Person or group – allows you to search and select people, domain groups or SharePoint groups.
- Date and time – allows you to present and edit date and time
- Yes/No choice – used to select the Yes/No value. The value of this form field is set by a checkbox on the instance.
- Choice tree – allows you to display the value in the form of a three and select one of the available options.
When adding the picker fields they must be configured in the Advanced configuration button menu. Otherwise, when you try to save you will receive a message:
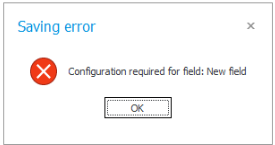
Fig. 3. The error message
Business case
A Car reservation workflow has been configured. At the first step select:
- Driver – a Peron or group field
- Start and end date of use – a Date and time field
- Car – a Choice field
A car driver can be selected by entering a fragment of a user name. If the entered value is unique – the system will select the user.

Fig. 4. The choice field window
After selecting an employee, select the start date of reservation:

Fig. 5. The Date and time choice field
In the next step, select the car which you want to reserve. Additionally, the field should be configured in such a way that by clicking on the plate number it is the ability to move to the given car card. To do this, go to the Designer Studio and select the appropriate field and click the “Advanced configuration” button.
Setting a link to the instance is possible when the data set is defined as a BPS data source. This means that the data source contains only the instances of another workflows.
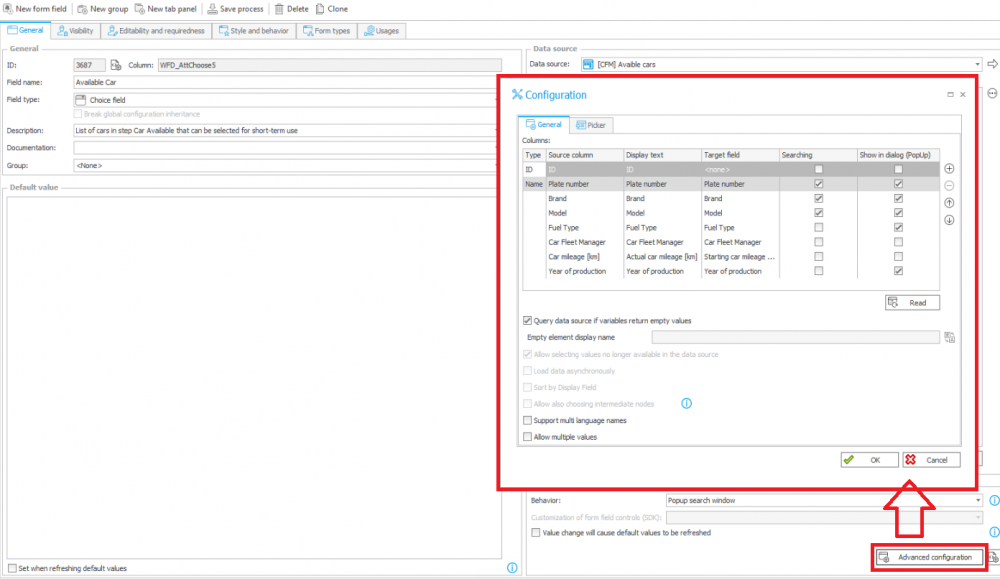
Fig. 6. The advanced configuration
Then enter the “Picker” field and select the “Show link to selected workflow instance” option.
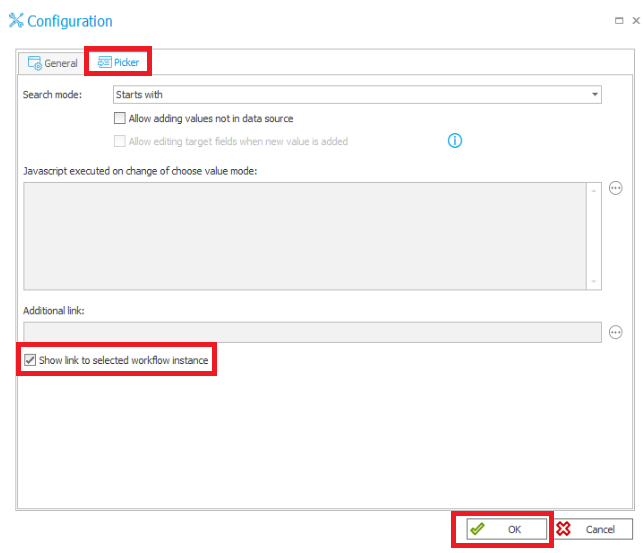
Fig. 7. The advanced configuration
After correct configuration, go to the form and check whether the system will move us to the car card. First, select a car – click on the icon located on the right.

Fig. 8. The Choice window
After opening the pop-up window, click the icon on the right:
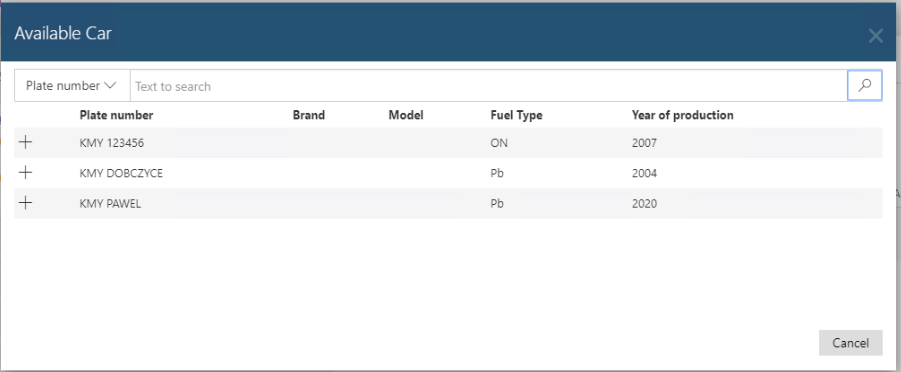
Fig. 9. A list of available cars
The results are displayed on the screen narrowed to what was entered in the field next to it. If nothing is entered, the system will return all registered cars in the system. After selecting the car, the system will close the window and enter the selected car in the field.
It should also be mentioned here that option enables searching through all fields marked in the configuration as “searchable”.
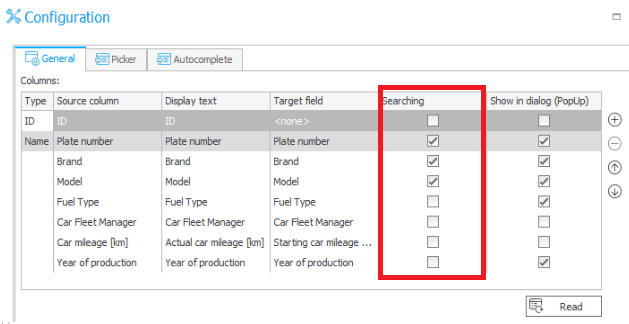
Fig. 10. The advanced configuration
A text will appear as a hyperlink. By clicking on the instance link, a preview window of the form will appear on the right side of the screen.
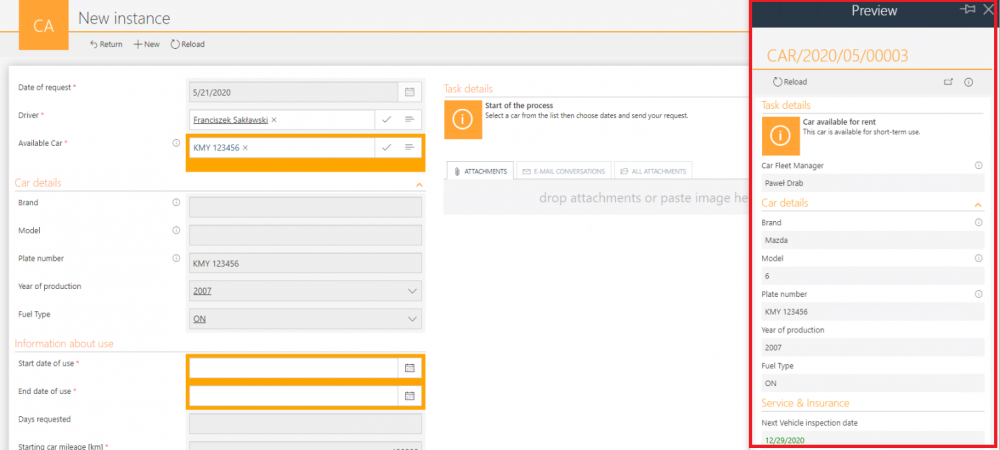
Fig. 12. The car reservation form
If you want to open the car card in a new window, hover over the inscription and then press the icon that appears to the right of it:

Fig. 13. The choice field
The field above could be also the field with an Auto-complete option. Go to the WEBCON BPS Designer Studio and enter the field edition. On the bottom right corner change the “Behavior” list to the Auto-complete option.
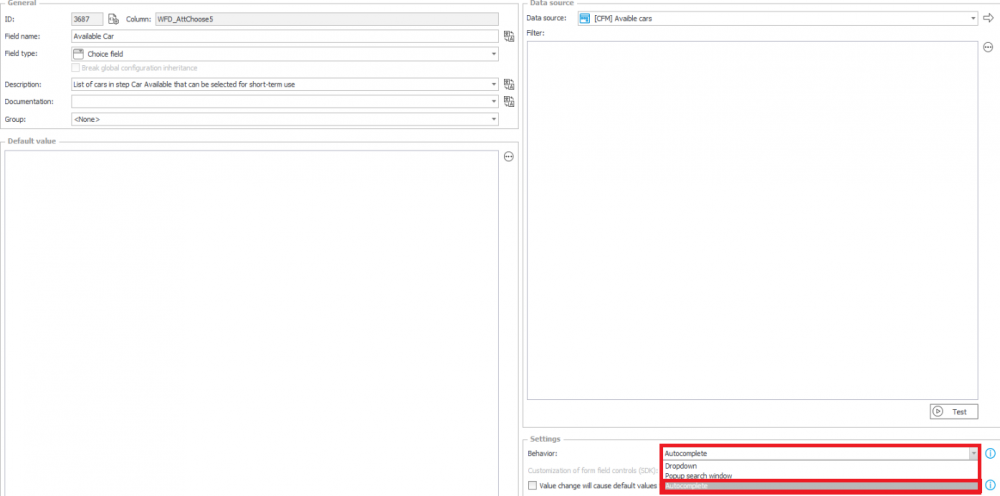
Fig. 14. A field edition in WEBCON BPS Designer Studio
Then click the “Advanced configuration” button and go to the Autocomplete” tab – set the values as in the screen below:

Fig. 15. The advanced configuration window – Autocomplete tab
Go to the Portal and check if the system works correctly. As you see, the system suggested a car to select.

Fig. 16. A list of results
Summary
Picker fields are an integral part of workflow systems. They allow you to manage the data sets and select values from them. The above examples are only a small part of the possibilities of Picker fields. Surely you can find other uses for them to improve your bpm workflow!

