How to create and configure start buttons in WEBCON BPS 2020 and 2021
Applies to version: 2020 and 2021.1; author: Krzysztof Gaszczyk
Start buttons start a process or workflow in WEBCON BPS. This article shows you how to create and configure them using Designer Studio or Portal. First, we explain how to do it in Studio and then how to do it on Portal. Both configurations are very similar.
Configuring start buttons in Designer Studio
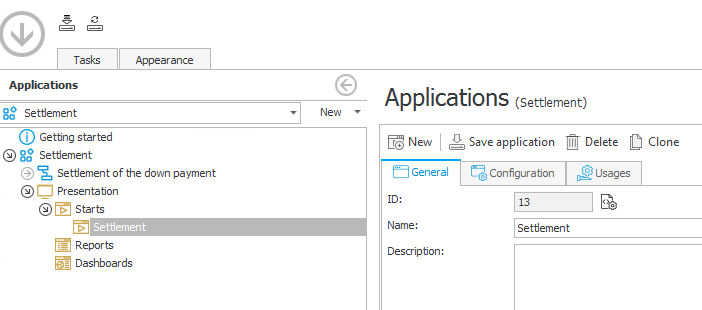
To configure a start button, open Designer Studio, choose the application for which you are creating the button and expand the “Presentation” tree in the left-side menu. Then, select “Starts” and create a new button. Now, look to the right. Enter the name for the button in the “Name field.” After that, open the “Configuration” tab above it.
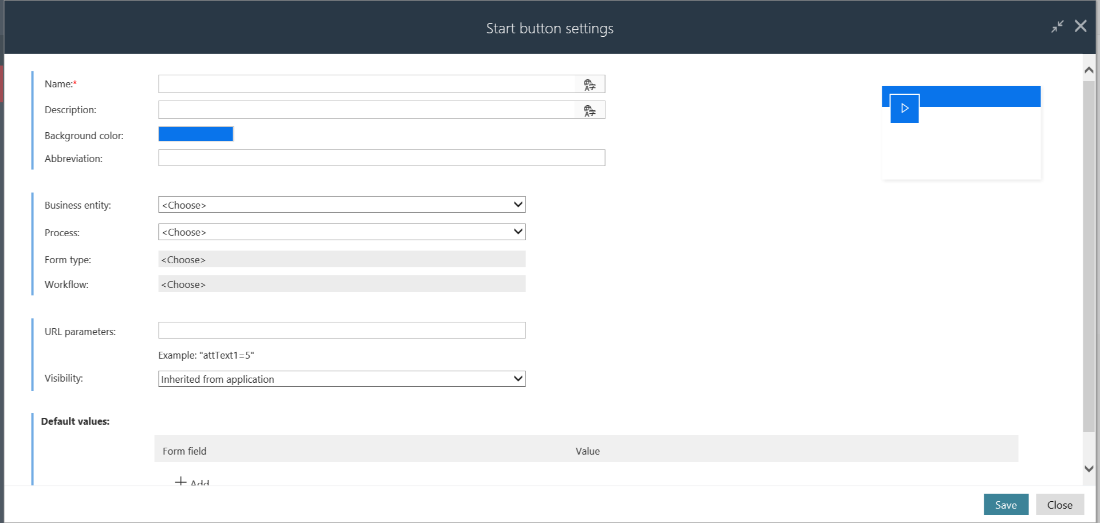
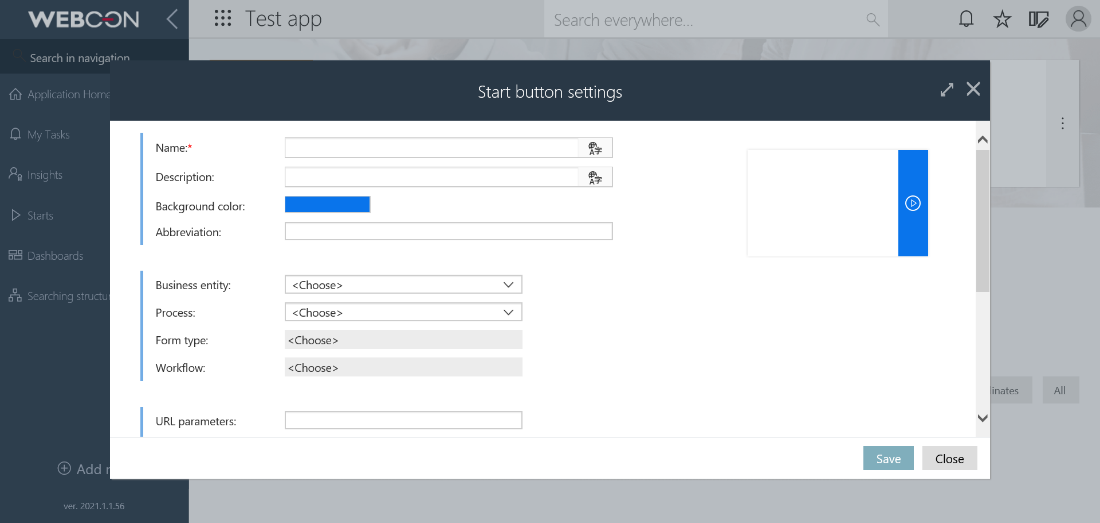
Now, you can configure other fields. You can change the button’s name, description, its background color and choose an abbreviation (up to three-characters) that will appear on the button. In WEBCON BPS 2020, you can use a predefined color for the button. In WEBCON BPS 2021, you can also choose any custom color by entering its color code. Below you can see configuration options in BPS 2020 and 2021. The latter has more options that are presented in this article: New options for start buttons in WEBCON BPS 2021
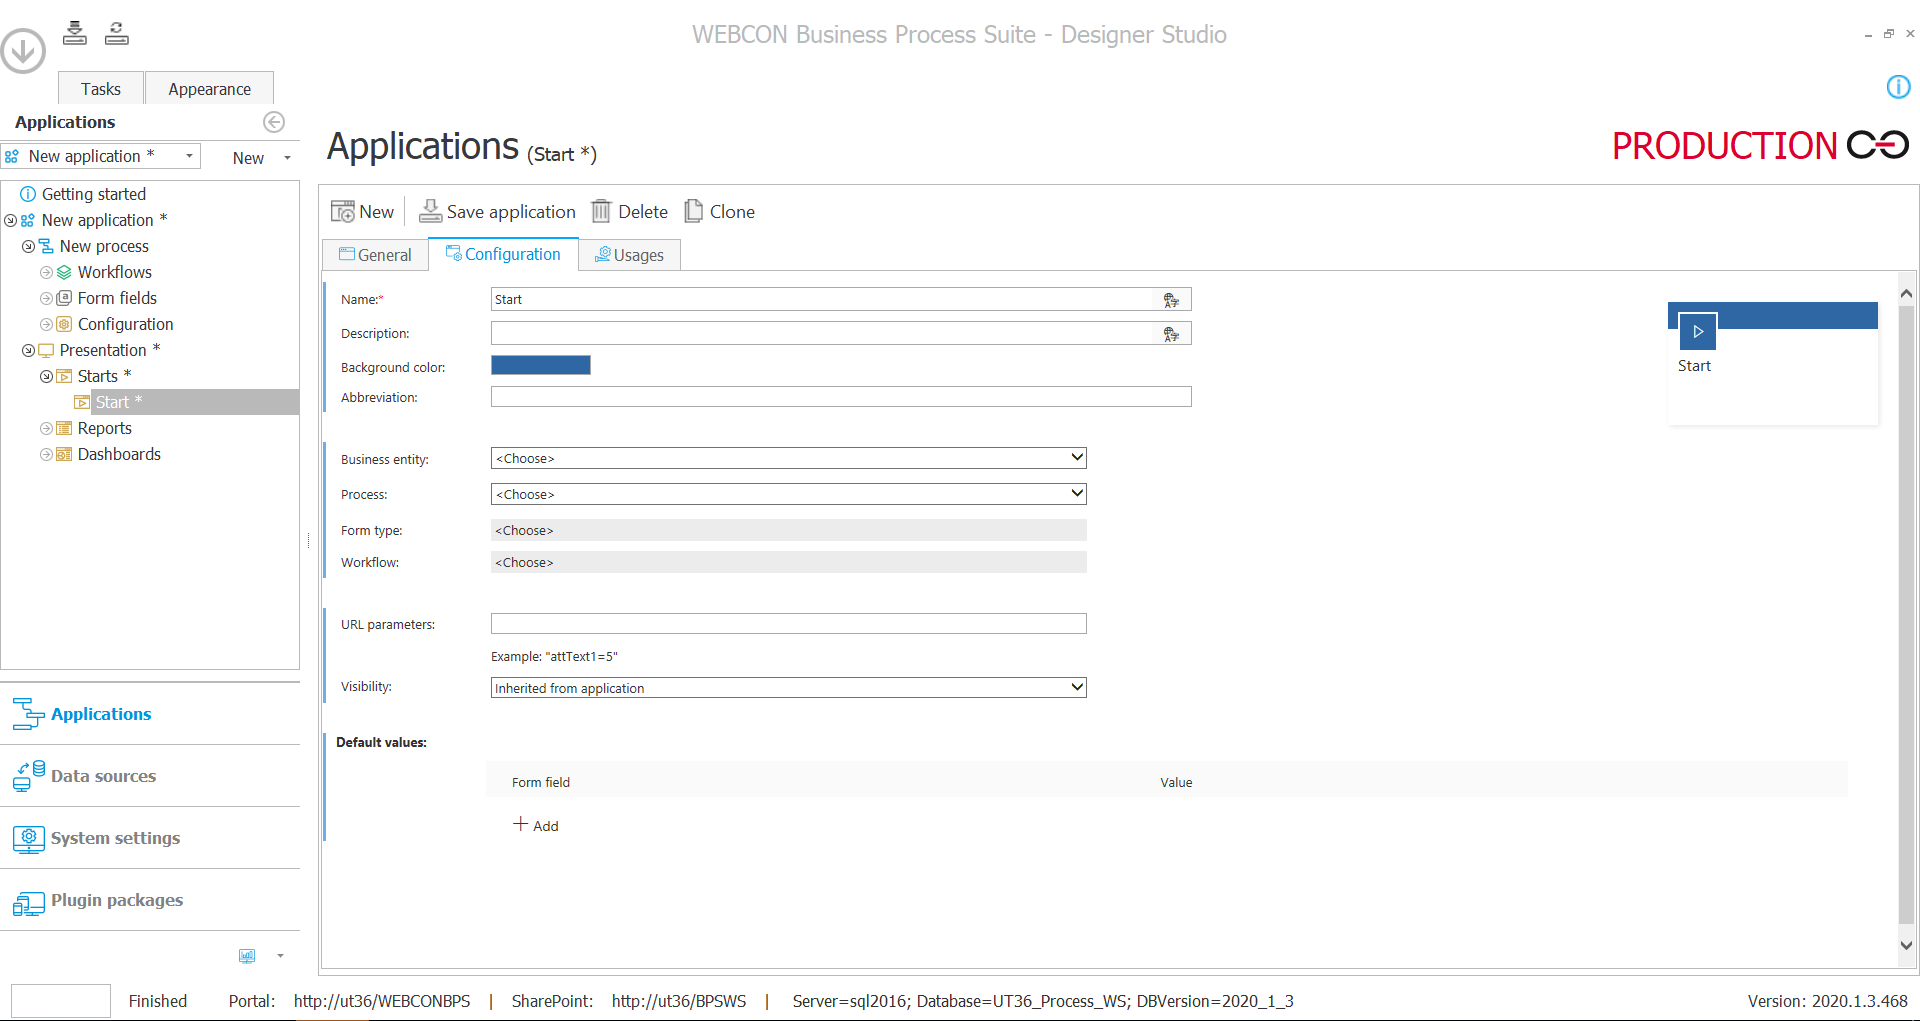
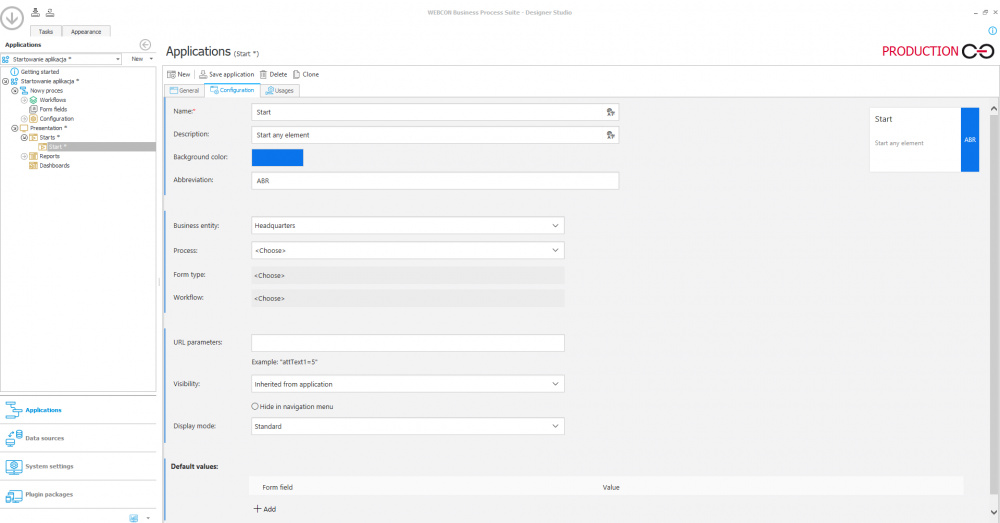
In the configuration, you can specify the business entity, process, form type, and workflow.

You can also provide URL parameters and default values for the form fields used in the specified workflow. Default values can be set for all editable form fields. You can pass values to form fields via URL, which lets you start workflows with some options selected or some fields prefilled.
For example, you can create a separate start button that should be used when ordering the usual office supplies. When pressed, it will load the office supplies that are regularly ordered into the form. They will be loaded from the URL parameters into the form fields you have specified.
You can also limit who can see the button by choosing “Custom” in the “Visibility” field and selecting the right user(s). Only Active Directory users can be selected here.

Configured start buttons on Portal
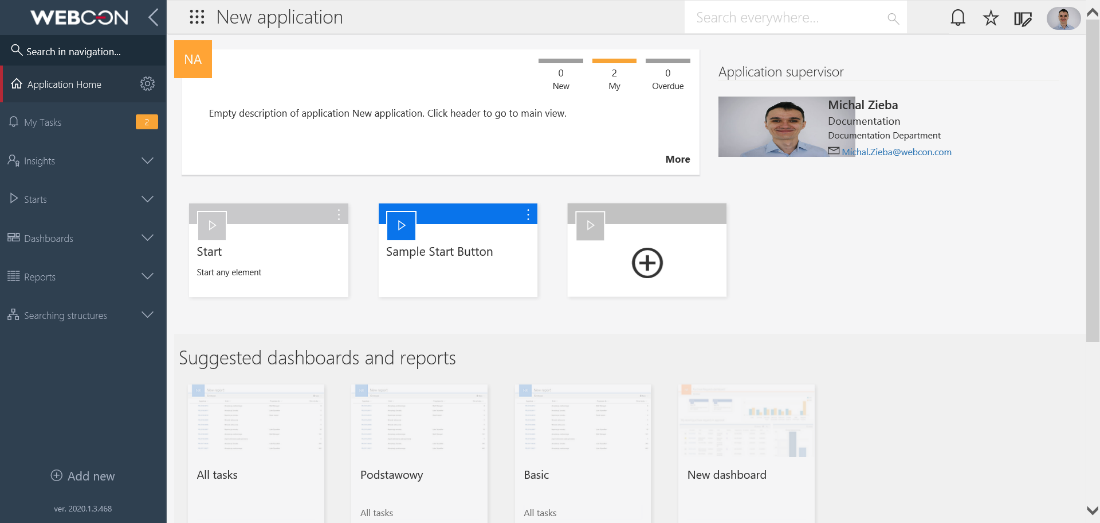
After you have configured a button and saved the configuration, it will appear in the application’s dashboard on Portal. Given that only the application’s supervisor can start any process in the application with a universal start button do not forget to create start buttons for other users.
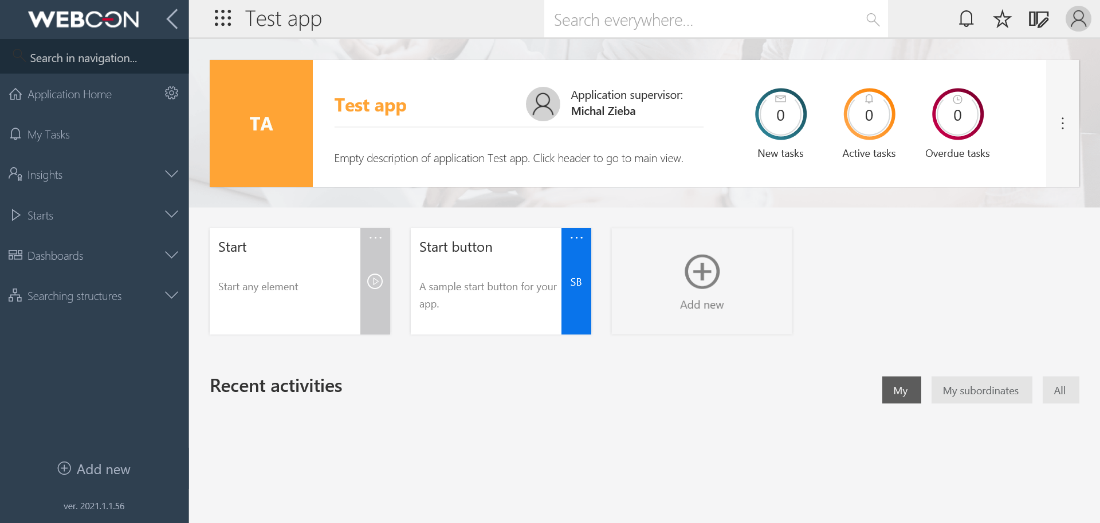
Configuring start buttons using Portal
To configure a start button using Portal, open your application’s dashboard (main page) and click the “Add new” button (shown on the two screenshots above). A configuration window will pop-up (see below). The configuration options are the same as in Designer Studio. Because of that, please refer to the earlier instructions when you configure your start button(s) using Portal.
WEBCON BPS enables you to create buttons for starting processes and workflows from your Portal. You can add them in Designer Studio or on Portal. As you can create as many buttons as you need, and every one of them can start a different process or workflow, WEBCON start buttons will streamline your work.
What is more, start buttons are imported or exported together with the process they belong to. Thanks to this, you can reuse them, for example, by putting them on your SharePoint site. Another interesting option is adding start buttons to the dashboards of your choice. To learn more about it, please consult this article: Dashboards (webcon.com)

