Advanced task assignment – task limits & task queue
Applies to version: 2020.3.x and above; author: Józef Cyran
The idea of the application
For this article we will implement a simple system for dividing up tasks between a group of users, based on the following principles:
- The task will go to the user with the least amount of tasks
- If multiple users are tied for the fewest number of tasks, one of them is randomly assigned the task
- There is a limit to how many tasks a user can have
- Once all users of the group have reached this limit, tasks will be placed in a queue
- Queued tasks will be assigned to somebody as soon as they are no longer at their task cap
We will build this mechanism into a WEBCON BPS application using two workflows.
- One workflow will be used to create and manage groups of users – the idea is that we can change who is in a group and assign tasks to different groups.
- The second workflow will be the task queue mechanism itself. It will assign a task to a user of the group (defined by the first workflow) in a round-robin until all users have reached some defined task limit. When all users are at this cap, the tasks will be queued using a special system step – where they will wait until a user of the group completes a task.
The purpose is to split up the workload between users equally and not overwhelm individual users with too many tasks.
Used processes
Create Task – the main process of the application, used to create tasks for groups. It assigns tasks to the “free” employees in a given group, and allows the employee to mark task completion. The workflow consists of two actions and one control step.

Fig. 1. The "Create Task" process
Task Groups – the process used to define groups of tasks and assign the employees to them. Groups of tasks go to the “Group Active” step and they can be edited.

Fig. 2. The "Task Groups" process
Implementation
Let’s create the “Task Groups” process that allows you to create a dictionary of the available task groups. You can use the dictionary process. Assigning users to the group may look like this:

Fig. 3. Creating the group with employees
Enter the name of the group of tasks for which tasks can be created and their members – people responsible for task realization. Data from this process will be a source in the Task type choice field configuration in the TASK workflow.

Fig. 4. The "Task type" field with example values from the data source
As ID in the “Task type” form field, you should use the instance ID that contains a group of tasks (Instance number).

Fig. 5. Process contant - Maximum number of tasks per person
A good practice is to use constants in processes – they allow for wide parametrization and also protects you against the need to change the parameter value in all places where it is used.
Next, configure the “Queue or assign” control step – below there is a business rule used to select the appropriate path:

Fig. 6. The rule configured in the "Queue or assign" step
The condition checks if the number of all tasks in the selected group is less than the product of the number of employees in this group and the process constant, that means the maximum number of simultaneous tasks for an employee. If so, the task is assigned to one of the employees of this group (the “Assign” path), if not, the task goes to the “Queue” step.

Fig. 7. The query that returns the number of tasks assigned to all employees from the group
The limitation in the query above selects only those elements that are:
- TASK type (narrowed down to the WFD_DTypeID = ‘TASK’ form type)
- Currently in the realization (WFD_STPID = ‘In progress’)
- Assigned to the same category/task type (Task type)
In the WFElements table there are workflow instances from all processes so you must add the conditions for the individual columns: the WFD_STPID column contains information about step where the form is located, and the WFD_DTypeID column defines the form type (the form type ID). For more information about the WFElements table see: WFElementDetails table description (webcon.com)
With this narrowing down, only the relevant elements will be counted.

Fig. 8. The query that returns the number of employees in the group
The query counts how many users (Member) in the group are assigned to the given task category (Task type). Data are loaded from the WFElementDetails table, which stores all information entered to the item list – a list of members defined in the “Task Groups” process. In this table add filters for the values in the columns:
- DET_WFDID – ID of the instance where the item list is located
- DET_WFCONID – defines the item list ID (in one form type they can be several item lists – DET_WFCONID allows you to select the interesting one)
More information: WFElementDetails table description (webcon.com).
When a new task is created, the system checks if there is an employee to whom the task can be assigned. If not, the instance goes to the “Queue” step, if so – follows the “Assign” path where the “Set responsible person” action is performed to complete the person responsible for the task execution.

Fig. 9. The configuration of the "Set responsible person" action
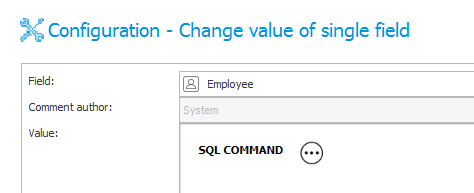
The action inserts the appropriate person in the “Responsible” field to whom the task is assigned in the next step. Below there is a query used to select a person:

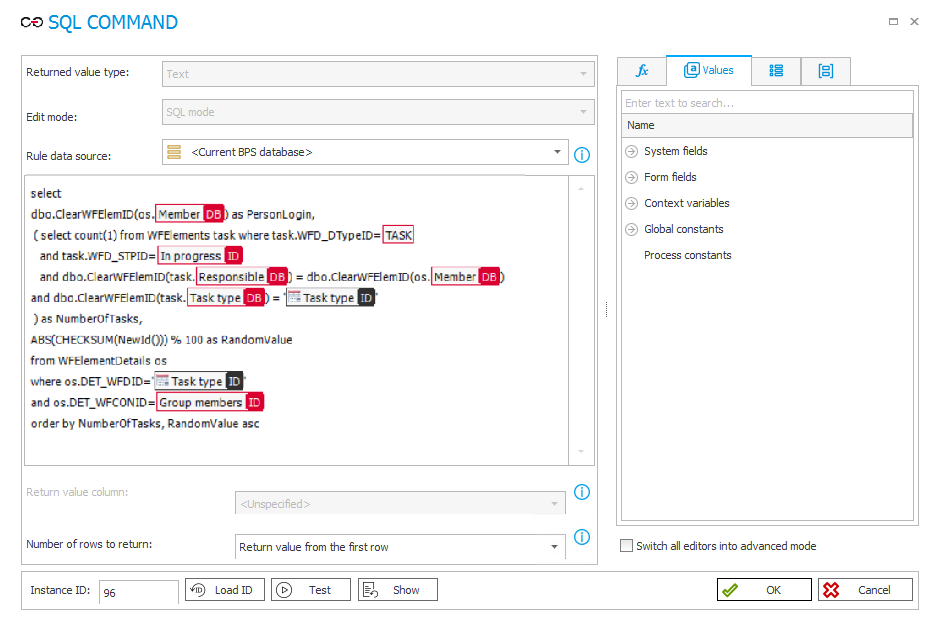
Fig. 10. The "Responsible" field is the person or group type. The SQL query returns an employee's login to whom the task is delegated and sets them as a field value
The query returns the user’s login (PersonLogin) – the ID of employee who receives a task based on the item list in the “Task Groups” process, where the employee’s list assigned to a given task category has been entered. The “NumberOfTasks” column is used to sort employees and select the one with the least tasks assigned. The “RandomValue” column is used to a random distribution of tasks for employees with the same number of assigned tasks.
The “PersonLogin” column is returned as a query on the WFElementDetails table, a condition:
- DET_WFDID = ‘Task type ID’ narrows down the number of returned employees to these who are in the selected group on the form of a given task
- DET_WFCONID = ‘Group members ID’ limits the rows to those in the “Group members” item list in the “Task Groups” process
In the main query, there is a sub-query used to receive the number of tasks assigned to the employee. All elements are returned, where:
- the form type is the TASK type (limited only to elements from the “Create task” process)
- located in the “In progress” step (currently in realization)
- a person responsible for realization is member of the group that is assigned to task realization in the “Task Groups” process
RandomValue assigns a random number to each returned employees. Results are sorted by the number of tasks and if this number is the same for several employees – the result is sorted by RandomValue.
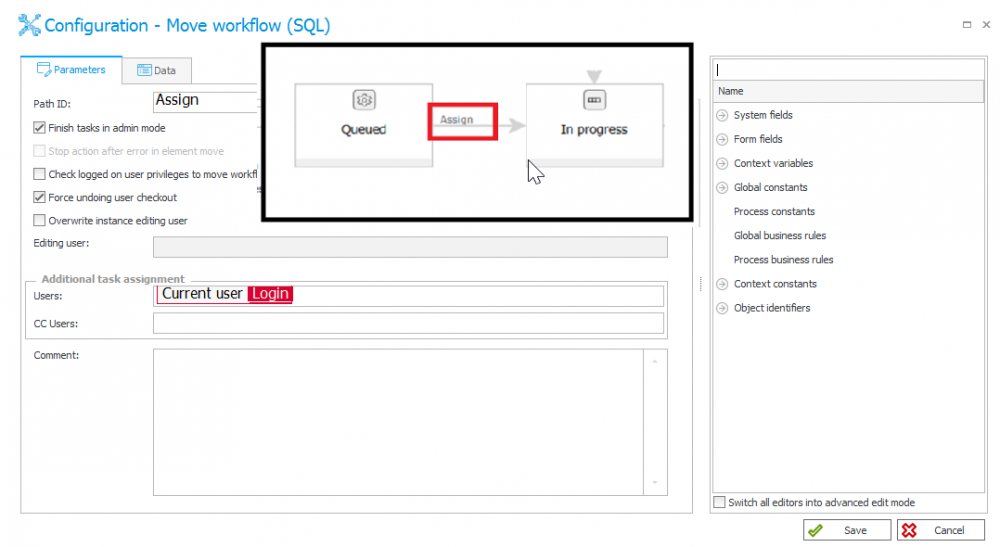
The last action to be configured is “Move workflow (SQL)” – in this example it is “Assign new task for me”. This action is started when an employee ends an active task and a SQL query is used to return the ID of the next instance – a task in the queue. This task can be assigned to the employee who has just completed the task (they can take a new task).
In the configuration of the action indicate a path on which the workflow is to be moved.

Fig. 11. The "Assign new task for me" action configuration
On the “Data” tab indicate an instance ID which must be updated.

Fig. 12. Selection of the instance to be updated
The SQL query presented above selects the instance ID (TASK type) which is in the “Queued” step. The returned columns must be indicated WFD_ID as an instance ID to be moved and values to update data as columns with the form field names of the shifted form. When assigning, you want to fill in the “Responsible” form field by a person to whom the task will be assigned.
Application
Create groups with employees.

Fig. 13. Defined groups and assigned employees
Now, create a task in the “Create task” process – enter the task type and description.

Fig. 14. Creating a new task
All employees have assigned a maximum number of tasks (in this example – 2) so the created instance is waiting in the queue.

Fig. 15. The report with number of tasks assigned to each employee in a given group
When one of these is marked as completed, the instance will be automatically sent for realization.

Fig. 16. Marking another instance as completed

Fig. 17. The “Check the lightbulb on floor 3” task was moved to the “In progress” step by using the “Assign new task for me” action. It is assigned to a person who marked the previous task as completed
Described processes allow you to quickly add the task queueing mechanism to any WEBCON BPS application.

