WEBCON BPS integration with Azure Active Directory
Applies to version 2019.1.3; Author: Łukasz Chechelski
- Introduction
- System requirements
- Registering the AAD application
- Registration of AAD application which handles BPS user list synchronization
- Installing WEBCON BPS
- Summary
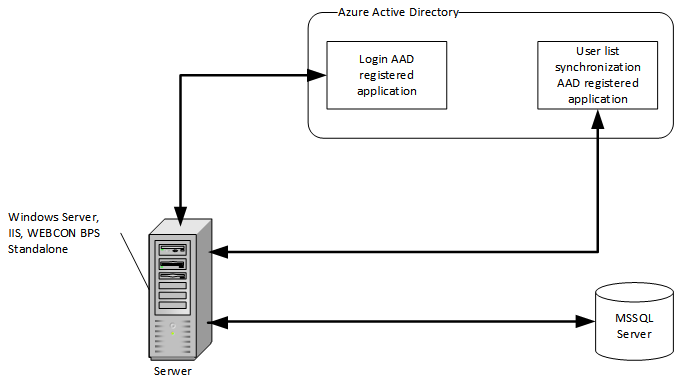
WEBCON BPS 2019 introduces the ability to integrate with cloud services provided by Microsoft Azure. The growing popularity of Microsoft Azure has caused it to become a great alternative to the classical “On-Premises” installations that guarantee high availability of the service. This article will cover the Standalone installation of WEBCON BPS without a local Active Directory domain. Logging into the system and BPS user list synchronization will be handled via Azure Active Directory.
This article assumes the following installation parameters:
- WEBCON BPS 2019 in the Standalone installation model, installed on a Windows machine without SharePoint or AD.
- Connection to SQL with a SQL login.
- Local service account and application pool
- Log in via AAD
- BPS user list will be synchronized from the AAD
The perquisites for an on-premises installation are as follows:
- Windows Server 2012 R2, Windows Server 2016, Windows Server 2019
- MS SQL Server 2012 or higher. This does not have to be a separate machine, The WEBCON BPS installer must have the ability to create and modify databases on the designated server.
- Accounts and privileges:
- Local or AD account for the IIS application pool.
- BPS service account – same requirements as the application pool account.
- SQL login which will be used to operate on SQL databases. During WEBCON BPS installation, it is recommended to provide sysadmin privileges to this account. After installing WEBCON BPS, the privileges can be downgraded to db_owner.
For integration purposes:
- Portal URL address. Azure Active Directory requires that the address adheres to HTTPS protocol.
- Trusted SSL certificate installed on the machine. “Self-signed certificate” will not work.
- Registered applications in the AAD management panel. Their configuration is covered below.
Registering the AAD application
It is a good idea to configure the application in the AAD management panel before installing WEBCON BPS. This will allow us to specify the log in method and BPS user list synchronization configuration directly during WEBCON BPS installation. For safety reasons, we recommend that two applications are created – one to manage user authentication and one from which to download the BPS users list.
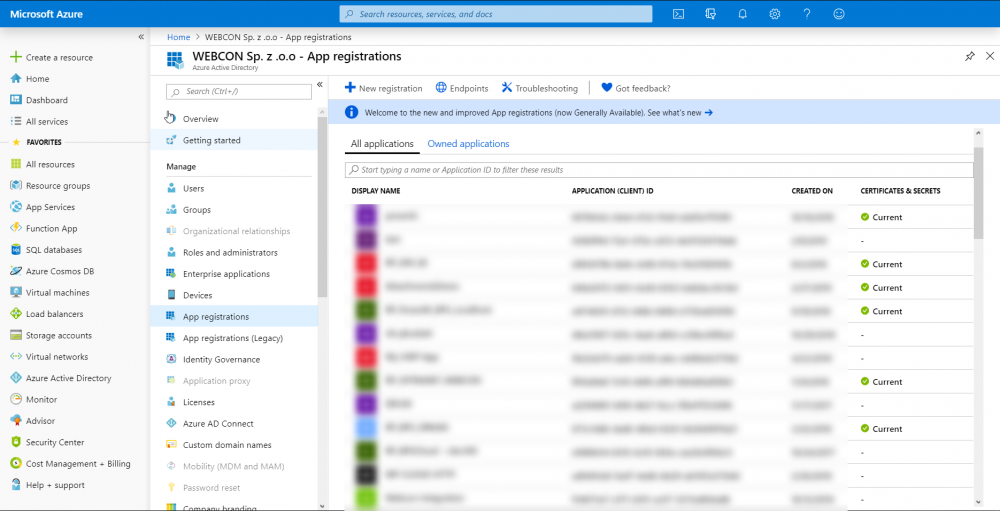
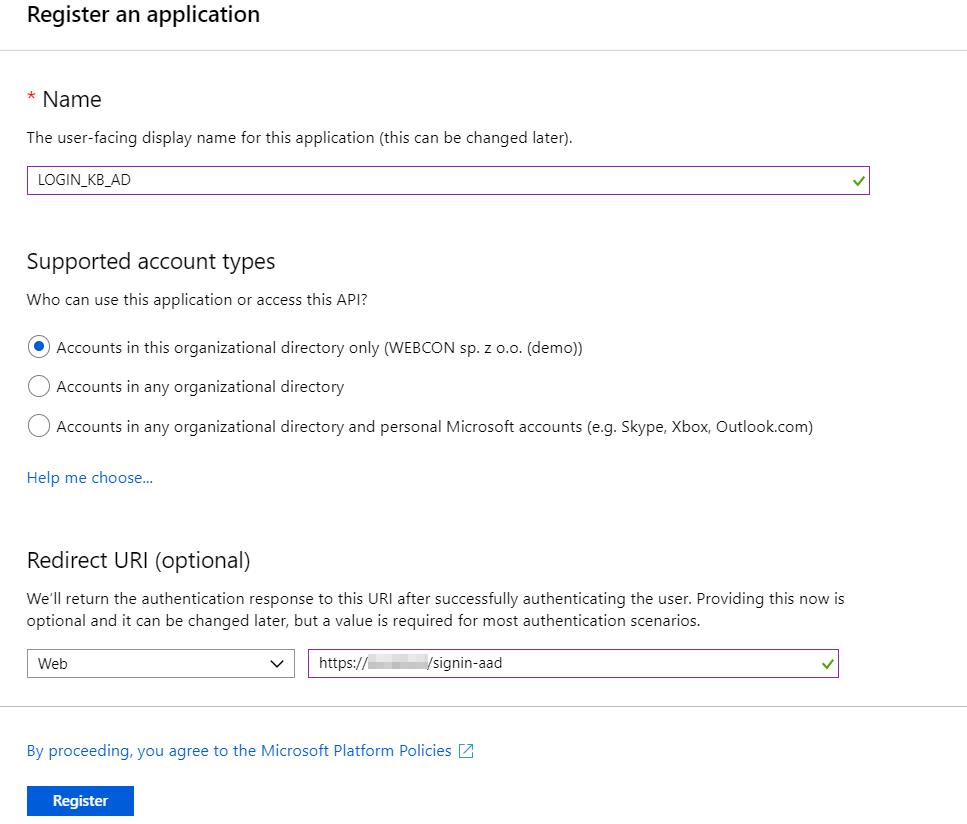
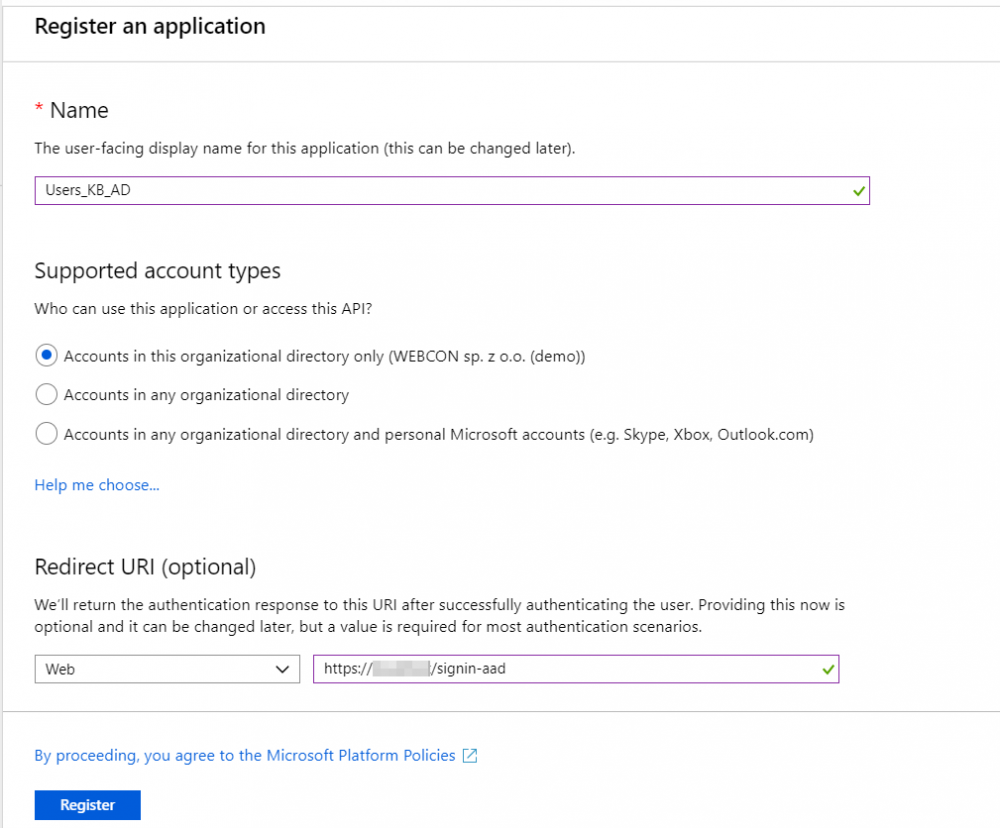
Let’s start with the application for managing the authentication process. In the App registrationswindow add a new application. In the Redirect URI section provide the Portal address along with the added /signin-aad suffix. If the WEBCON BPS Portal address has not yet been defined, you can enter it after installing WEBCON BPS.
Once an app is registered, you can fill in its configuration. In the Branding tab provide your Home page URL, which will be your Portal address. Again, if the WEBCON BPS Portal address has not yet been defined, you can add it after installing WEBCON BPS.
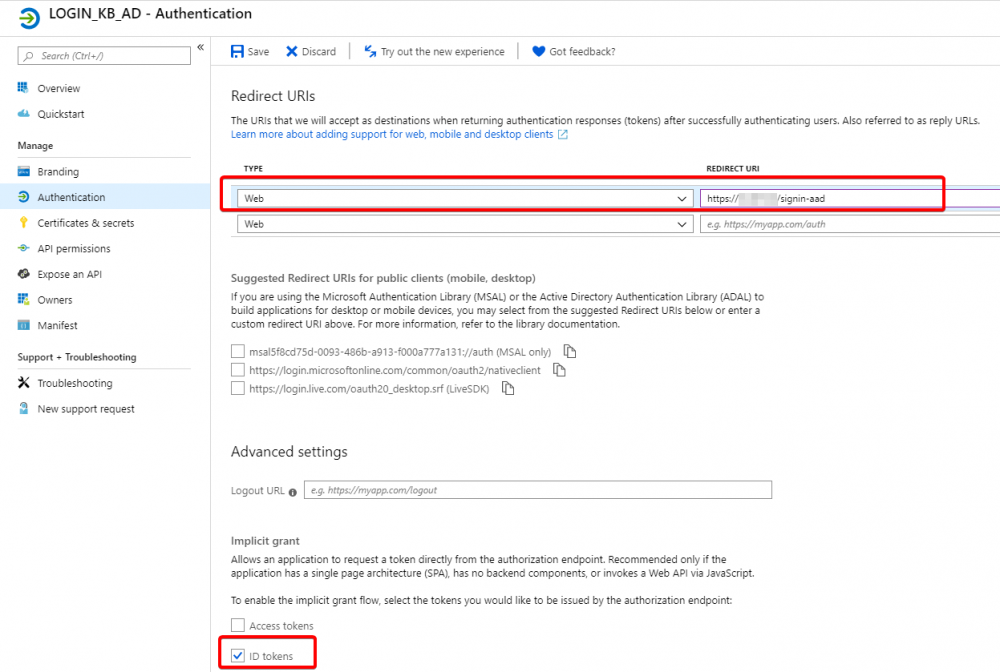
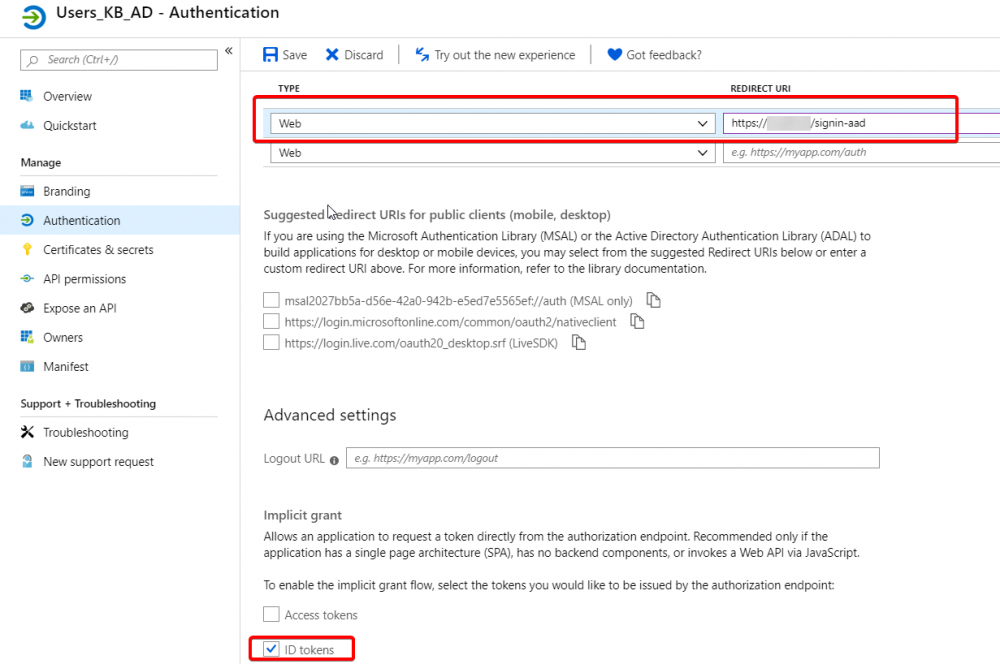
In the Authentication section, mark the ID tokens option.
The last step for this application involves verifying privileges. Go to API permissions and provide the User.Read privileges under Azure Active Directory Graph (this may be already set for you). This will allow WEBCON BPS to verify users using data provided by the AAD. To confirm the new permission settings, click on the Grant admin consent (…) button. It is required to confirm each change of the permissions
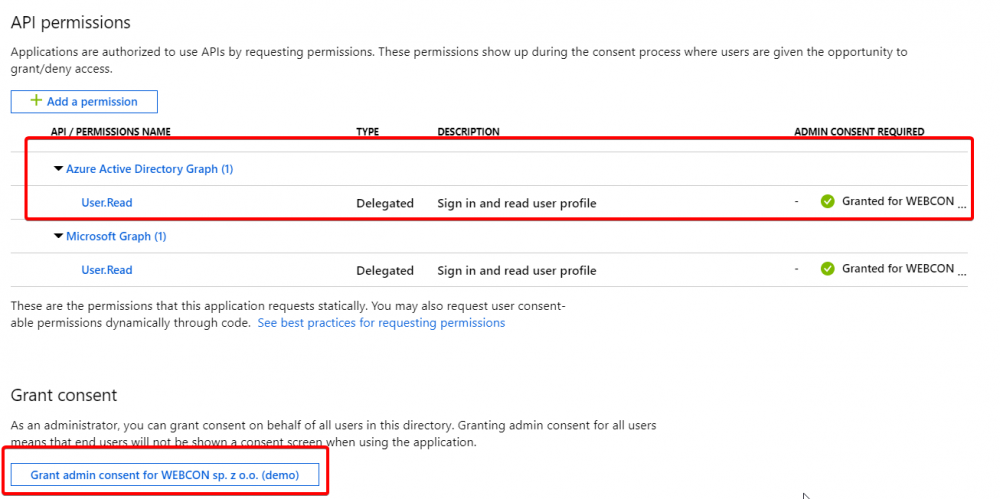
Azure Active Directory will be deprecated in Jule 2022. We recommend using Microsoft Graph APIs for your application.
| Required privileges for the login application | ||
| Category | Type | Level |
| Azure Active Directory Graph | Delegated | User.Read |
Registration of AAD application which handles BPS user list synchronization
The next stage would be to create a second application that will handle loading data to the BPS user list. Register the application and configure it identically to the one above.
Additionally, it is necessary to configure privilege settings in such a way, so that it’s possible to load the list of users from the Azure Active Directory. All necessary privileges can be added in the API permissions tab. After adding them you need to confirm them by clicking on Grant consent. Such confirmation is required after each change of the privileges.
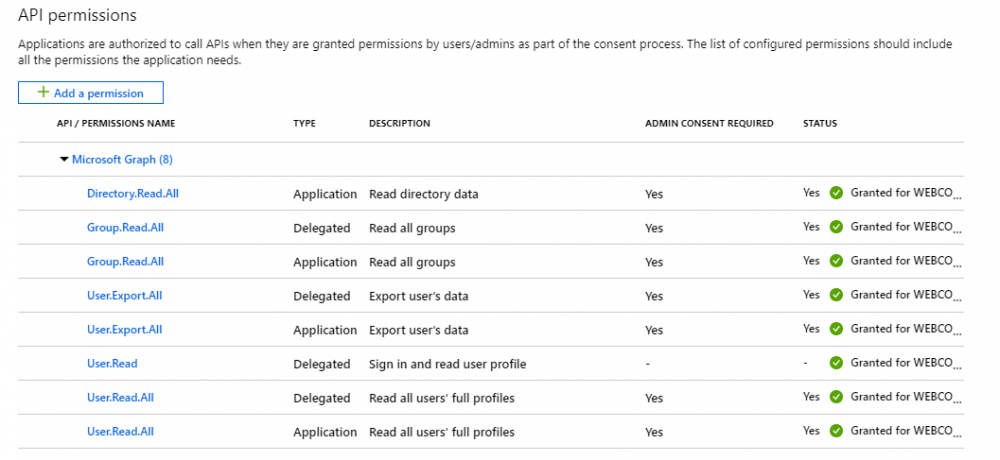
| Permissions required for BPS user list synchronization application | ||
| Category | Type | Level |
| Microsoft Graph | Delegated | Group.Read.All |
| Microsoft Graph | Application | Group.Read.All |
| Microsoft Graph | Delegated | User.Export.All |
| Microsoft Graph | Application | User.Export.All |
| Microsoft Graph | Delegated | User.Read |
| Microsoft Graph | Delegated | User.Read.All |
| Microsoft Graph | Application | User.Read.All |
| Microsoft Graph | Application | Directory.Read.All |
Make sure that in the “Authentication” tab the correct Portal address is provided as well as if the token handling is turned on.
In the Certificates and secrets view, you will need to generate a code (i.e. Secret) which we will use to configure the mechanism on the side of WEBCON BPS. Make sure that you save the generated code immediately because after exiting this view you will never be able to see the code again.
You will need only one secret for the application that handles user list synchronization.

The installation process of WEBCON BPS ‘Standalone’ doesn’t diverge much from the one presented in the installation manual found in this article on our technical blog or inside the installation folder.
The data necessary for the installation process can be found in the app management panel in the Overview tab. If you happen to lose your Secret code, you can simply delete it and generate a new one.
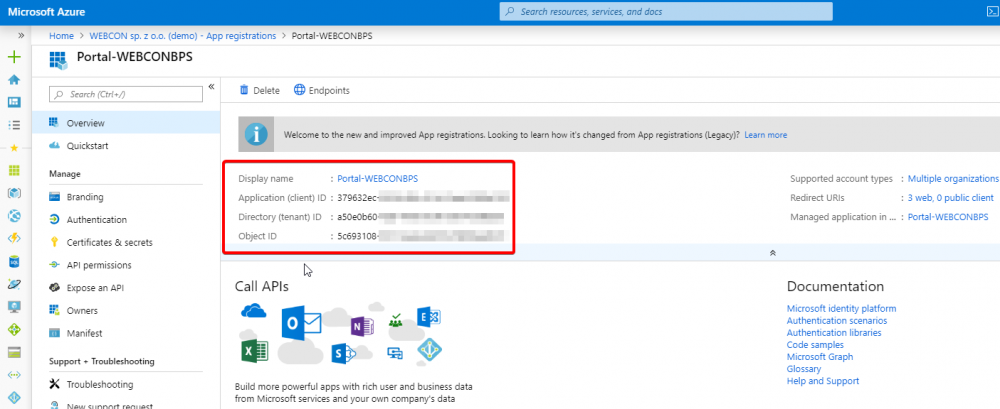
Additionally, you must provide the source of user data and the verification mechanism. After selecting the BPS user list Synchronization source, it will be possible to select the AAD application.
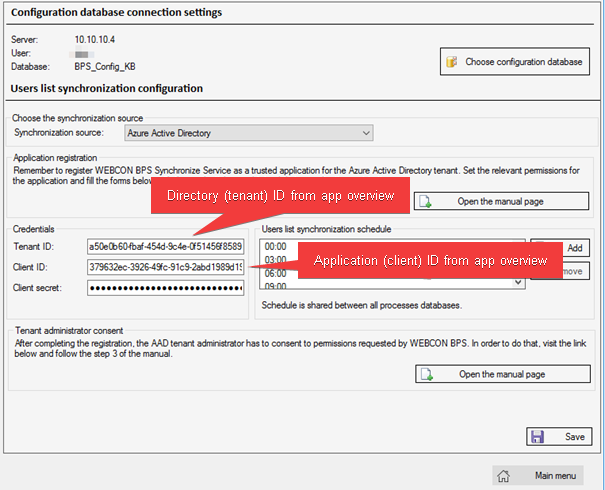
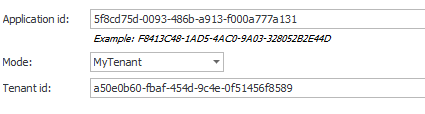
To configure the log-in data in the WEBCON BPS installer, simply provide the Application (client) ID and Directory (tenant) ID into their respective fields:
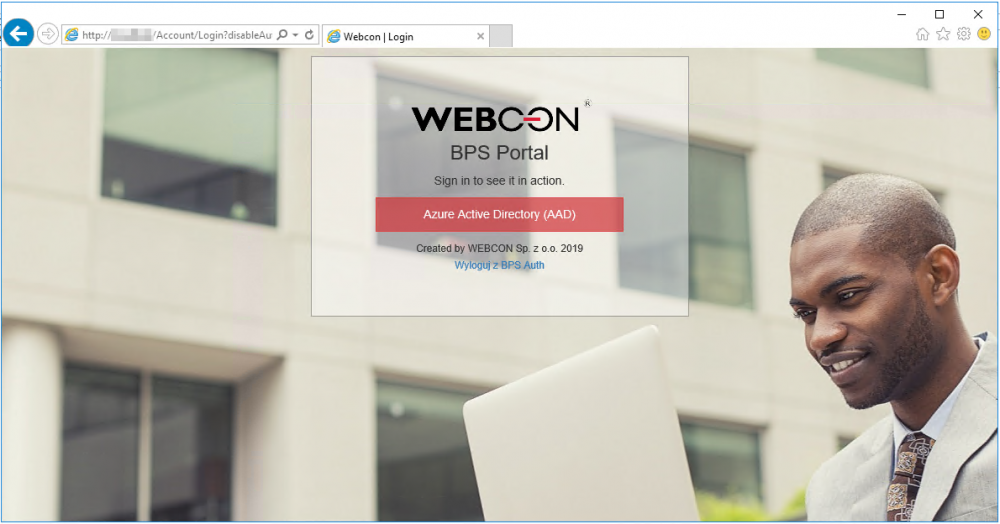
Once the installation process is complete, and a user attempts to access the WEBCON BPS Portal site, they will be greeted with a Sign in screen that contains the log-in methods that you defined during the installation process. If you see a message about lacking access to WEBCON BPS, we recommend that you use the WEBCON BPS System Administrators tool. It can be found in the folder in which WEBCON BPS Designer Studio was installed.
With the option to integrate WEBCON BPS with Azure Active Directory, we take an enthusiastic step towards cloud services – which are quickly gaining in popularity.
WEBCON BPS can now be installed in environments without a local AD domain or SharePoint. The configuration of such an installation is also noticeably easier than with the complex Active Directory Federation Services.
+48 12 443 13 90