Automations
Applies to version: 2022.1.x and above; author: Grzegorz Straś
Automations are a feature added in WEBCON BPS 2022 to add an additional dimension to our actions mechanism, and to make it easier to configure and manage groups of actions. While the concept of actions types, action triggers, and execution conditions will remain exactly the same, the addition of automations will allow WEBCON BPS to handle scenarios that required workarounds in the past.
General Overview
Where are they?
Automations can be found as an intermediary node between action triggers and actions – an automation encompasses all actions defined on a trigger. Similarly to how processes were packaged into applications in version 2019, now all actions on a trigger will be packaged into an automation.
Each automation is divided into a General and Error handling tab.
What are they?
The purpose of automations is to help power users that implement actions in three major ways:
- Better visual representation and handling of large numbers of actions – in a way, automations fill the role of an action group feature that has been requested for years.
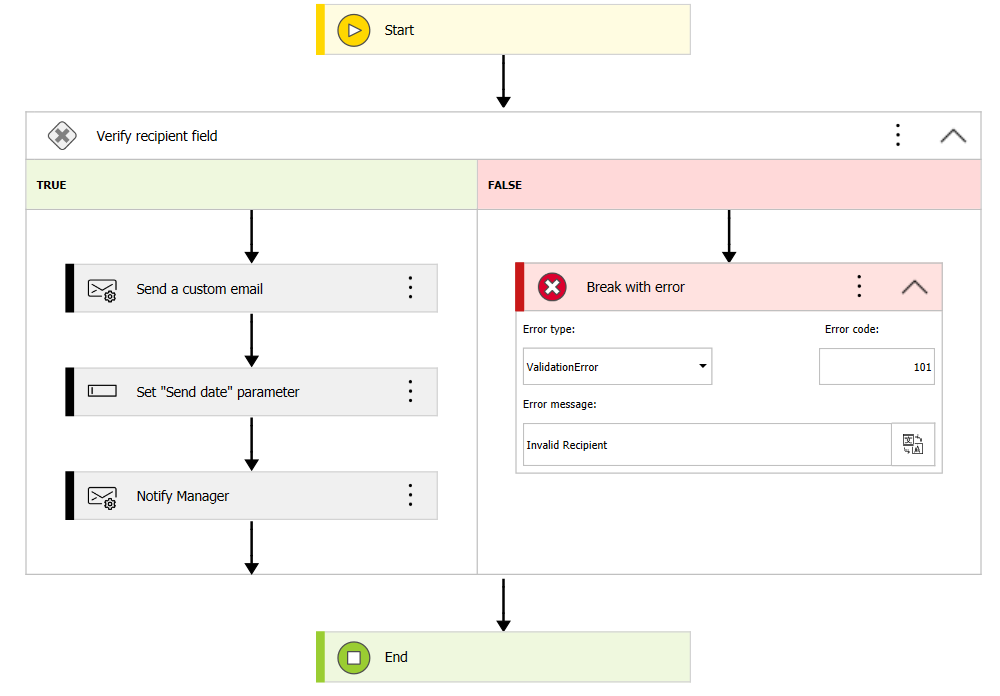
The visual flow designer of automations (which is similar to the workflow designer) will help keep large batches of actions organized.
Conditions within automations can be used to either supplement or replace existing execution conditions – similarly to a Flow Control step, they can direct automations to carry out different sets of actions depending on some condition. In earlier versions, the execution conditions did the heavy lifting in terms of determining which actions should be executed – now they can share the burden with automation definitions.
- Robust error handling – if something went wrong when executing a large stack of actions, rolling back the effects inside the WEBCON BPS system was never a problem, since everything related to the system is found in the SQL database on which the system is installed. Problems started when actions in a transaction affected external systems, rolling back those changes required creative solutions.
In each automation, there is the option to configure the Error handling tab, this is a separate automation flow that will trigger if the main automation in the General tab encounters an error. Each action in an automation can be assigned an Error code which can then be referenced in Error handling (e.g. using automation or action execution conditions) – so that the system can distinguish between different types of errors and respond accordingly.
It is also possible to end the main automation flow prematurely (with an appropriate error message and error code) if the defined conditions are not met.
- Local parameters and additional context variables – many action implementations relied on technical fields, whose purpose was to store or ‘hold on’ to a value that can then be recycled into other actions. While technical fields can still be used for actions, automations offer an alternative: Local parameters. These parameters can be set just like technical fields (e.g. Change value of a single field action) and can be referenced through the automation editor. They store values (Text, Decimal, Boolean, Date, User list) for use within the automation. These parameters are cleared after the automation finishes executing, essentially functioning as temporary technical fields.
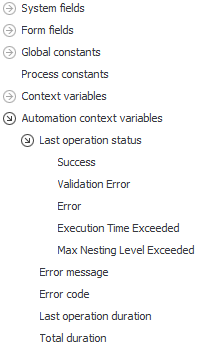
Additionally, the automation editor comes with a branch of context variables related to automations: Last operation status, Error code, Error message, Total duration etc. that can be used to further customize automation and execution conditions.
What will change in my system after the update?
- Any trigger that has actions defined on it will have a new automation named after the trigger (i.e. “on entry”, cycle name, path name) created for it, and all defined actions are added to that automation.
- Attachments menu actions are the exception, these will remain unchanged and actions on this trigger will not be migrated into automations.
- The WFTimeoutActions table will be deleted from the database. It is no longer needed since each timeout will now be associated with an automation.
- Menu buttons that have a Printout a barcode label action defined on them will have an additional business rule added to their visibility condition: one that states that the button will only be visible if the Document entry point ID is different than EMPTY. This is so that such buttons are only visible on machines that are document entry points.
- If the menu button did not have any visibility condition defined previously, then this comparison is simply added as the new visibility condition
- If the menu button did have a visibility condition defined previously, then this comparison is added onto it using an AND logic operation.
![]()
Interface and configuration
Automations are found in the same place that actions were and still are found – in the Actions tab of the step edit window. Each action trigger on each step may have one automation, but the configuration within this automation is pretty extensive.
Creation
It is no longer possible to add actions directly to triggers, an automation is created on the trigger instead and add actions are added to that automation.
Existing actions added in previous versions will be placed within an automation on the same trigger on which they were configured.
Once an automation is added to a trigger, it is possible to give it a Name and Description, each automation will also have two Definitions – one in the General tab and one in Error handling.
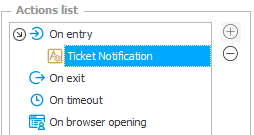
An automation named Ticket Notification created on an On entry trigger
NOTE: As with action templates, it is possible to create automation templates in the Configuration node of process – such automations can then be freely reused throughout the process by nesting them within automations on triggers.
Definition
The Definition box is the main work area where the automation is designed.
The main structure of the automation is similar to that of a vertical workflow diagram. It has a Start and End block (comparable to a workflow step) that cannot be deleted. The automation is configured by adding new blocks from the automation menu – this is done by clicking the ![]() sign on the “paths” connecting the blocks.
sign on the “paths” connecting the blocks.
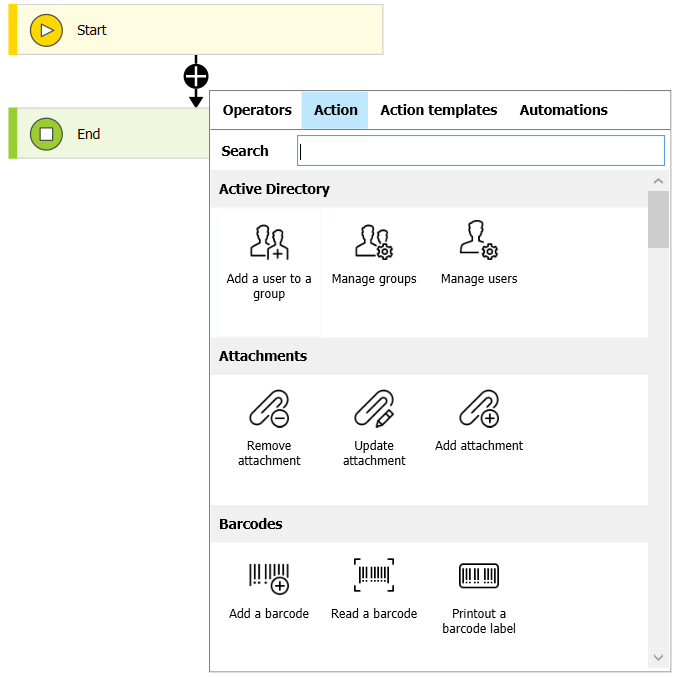
From this menu, the following types of blocks can be added to the automation:
- Automations – as mentioned above, automation templates created in the process can be nested within automations on triggers.
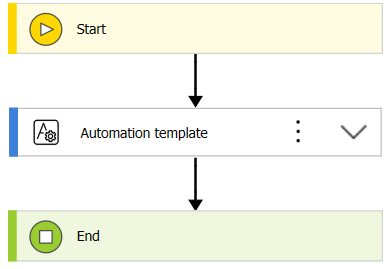
- Actions and Action templates – the bread and butter of each automation, actions will be executed starting from the top and going down (just like on the old action list) until the automation encounters an End or Break with error block. As was the case in previous versions, not every action can be used on every trigger, so automations created on different triggers will have access to different pools of actions.

- Operators – contains the Condition block that can create branching paths for the automation. Each condition is defined as a Boolean business rule that directs the automation down one of two paths. It is possible to nest conditions within conditions to create even more branching paths. Within a condition block, two new operators: End and Break with error can be used to end the automation prematurely. The later will simulate a real error – all events of an automation will be rolled back and the Error handling automation flow will be launched. On the Break with error block it is possible to define a message and error code which can later be used to customize the Error handling flow.
Suggested values
As with similar editors in Designer Studio, a menu of variables will be available on the right containing various context variables, system fields, and database objects that can be used to build Conditions.
There are two noteworthy features here; variables and parameters.
- Automation context variables – information regarding the execution statistics of the current automation can be accessed through variables here. Notably, the Error code can be used in the Error handling flow to build a robust failsafe plan that responds accordingly to different scenarios.
- Parameters – these differ significantly from Business/Form rule parameters. Local parameters should be treated as temporary technical fields that can hold onto a value until the end of the automation. They can be set using e.g. Change value of a single field actions. Additionally, automation templates created on the process configuration node can also use Input and Output parameters which do function similarly to Business/Form rule parameters.
Actions will be able to access these parameters as variables and insert them into their configuration. Certain action types will also be able to set Output parameters that can then be recycled into the configurations. These actions include:
Action Type Output Verify attachment’s signature Verification result saved to chosen fields Read a barcode The result sets one chosen field Start sub-workflow Copy ID of sub-workflow to a field Read data from an Excel file Copy results to fields Add a substitution Substitution ID saved to a field Remove a substitution Select field storing Substitution ID Exchange Event Save event ID to field Exchange Task Save task ID to field REST and SOAP invocation Save results to fields chosen from a list Change value of a single field Choose a form field to set Change value of multiple fields Table with form fields to set Create list Save list address to a selected field Create site Save site address to a selected field Add a new list element Save added element ID to a selected field
Action configuration
As with similar editors in Designer Studio, a menu of variables will be available on the right containing various context variables, system fields, and database objects that can be used to build Conditions.
Actions are still configured in largely the same way, the only thing that changed is where this configuration is found.
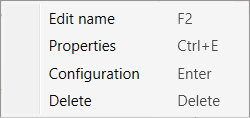
Clicking on the three dots of an action block (or right-clicking the block) opens the context menu which allows to change the actions name (F2), change its properties (CTRL+E), or configuration (ENTER).
The Configuration which is tied to the actions type remains the same as in previous versions.
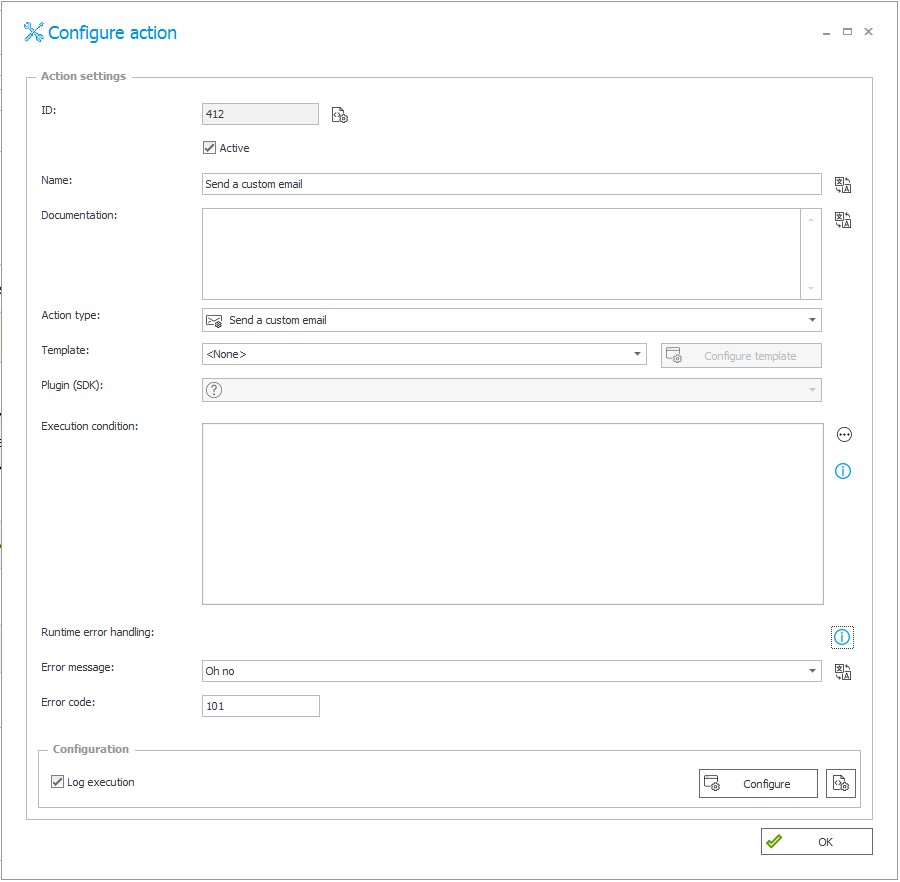
The Properties now contain the Action settings of an action and remain largely unchanged.
The main difference is the addition of Error message and Error code which can then be used to handle different error scenarios via Error handling.
Error handling
The second tab is used to configure the Error handling flow. The Error handling flow is launched on three occasions:
-
An error occurs while attempting to execute an action from the General flow
-
The General flow reaches a Break with error block
-
The time allotted for the automation in the bottom right corner of its configuration is exceeded, causing an Execution time exceeded error
In all cases, the actions from the General flow are rolled back and the Error handling flow is engaged.
The purpose of this tab is to create a contingency plan that will help the system roll back changes to external systems. To this end, the actions available in this tab are limited compared to the General tab, regardless of trigger.
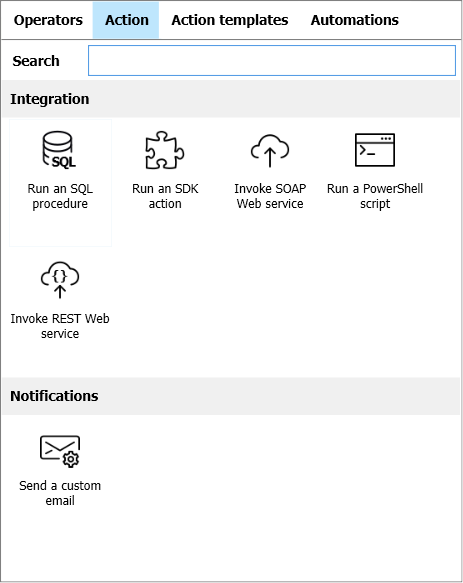
Available actions in the Error handling flow
The flow can make use of Conditions to handle different scenarios, and Error codes configured in the action’s Properties and Break with error blocks can be used to customize and direct the flow.
While the Error handling flow cannot use its own Break with error blocks, it does have access to a Set error message block that can be used to override and customize the original message of the error that launched the flow in the first place.

