Signing document with Autenti service
Applies to version: 2020.1.x and above; author: Piotr Dąbrowski
Introduction
WEBCON BPS handles digital signatures through dedicated actions (SDK – Software Development Kit).
There are 4 plugins available to integrate with external digital signature providers:
- AdobeSign
- Autenti
- DocuSign
This article describes the process of signing document with Autenti service. Additionally, it presents sample workflow with configured send document for signature and download signed document actions.
Process description
Autenti platform provides various options to handle processed document, i.a.:
- creation of document in the system
- uploading file containing document for signature
- checking document status
- sending e-mail with link for document signature
- two-stage validation with SMS service
With the above options you can establish the following communication:

Figure 1. Workflow diagram
The process will include 3 defined actions:
- sending document to Autenti
- sending request for returning document with status
- checking status
It is important to mention the user verification method here. The above-mentioned scenario uses one Autenti system account from which documents are sent for signature. The signer does not need to have Autenti account nor license for WEBCON BPS.
After sending, the timeout action automatically runs document downloading and checks its status.
Business case
The presentation uses a simple workflow:

Figure 2. Signature workflow
The form includes fields required for triggering signature action. Note the „Technical attributes” group – it includes technical field forming an integral part of the described process.
- External document ID – field filled in with document ID from Autenti database.
Additionally, pay attention to the types of created attributes, in particular to the “Role” field in the approver section. The field needs to be set up as a choice field returning the following data (IDs of respective options are important here):
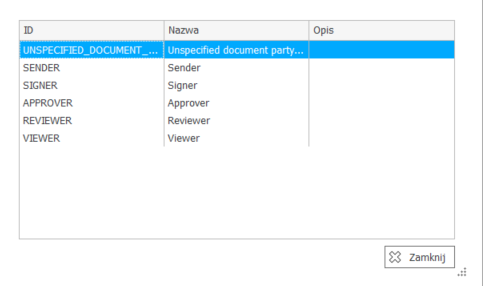
Figure 3. Choice field configuration
The Autenti REST API documentation states that once a GUID is returned by the system, the document was uploaded properly into the company’s internal database. Therefore, the user is blocked from progressing forward until a number is returned and entered into the corresponding field.
The form looks as follows:
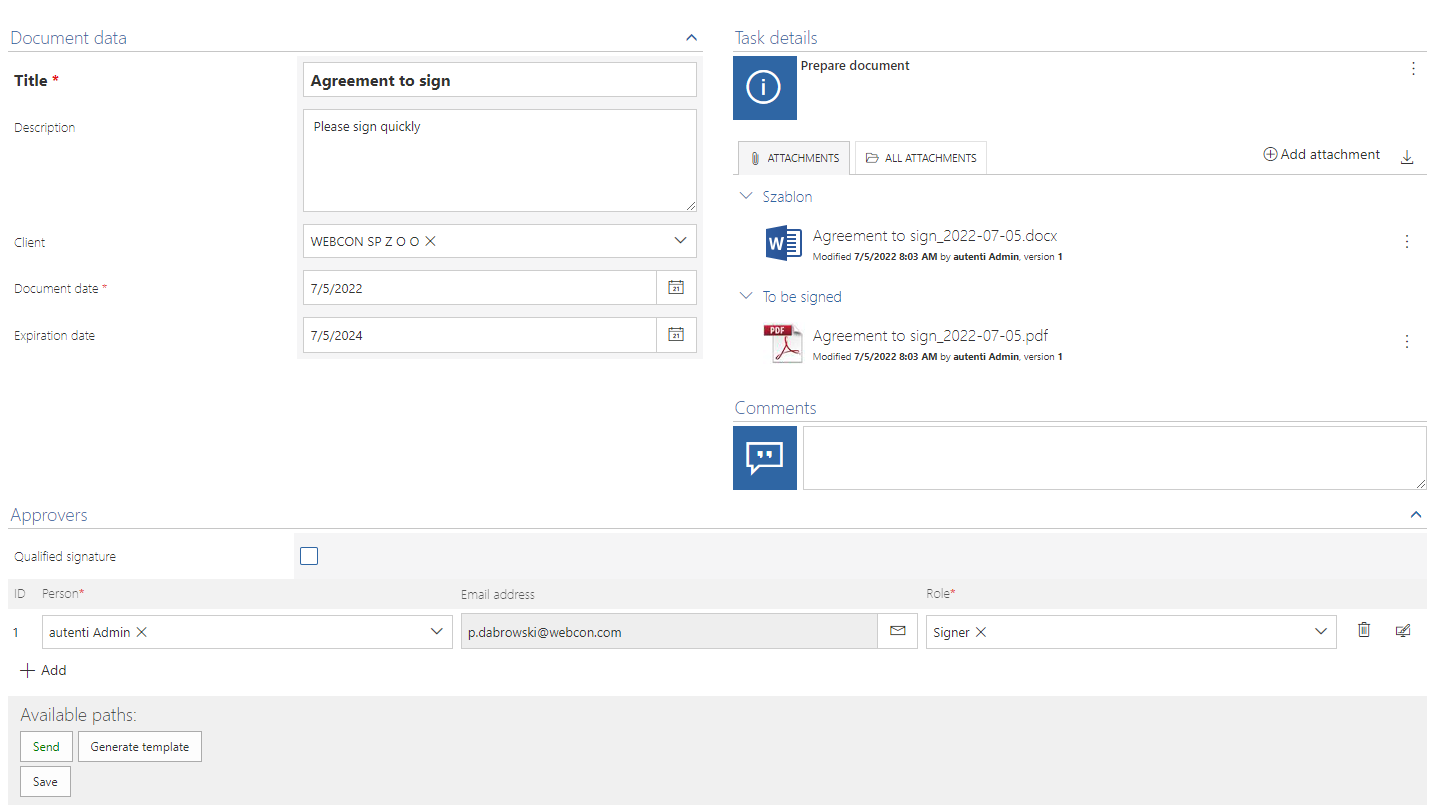
Figure 4. Entry form
The “Generate template” path generates a sample agreement document. The document for signature should have a PDF format.
Begin with configuring REST connection from REST API Autenti.
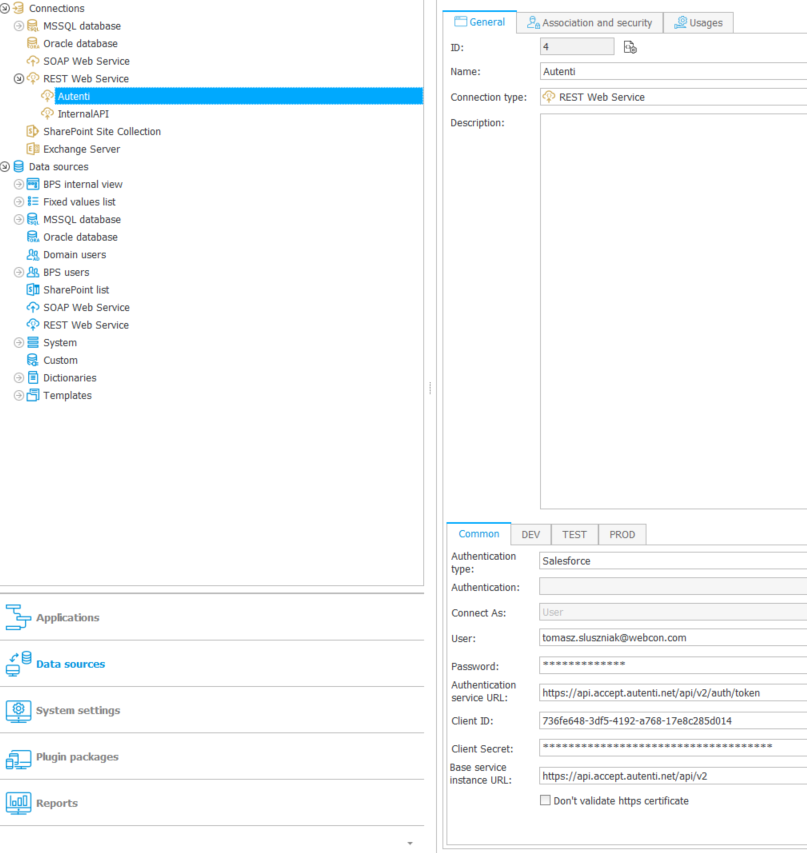
Figure 5. API connection configuration
Create “REST Web Service” connection and select Salesforce authentication. Using data from Autenti account, enter “Client ID” and “Client Secret”. URL addresses are valid as of 4th July 2022. When configuring the connection check the up-to-date version of Autenti and properly modify the addresses provided in this screenshot.
Configure the send document for signature action. Here it is triggered at “Manager approval” step. On “Approve” intermediate path add “Approve” automation including the trigger SDK action.

Figure 6. Configuration of the send document action
Configuration of the subsequent action sections is presented below:

Figure 7. Attachment selection
Here, create SQL query to WFDataAttachmets table returning ID of the attachment sent for signature. In the respective case restrict searching to searching with the current instance ID, check if the file belongs to “To be signed” category, and make sure it is not deleted.

Figure 8. Authentication configuration
In the authentication section select the previously created connection, set “grant_type” parameter to password authentication, and define the scope, i.e. specify the area to which the application has full access.

Figure 9. Request body configuration
“Request body” is the next section. Here, attributes determining the name and the description of the query are provided. In the “Users” field select the item list from which the action obtains data:
- Name – signer’s name and last name
- E-mail – e-mail address on which an e-mail with link to document signature is sent
- Phone Number – optional field allowing for additional authentication with SMS. If used, a short message is sent to the phone number provided here.
The final step is the selection of “Signature Type”:
- ESIGNATURE – standard electronic signature
- QUALIFIED_ESIGNATURE – qualified signature
There are two types of roles that can be assigned:
- Viewer – only persons specified on the list must sign the document
- Signer – persons specified on the list and the sender must sign the document
The last configured section is “Plugin configuration”:

Figure 10. Plugin configuration
In this case you can copy and paste the configuration available after clicking on the context help. In “Returned id of document” specify the technical field the user created where the external document ID is stored.
After proper configuration of the action you can enter the Portal and test the solution. To do that follow the path to the manager approval stage.
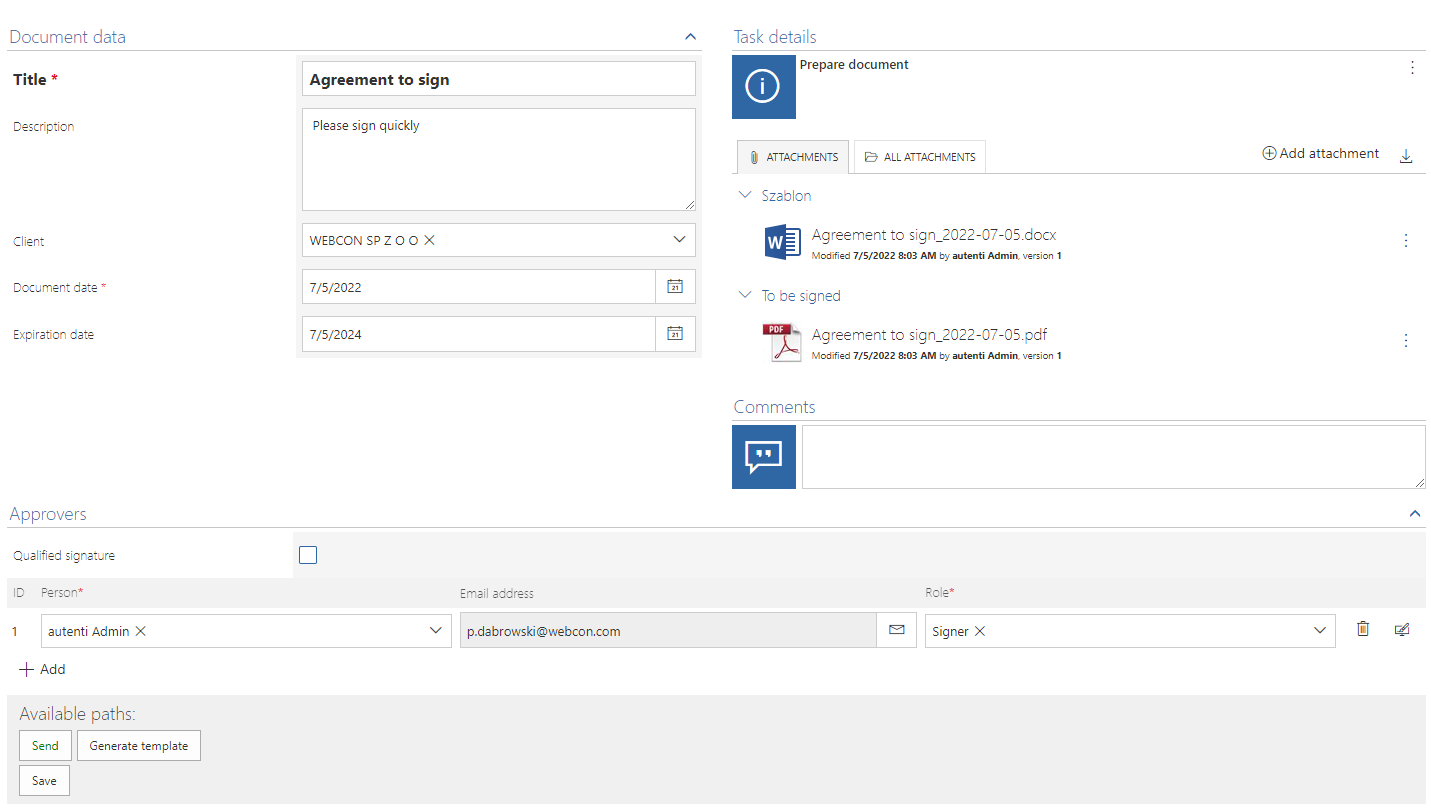
Figure 11. Form window in the “Prepare document” step
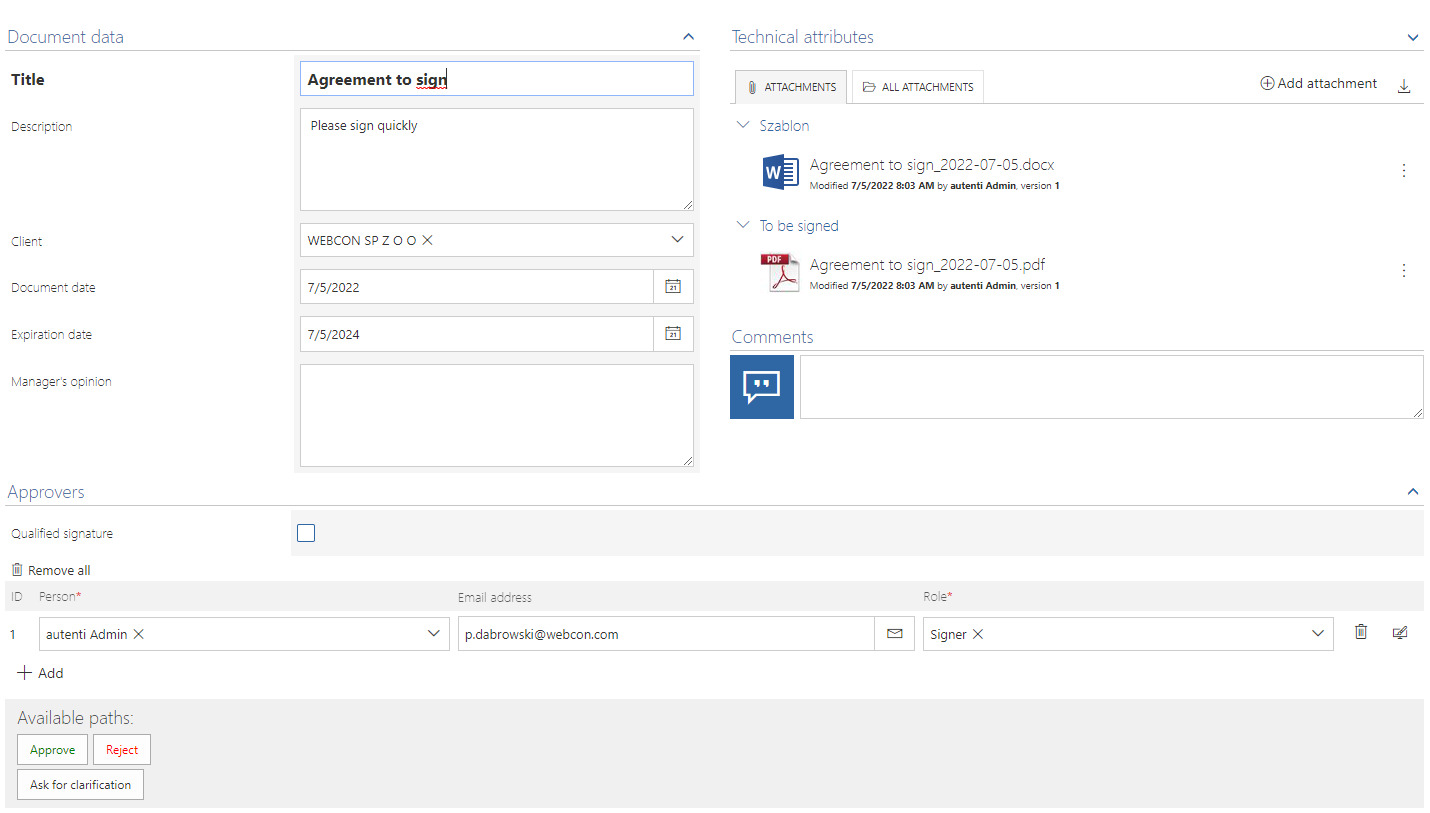
Figure 12. Form in the “Manager approval” step
Following the manger approval the document is sent for signature by specified persons. They receive the following e-mail:

Figure 13. The content of the e-mail from Autenti
The “Show document” text is hyperlinked to the user’s document for signature. Clicking on it will redirect you to the producer page where you need to select the field confirming familiarity with the document content and press “Sign” button.
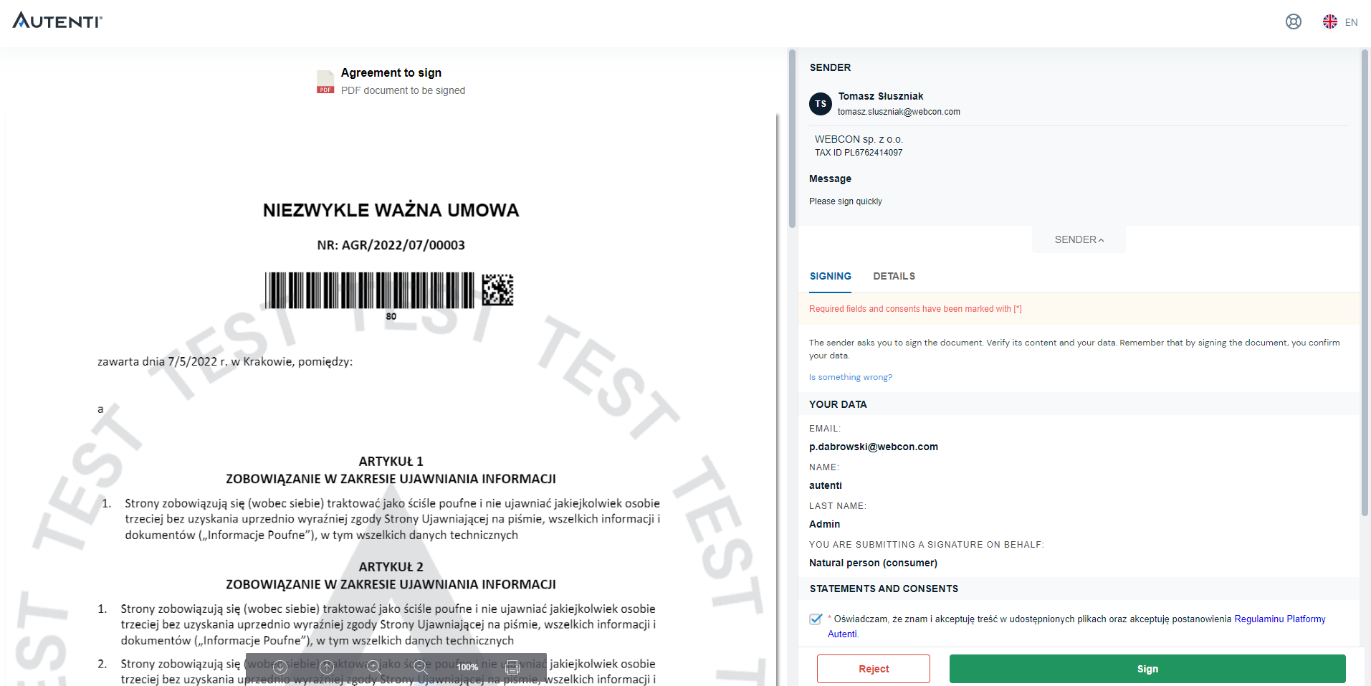
Figure 14. Document for signature
Information on the user signature workflow is shown after clicking the button.
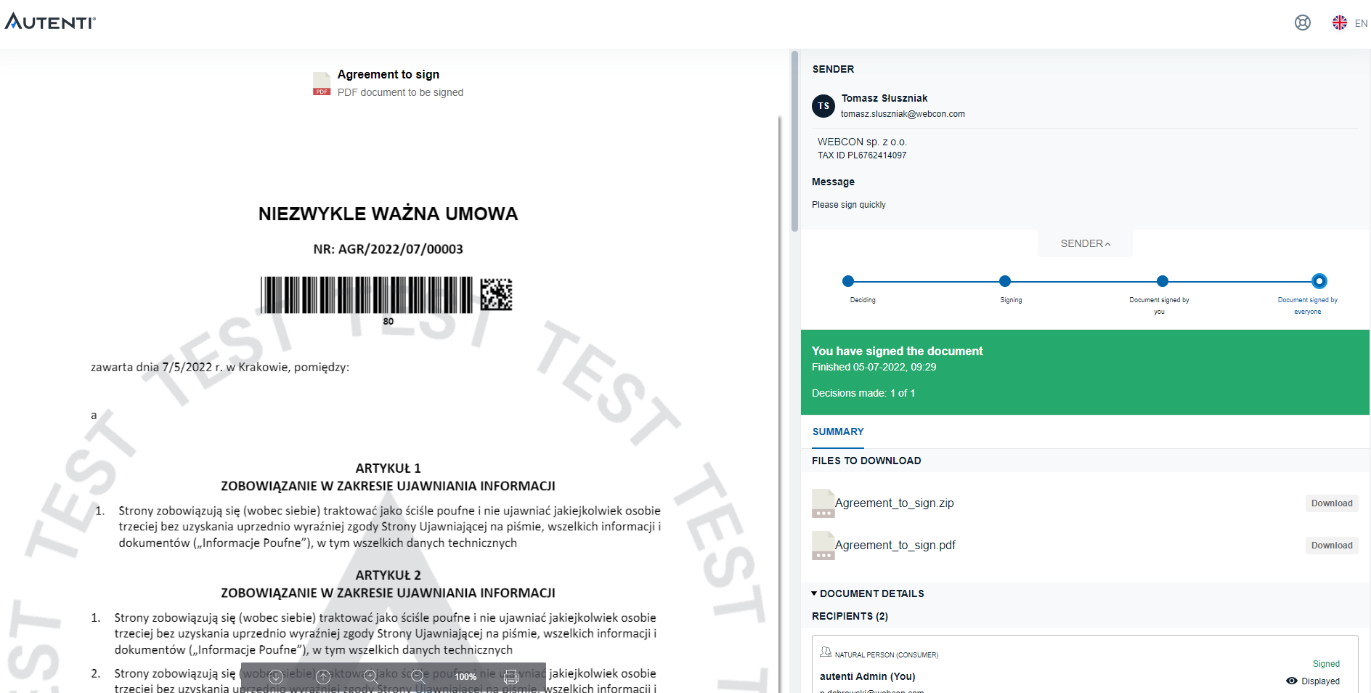
Figure 15. Signed document screen
The signers receive a confirmation message once the document is signed successfully. They also receive a copy of the signed agreement.

Figure 16. Return e-mail
A properly signed document comes with a certificate and a stamp certifying the signature authenticity:
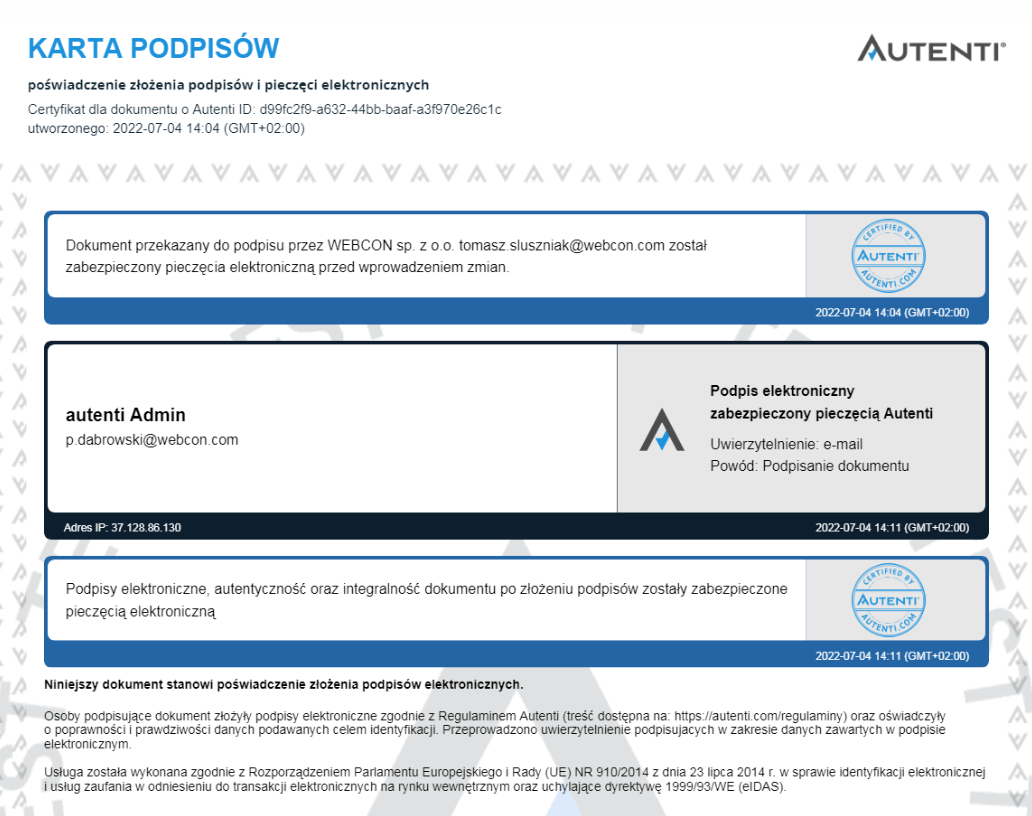
Figure 17. Autenti signature certificate
Following its approval and signature the respective document is passed to “Awaiting for E-Signatures” step. To finish the process you need to configure the download document with its status action. On “Get documents” path add automation with the download signed document action:
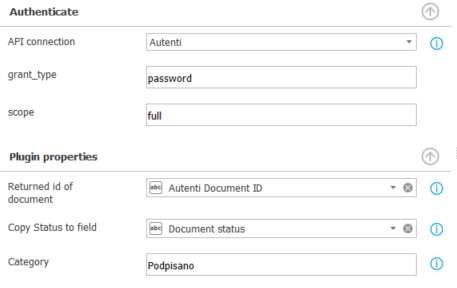
Figure 18. Configuration of the download document action.
Most of the configuration is done analogously to the send document action. In “Copy Status to field” specify the form field filled in with the status downloaded by the user – this will make it easier to set up the condition in the subsequent conditional step. The “Category” field defines the category the downloaded document is assigned to – in this case this is “Signed”.
Now let’s configure the “Signed?” conditional step the “Get documents” path leads to.

Figure 19. Configuration of the “Signed?” conditional step
If the download action fills in the “Document status” with the value “Completed”, the instance is transitioned to the final step. Otherwise, it returns to “Awaiting for E-Signatures”. The system can return 5 different statuses:
- PROCESSING – decisions not taken by all persons yet
- SUCCESS – everyone signed document
- FAILED – at least one signer refused to put their signature
- WITHDRAWN – document was withdrawn
- ERROR – operation error
Finally, in the “Awaiting for E-Signatures” step you need to configure the timeout function that checks every hour if the document is already signed.

Figure 20. Timeout configuration
Set the operation mode to “Path transition after action call”. As no action to perform is defined, the described timeout function attempts to proceed to the next step every hour.
If the action is properly performed, the following screen is displayed:
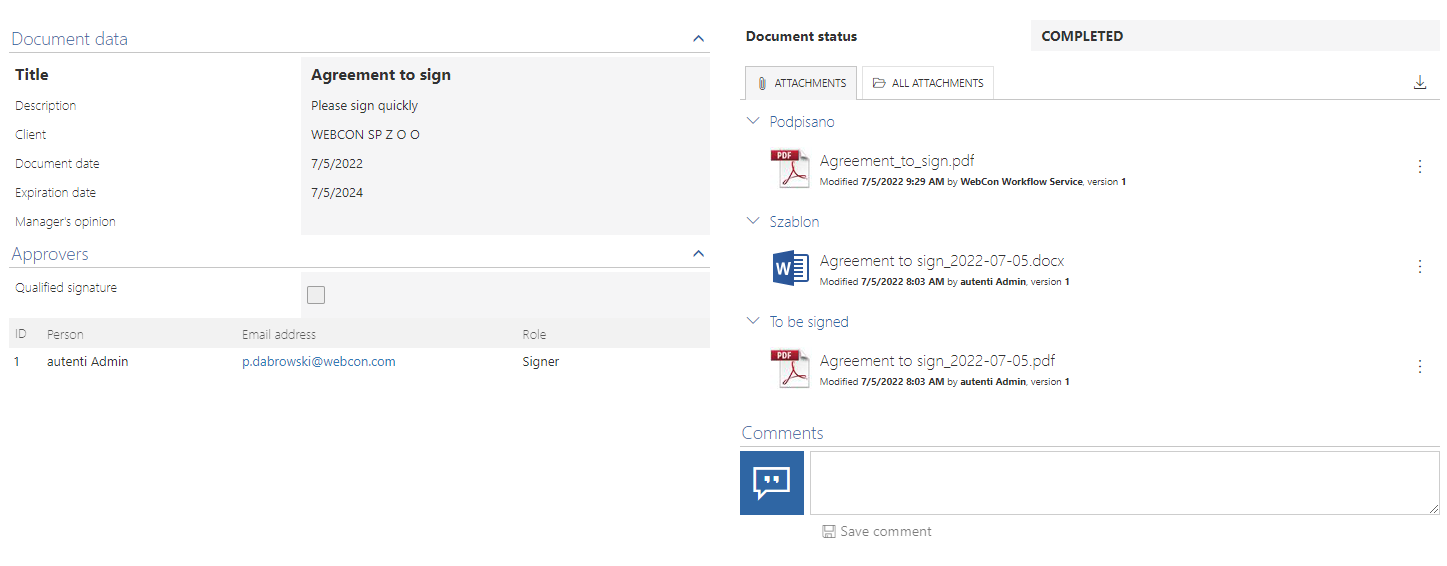
Figure 21. Final screen
As you can see the instance reached the final step and the signed document was added to the “Signed” category.
Summary
The workflow described above presents only an example of application of the WEBCON BPS plugin for integration with Autenti. After minor modifications the plugin can be added to any workflow.
You can obtain the source code of the plugins from our Github account at: https://github.com/WEBCON-BPS.
They are provided under this license.


I have downloaded SDK from Github and installed it but the 'Signature type' field is missing from the 'APIv2 SendingDocumentAction'. This is probably the reason I got the following errror message:
System.AggregateException: One or more errors occurred. (A connection attempt failed because the connected party did not properly respond after a period of time, or established connection failed because connected host has failed to respond. (api.accept.autenti.net:443)).
How can this issue be solved?
W