WFSecurities table description
Applies to version: 2020.1.x and above; author: Dawid Golonka
Introduction
Each of the individual stages of the business process requires the involvement of specific employees or groups. The degree of involvement can vary from person to person – from one action and access to some resources to participate in the entire process cycle and insight into each instance. WEBCON BPS allows you to map these conditions by using the privileges mechanism.
For more information about privileges, see Tasks vs privileges.
The WEBCON BPS system operates based on a SQL database, one of the places where the information the privileges is stored is the WFSecurities table.
Description
The WFSecurities table contains information about current privileges granted at the process level, instance and type form in the context of a given workflow. The table consists of the following columns:
SEC_LevelID – information about the access level:
1 – Admin
2 – Modify without delete
3 – ReadOnly
4 – AddNew
5 – ReadOnly without attachments
SEC_WFDID – a relation regarding to the instance ID
SEC_DEFID – a relation regarding to the process ID
SEC_ASSID – a relation regarding to the form assignment ID for workflow
SEC_USERGUID – a user/group GUID
SEC_UserLoginName – a user/group login
SEC_UserName – a user/group name
The configuration of the example process
The article describes the places in Designer Studio where you can configure the privileges granted on the process, form or instance. The way of storing this information in the database will also be checked.
A simple workflow for submitting a vacation request was created:

Fig. 1. The workflow for submitting a vacation request
Process privileges
To grant the privileges at the process level, select the process from the list on the left and go to the “Privileges” tab.
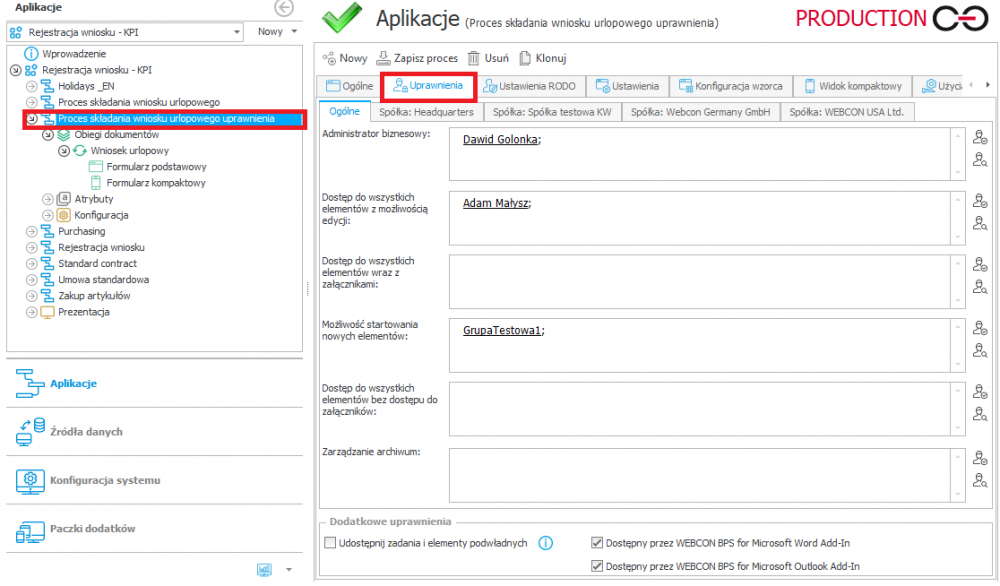
Fig. 2. Granting the process privileges
Examples of authorized users and one group have been introduced. By querying the WFSecurities table in the database you can obtain information about the privileges granted in the process (the process ID can be read from the “General” tab).

Fig. 3. The result of the query regarding the privileges on the process
The table contains information about the granted privileges, in addition you can check the date and time of granting the privileges and refresh information about them.
Form privileges in the workflow
To grant the privileges for the individual forms in the workflows, select the specific workflow on the “Associated form types” tab. If the workflow uses from several types of forms, you can grant the privileges for each type separately.
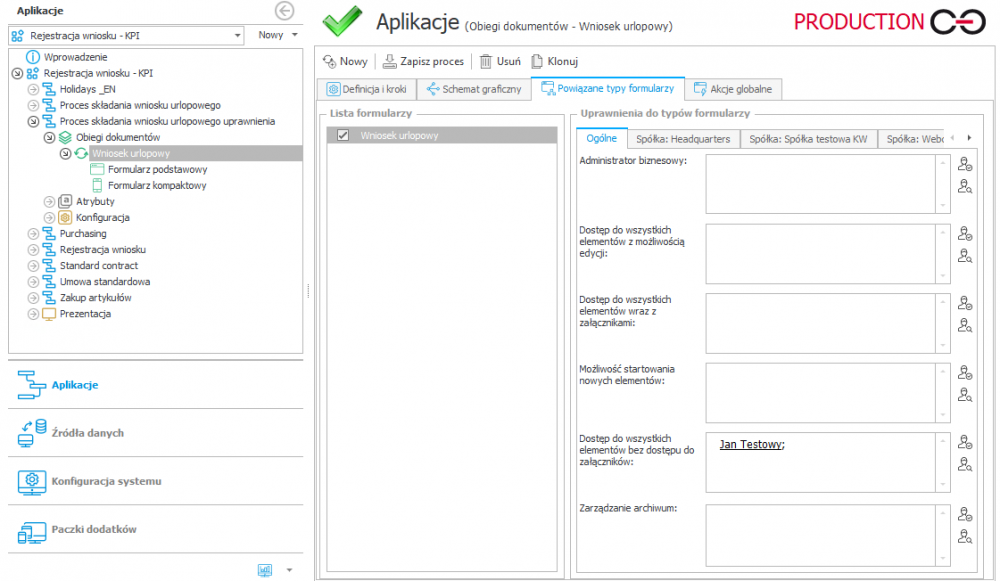
Fig. 4. Granting the privileges at the form level in the workflow
The following SQL query allows you to download data from the WFSecurities table that relates to the form type for which users have been granted the privileges in the given workflow (ASS_DTYPEID – ID formularza).

Fig. 5. The result of the query regarding the privileges on the form
Privileges at the instance level
You can grant the privileges at the level of the individual instance. The selected users or groups of users can be granted privileges for the individual steps – select the “Add privileges” action.
In order to present changes in the WFSecurities table the action was configured on the “Acceptance”.
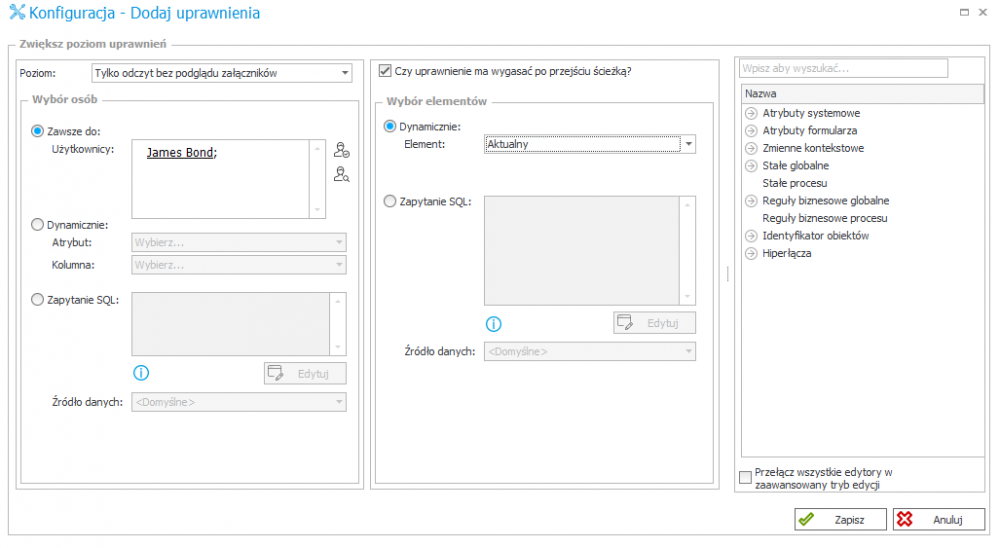
Fig. 6. Granting the privileges at the instance level
After completing the data at the “Registration” step and following the “Send to acceptance” path, the instance goes to the “Acceptance” step, where it waits for the acceptance of the supervisor.
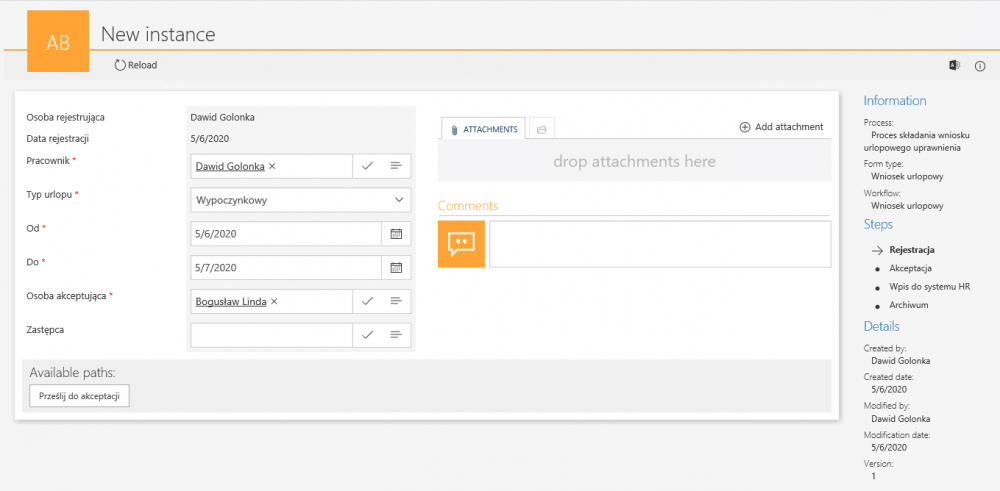
Fig. 7. The “Registration” step
At this moment the privileges to access to the instance is given to the user who registered the request and their supervisor who received the task.

Fig. 8. The result of query at the “Acceptance” step
Going through the “Accept” path from the “Acceptation” step to the “Entry into the HR system” step triggers the action which adds the access to the instance to the James Bond user (e.g. to add the data to an external HR system). Information about granting the privileges is saved in the database.

Fig. 9. The result of query at the “Entry into the HR system” step
See, that the Dawid Golonka user who registered the request retained the privileges enabling them to read the data (users of the workflows retain the privileges to read in further steps, even after completing their task). The Bogusław Linda user (accepting person) still has the task assigned, so they retained the ability to modify the instance. You can also find out from the table when the data has been viewed by the James Bond user, who has been granted the appropriate privileges.
Checking privileges from Portal level
Information about which users and groups have the privileges in the process, associated with the workflow can be obtained in the Portal from the administrator level.
From the Portal level, enter any step after registering the form, switch to the administration mode and select the “Privileges” option from the drop-down menu.

Fig. 10. The “Privileges” window
The window that appears contains information about the privileges. The screenshot above shows the status from the “Acceptance” step. All values related to those given in the configuration section.
After going further and executing the action related to grant the privileges to another person, you can see that the James Bond user has been added, who can now view the form without previewing the attachments (screenshot below).
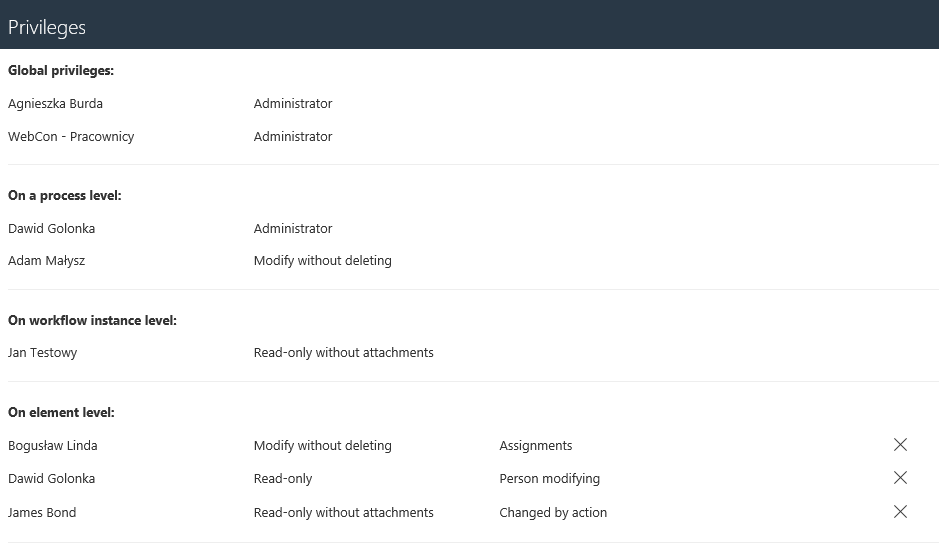
Fig. 11. The “Privileges” window
Both methods of checking the granted privileges enable their comprehensive review and control of whether more people than necessary are involved in the instance of the process, and whether users have privileges adequate to their role in the process.

