Conditional display of form fields based on another form field value
Applies to version 2020.1.3; author: Michał Kastelik
The WEBCON BPS program allows you to build advanced form templates. One of the features that can be especially useful is showing or hiding form fields depending on the value of another form field. For example, you can decide that some fields won’t be shown on the form unless the user checks a field that makes them visible. Thanks to this feature, you can make your form more readable and easier to use by hiding groups of form fields (or single form fields) that don’t need to be immediately visible.
Read this article to learn how to hide a group of form fields based on the value of one of the form fields.
What does the solution look like when implemented?
In this article, we assume you already have an application for handling Cases. If you do, open it and follow the tutorial. If you don’t have it, you can still replicate the steps we explain in another application you have available.
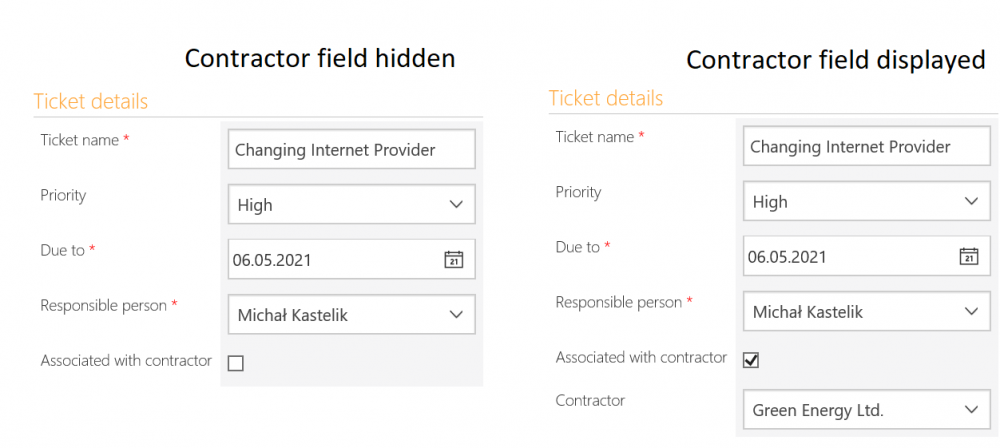
In your application, you will configure a form field for the Contractor to be shown only if the user marks the Associated with contractor checkbox. Look at Figure 1 below. On the left, the Contractor field is hidden (this is the default option), and on the right the checkbox is checked, so the Contractor field is displayed.

How to implement the solution
To configure a conditional display of a form field, you need to follow three steps:
1) create a Form rule containing the condition and the desired outcome that will be seen on the form
2) apply the form rule in the Form rule to be executed on value change section of a chosen field, i.e., connect the condition with the form field Case associated with contractor (or another form field in your application that will work as a checkbox to display the contractor),
3) apply the form rule in the Form rule to be executed on page load section of the main form – to ensure that the rule is executed when the value changes AND when the page is first loaded.
-
Create the form rule
You can define form field behavior using rules. Here, you will use a rule to create a checkbox for hiding or displaying the Contractor field.
Go to the Configuration tab (under Workflows), choose Form rules and click on the New rule text. A window will open. Under the header that says General, find Rule name and write in the blank space right to it this name: Show/hide the Contractor (case).
Then, look under the header Definition. You will see a blank space. Click on it and after that you will see square brackets and a plus button.
Now, you need to choose (or write) an IF THEN function and complete it with data as shown on the screenshot below. In a graphical form, the rule looks like this:

The rule we show you in the picture uses an IF THEN function in its shortened version. How do you understand this rule? It says that if the field Associated with contractor is checked, then the Contractor field should be displayed. Otherwise, it will be hidden, because this is how we have configured our form.
After introducing the rule, save the changes.
Not sure how to write the rule above? Click on the work area (the blank space). You can: 1) select the function from the right menu by double clicking it, 2) drag and drop the function from the menu to the work area or 3) type your rule.
If you type, a function will be suggested, and you can hit enter to select it. If you need to add another field, press Enter to create it.
Don’t see the same names of the form fields as in the picture above? They may have different names in your application. In this case you need to replace the Associated with contractor field with the name of your checkbox for showing/hiding form fields; and the Contractor field might need to be replaced with the name of the form field you use in your application to store information about the contractors.
-
Add the rule to the form field
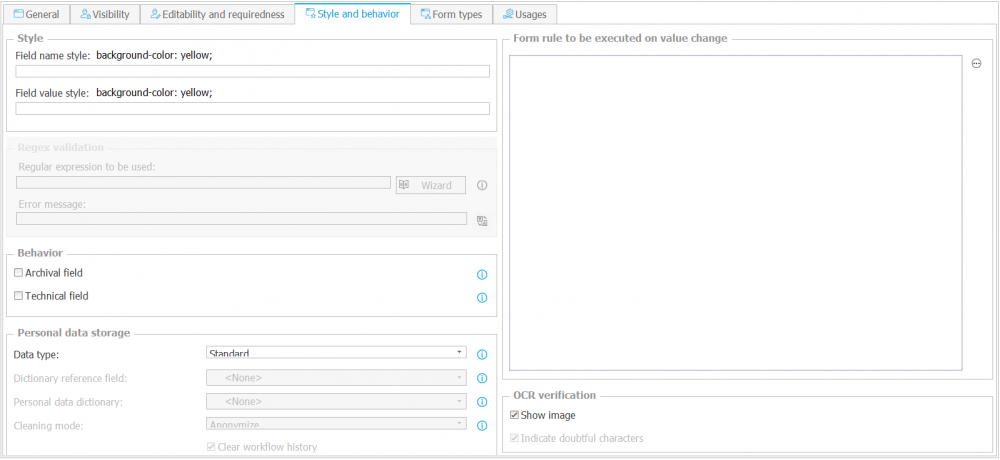
Click on the form field Associated with contractor and click on the tab Style and behavior (you can see it on the screenshot below).

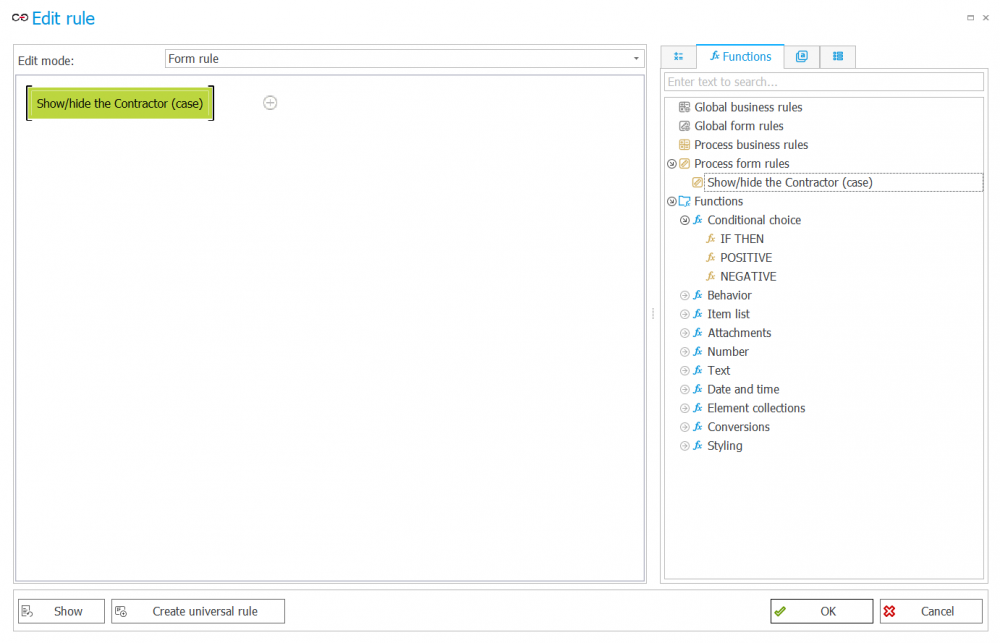
On the right, you will see the text Form rule to be executed on value change and a lot of white space below this header. Just below the text, on the right, there is a button with three dots. Click it to open the editor. Now, open the tab Functions, and find the function named Show/hide the Contractor (case) which you have created in the previous step. Click on it to add it to the editor. Confirm your choice by pressing the OK button below and save everything.

Once you have saved the changes in the Designer Studio, the checkbox Associated with contractor will be working on your form, allowing to show the Contractor field when checked or hiding it when unchecked.
However, you need to do one more thing to finish the configuration. Go to step number 3 below.
-
Add the rule to the Main form
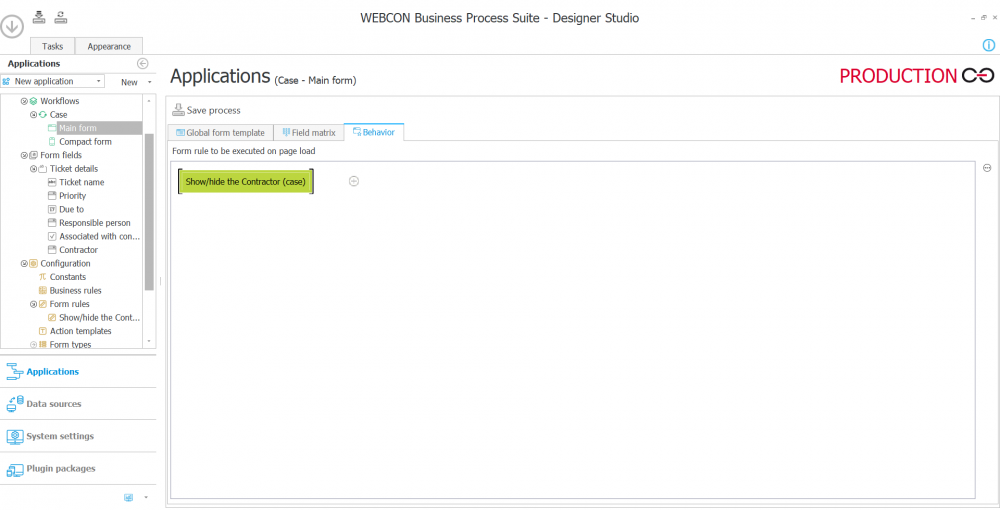
Form rules associated with the template of the main form are executed every time a page is loaded. To add the rule, we have created to the main form, choose Main form (under Workflows) and on the right click on the Behavior tab.

On the right, you will see the text Form rule to be executed on page load and a lot of white space below it. Look to the right and you will see a button with three dots (…). Click it to open the editor.
Now, open the tab Functions, and find the function named Show/hide the Contractor (case) which you have created in the first step. Click on it to add it to the editor. Confirm your choice by pressing the OK button below and save everything.
After that, the setup is finished. When you go to the form you were changing, it should have a checkbox to show or hide the contractor as shown at the beginning of the text in the section “What does the solution look like when implemented?”.

