Outlook Classic – installation and use
Applies to version: 2022.1.x and above; author: Krystyna Gawryał
Introduction
Outlook Classic is an add-in that allows WEBCON BPS to integrate with the Outlook desktop application available as part of Microsoft Office, which is one of the most widely used applications for managing e-mail correspondence in enterprises. Upgrading it with a dedicated WEBCON add-in will allow users to efficiently handle tasks and processes from within the e-mail application itself, especially when working with external entities.
This article describes how to install the Outlook Classic add-in and provides examples of its use.
Installation
To download the add-in, log in to WEBCON BPS Portal. Click on the profile icon in the upper right corner of Portal and then Install MS Office add-ins and Outlook Classic.
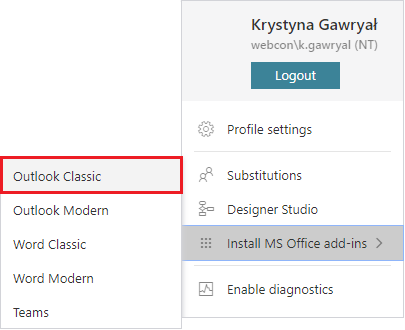
Note: for the installation to be possible, the user must have administrator privileges on the local machine. Alternatively, the add-in can be installed globally in an Active Directory environment with properly defined Group Policy, in which case the local user does not need to have administrator privileges.
In the next step, the installer window will be displayed:
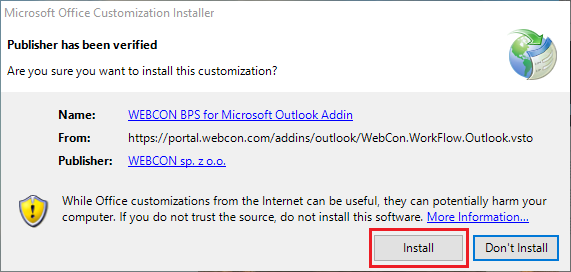
Click Install – the installation of the add-in will begin. It may take a few minutes.
After successful installation, close the installer window by clicking Close.
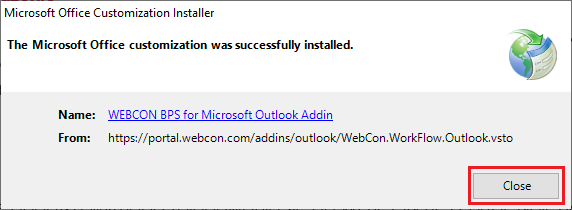
If you had Outlook open before, you need to close it and restart it for the newly installed add-in to appear on the ribbon. The add-in will now be available in a dedicated area on the MS Outlook ribbon.

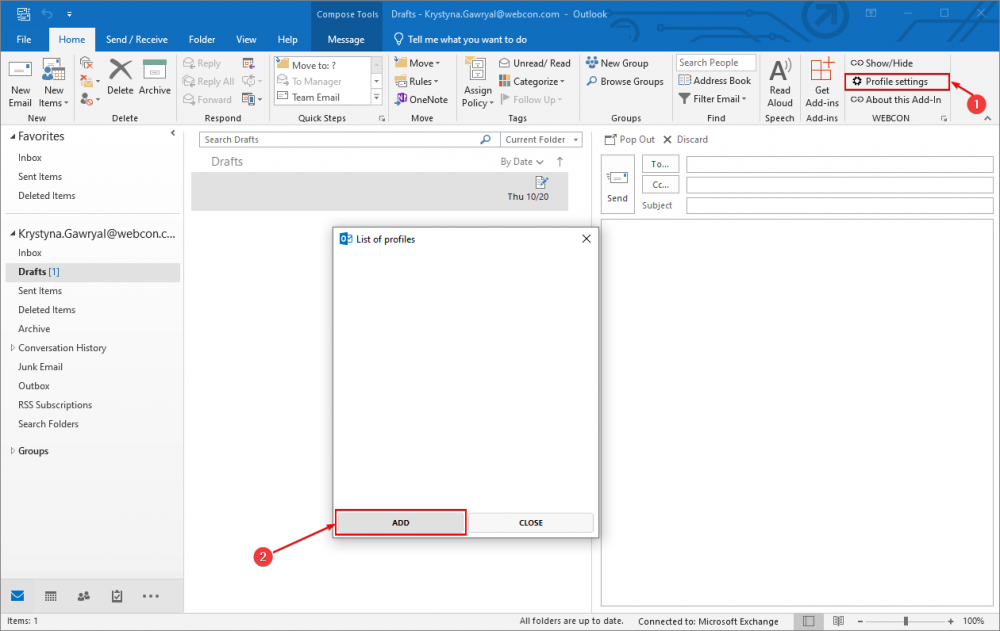
The WEBCON area, where the Outlook Classic add-in is visible, includes the following three actions:
- Show/Hide – selecting this option displays the add-in panel. Click this button again to hide the panel.
- Profile settings – allows you to manage the profiles the add-in is associated with.
- About the Add-in – selecting this option displays a window with information about the installed add-in version.
Creating a profile
After installing the add-in, you are required to create a user profile. To do this, select Profile settings – a window with a List of profiles will open in the application, where you should click Add .
Next, the Connection parameters window will open in MS Outlook. To create a new profile, complete the Name (profile name) and BPS Portal address fields, and then click Save.
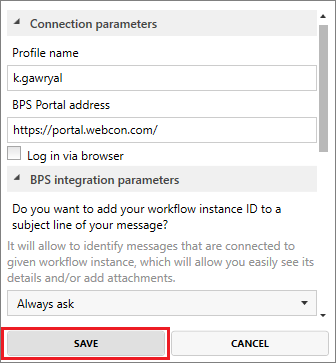
A profile will be created, but it is still necessary to log in to Portal after selecting Show/Hide.

You need to enter the same credentials as when logging in to Portal in a web browser. If the Log-in via browser box is checked in the Connection parameters window, the system authorizes via the browser.
Using the add-in
The options available at this stage are:
- New – allows you to create shortcuts to selected workflows and start new workflows in WEBCON BPS based on e-mail messages.
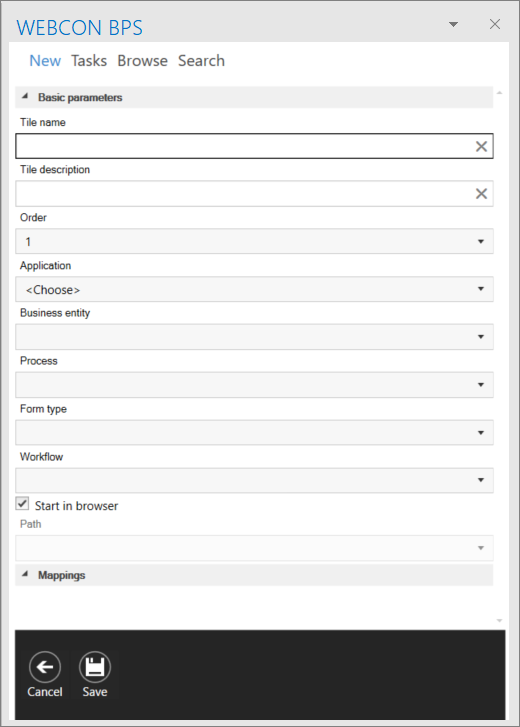
To add a new shortcut, click on the plus icon located in the Add field. The tile configuration window will open, in which you must provide the following data:
- Tile name – shortcut name displayed in MS Outlook.
- Tile description – shortcut description available in MS Outlook.
- Order – tile order in MS Outlook.
- Application – application in which the process will start.
- Business entity – name of the related company.
- Process – selected process to be started.
- Form type – type of document started in the process.
- Workflow – related document workflow.
- Start in browser – if you select this parameter and use the tile, the configured process will be started in the default browser.
- Path – option available only when the Start in browser box is unchecked. Paths are selected from the paths defined in the registration step of the given workflow.
- Mappings – this section allows you to set the value of the newly created instance. Here you can use data available directly in the e-mail, such as sender, body, etc.
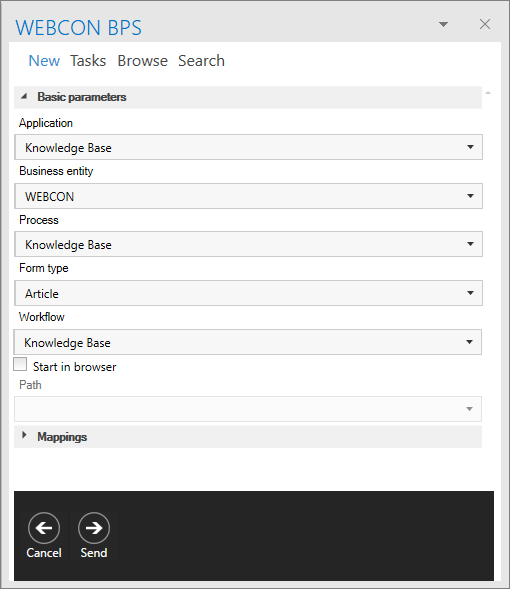
Dragging the selected message or the selected attachment onto the tile created in this way starts a workflow in the background or opens the appropriate registration form in the browser window. In either case, the message or attachment will be automatically included in the started workflow.
Advanced settings allow you to specify which fields of the source message will be automatically copied to the form (e.g., the name of the e-mail sender can be copied to the field with the registrant details).
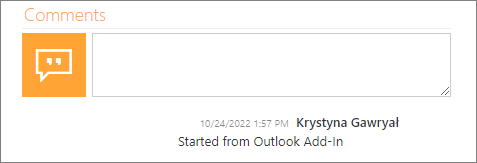
Should a workflow be started from Outlook Classic, the comment "Started from Outlook Add-in" will be automatically added to the instance after going through a path or saving.
- Tasks – allows you to preview a list of your active tasks in the add-in window.
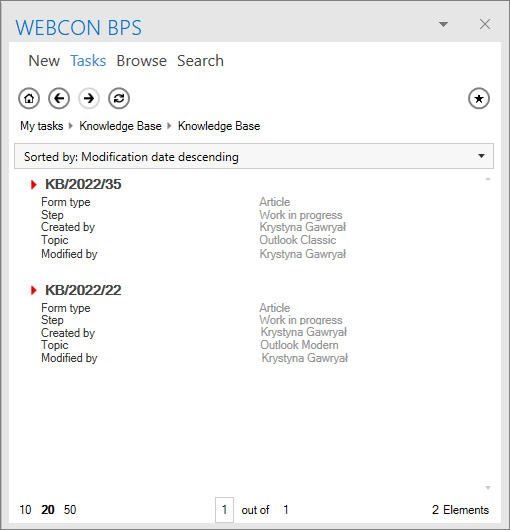
After selecting a task, it is possible to view the content of the form, its attachments, as well as detailed information about the task.
Additionally, the add-in can be used to create an e-mail contextually linked to an instance as part of which the user is assigned a task in the system. Such a link can be created by right-clicking on a specific task and selecting New e-mail from the context menu.
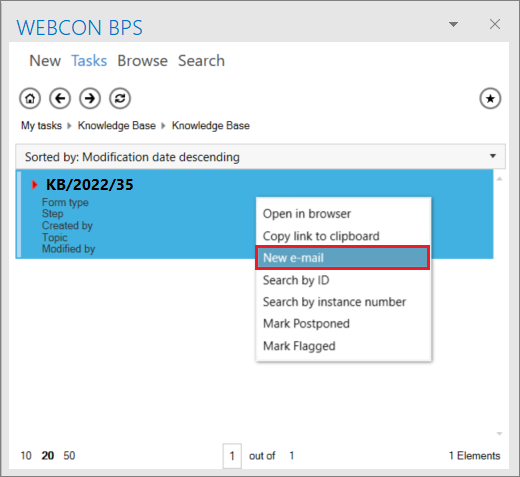
As a result, the new e-mail message will be created, its window will automatically show the add-in panel with instance for which the message is created, and ID of the instance will be added in the e-mail subject line, e.g. “[BPSHR # 47331]”.

When sending an e-mail created in this way, the system will ask you whether to save it among the attachments of the related instance. In this way, related messages are stored in the system, and the e-mail interactions with external entities are effectively recorded.
Upon receiving a response, the system will enable a quick search and preview of the related workflow instance and, again, saving the received response as an attachment to the instance.
On the E-MAIL CONVERSATIONS tab, a file with .msg extension will be added in the Attachments section, and when clicked, you can preview the message.

Moreover, if any attachments have been added to the instance, Outlook Classic allows you to forward them easily. All you need to do is click on the attachment in the add-in panel and drag it to the new message window.
- Browse – allows you to browse the document archive and define customized search structures.
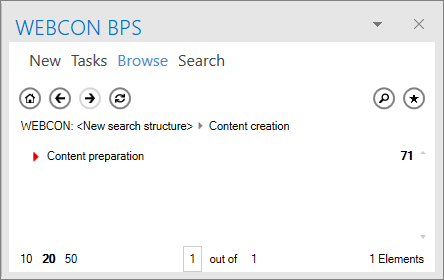
This means that you can decide how you will browse the document repository; for example, first select the type of document, then the year it was created, then the counterparty to which the document was linked, in order to finally indicate the step of the document and display the resulting list of instances.
It is also possible to save favorite places in the repository, such as a list of all contracts that are currently in the negotiation step, or all invoices related to a selected counterparty and placed in the archive.
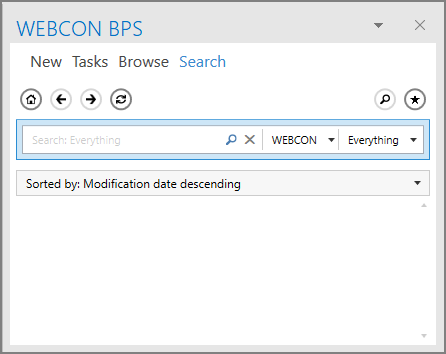
- Search – selecting this option will display a search engine in the add-in panel, which allows you to check the availability of specified tasks and documents. Here you can also select the criteria by which your search results will be sorted.
Other examples of use
The use of the Outlook Classic add-in is an alternative to automatic start of workflows based on messages sent to functional mailboxes (such as notifications@company.com), which is supported in WEBCON BPS through the Hotmailbox feature cooperating with the Exchange server. The feature should be used when the decision to start a workflow is made by the end user and you want to avoid a situation in which the workflow starts automatically for every e-mail message that reaches the company.

